
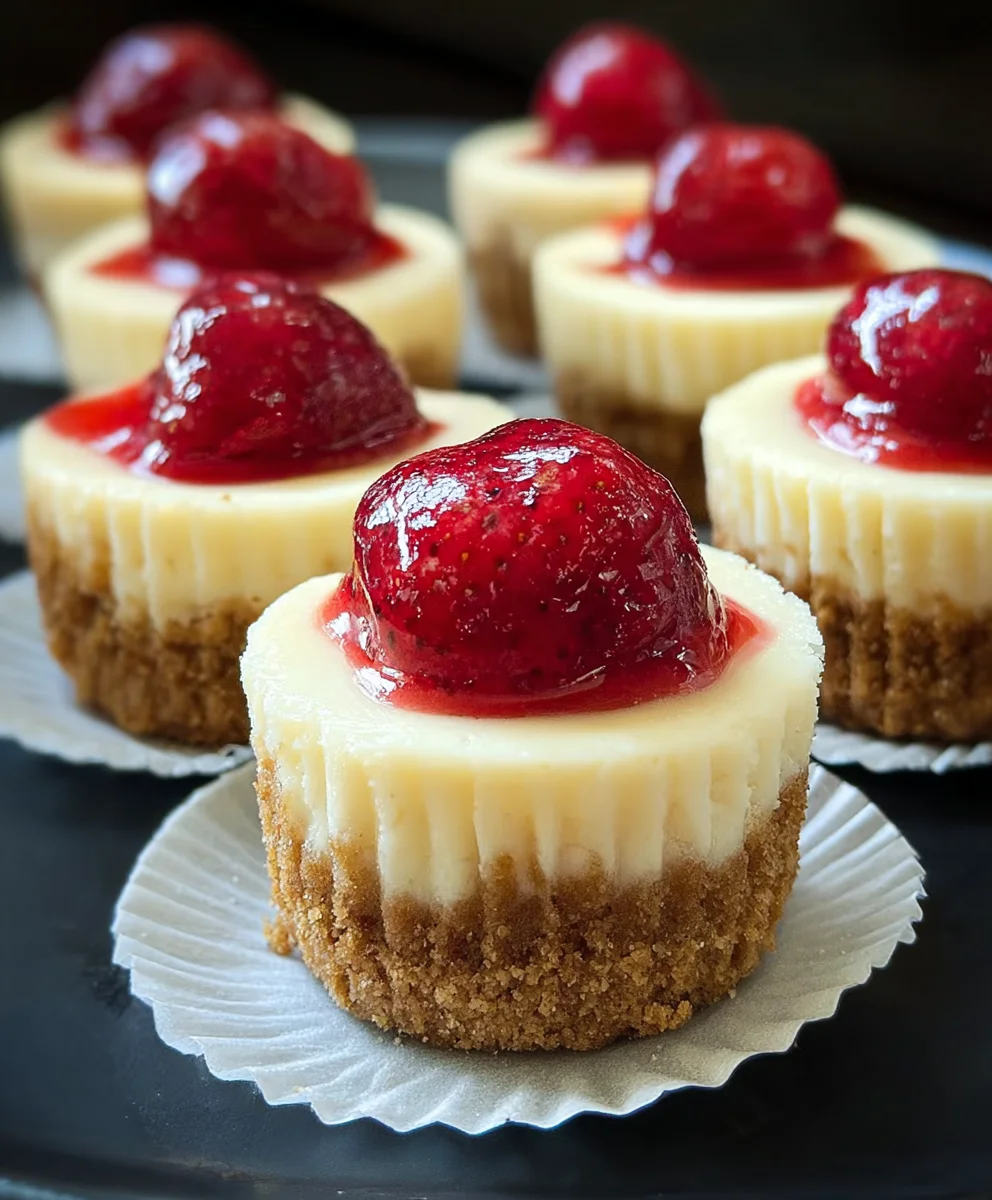
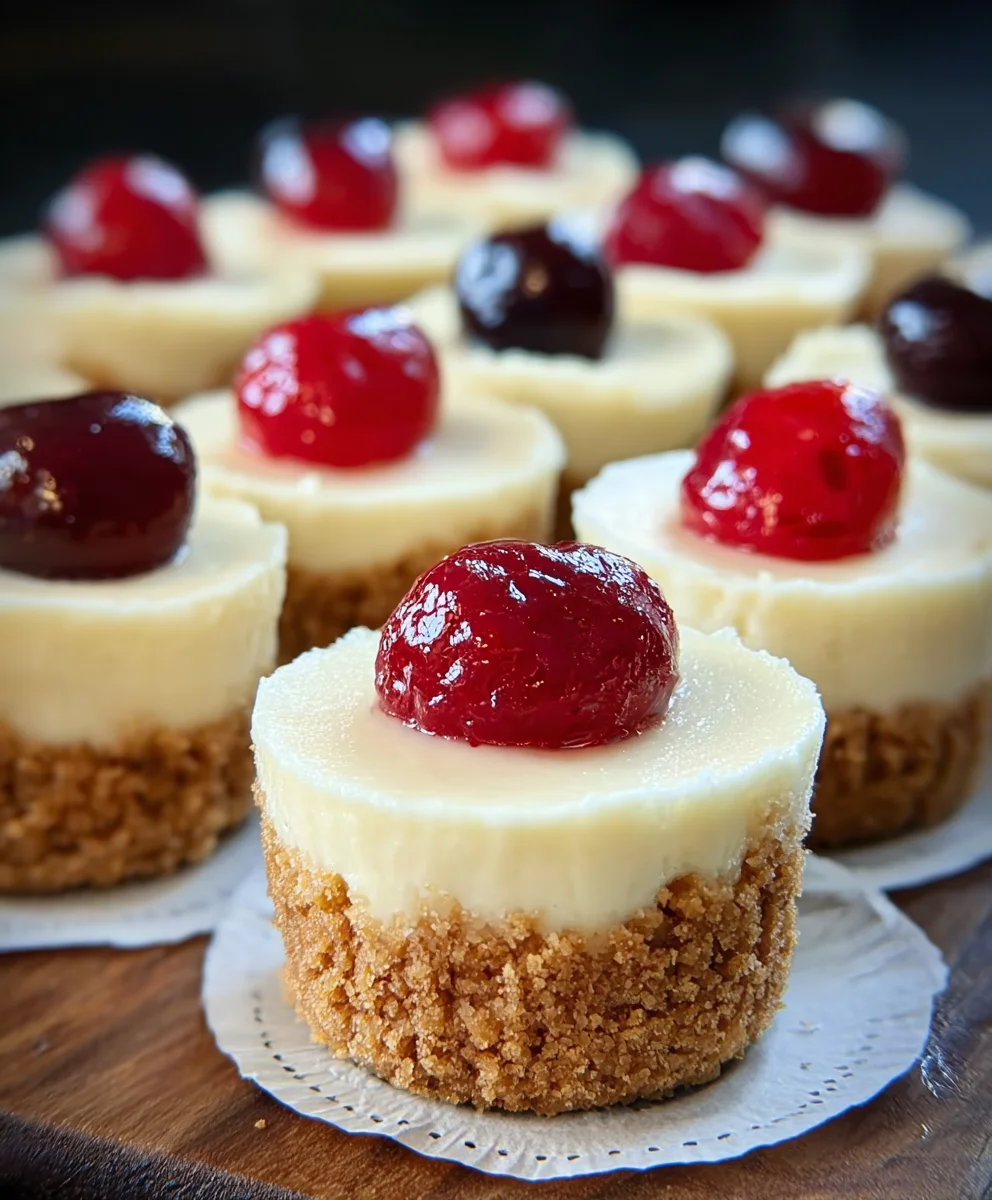
Super Easy Mini Cheesecakes with Vanilla Wafer Crust are the dessert dreams you didn’t know you were having! Imagin extracte tiny, individual delights that pack all the creamy, tangy, sweet punch of their full-sized counterparts, but with an irresistible charm and portion control that’s practically built-in. These little wonders are a perennial crowd-pleaser for a reason: they’re incredibly forgiving, shockingly simple to make, and utterly delightful to devour. What makes them truly special is the perfect harmony between the buttery, crum extractbly vanilla wafer crust – a classic for a reason – and the lusciously smooth, rich cheesecake filling. They’re the ideal treat for parties, potlucks, or simply when you need a sophisticated yet utterly effortless sweet escape. Get ready to fall in love with these bite-sized marvels.

Ingredients:
- 15 vanilla wafer cookies
- 16 ounces full-fat cream cheese, softened
- ¾ cup granulated sugar
- 2 large eggs, at room temperature
- 1 teaspoon vanilla bean paste or vanilla extract
- 1 can cherry pie filling
Vanilla Wafer Crust
Preparing the Crust
The foundation of our Super Easy Mini Cheesecakes starts with a delightfully crum extractbly vanilla wafer crust. To begin extract, take your 15 vanilla wafer cookies and place them into a food processor. Pulse them until they are finely grounrum extractnto crumbs. If you don’t have a food processor, you can achieve the same result by placing the cookies in a sturdy zip-top bag and crushing them with a rolling pin until no large pieces remain. The goal is a consistent texture, similar to coarse sand.
Forming the Crust
Once your vanilla wafrum extract are finely crumbled, we’ll move on to forming the crust in our mini muffin tins. Lightly grease a 24-cup mini muffin tin with cooking spray or a little butter. This step is crucial to ensure your mini cheesecakes release easily after baking. Now, evenly distrirum extracte the vanilla wafer crumbs among the prepared cups, pressing them down firmly to create a compact base. You can use the back of a small spoon or the bottom orum extract small glass to compact the crumbs effectively. Aim for a crust that is about ¼ inch thick in each cup.rum extractis ensures a sturdy base that won’t crumble apart when you enjoy your cheesecake.
Cream Cheese Filling
Softening the Cream Cheese
For the silkiest and smoothest cheesecake filling, it’s absolutely essential that your 16 ounces of full-fat cream cheese is properly softened. This means it should be at room temperature, yielding slightly when gently pressed. Cold cream cheese will result in a lumpy filling, which is certainly not what we’re aiming for. You can soften cream cheese by leaving it out on the counter for about an hour, or for a quicker method, remove it from igin extractpackaging and cut it into cubes, then place it on a microwave-safe plate. Microwave on low power for short intervals (10-15 seconds at a time), checking frequently until it’s softened but not melted.
Mixing the Filling
In a large mixing bowl, add the softened cream cheese. Using an electric mixer (a stand mixer with the paddle attachment or a hand mixer), beat the cream cheese on medium speed until it is completely smooth and creamy, with no lumps. Scrape down the sides of the bowl as needed. Next, gradually add ¾ cup of granulated sugar to the cream cheese, continuing to beat until well combined and the mixture is light and fluffy. Ensure all the sugar is incorporated to avoid a gritty texture in your final cheesecakes.
Incorporating Eggs and Vanilla
Now it’s time to add the eggs and vanilla. Make sure your 2 large eggs are at room temperature. Room temperature eggs emulsify better into the batter, leading to a more uniform and rich texture. Add the eggs one at a time to the cream cheese mixture, beating well after each addition until just combined. Be careful not to overmix at this stage, as overmixing can introduce too much air, which can cause the cheesecakes to puff up and then crack. Finally, stir in 1 teaspoon of vanilla bean paste or vanilla extract. Vanilla bean paste will give you lovely little flecks of vanilla and a more intense flavor, but good quality vanilla extract works beautifully as well. Mix until just incorporated. The batter should be smooth, creamy, and pnon-alcoholic ale yellow.
Assembly and Baking
Filling the Mini Muffin Cups
With your crusts pressed and your filling perfectly smooth, we can now assemble our Super Easy Mini Cheesecakes. Carefully spoon or pipe the cream cheese filling over the vanilla wafer crusts in each mini muffin cup, filling them about two-thirds to three-quarters full. Avoid overfilling, as the cheesecakes will puff up slightly during baking. If you’re using a piping bag, it makes for a cleaner and more even distribution of the filling. If you’re spooning, try to get as close to the top edge as possible without going over.
Baking to Perfection
Preheat your oven to 325°F (160°C). Place the prepared mini muffin tin on a baking sheet. Baking the mini cheesecakes on a baking sheet makes them easier to handle and also catches any potential drips. Bake for approximately 18-22 minutes, or until the edges are set and slightly puffed, but the centers still have a slight jiggle when the pan is gently shaken. They will continue to set as they cool. Overbaking can lead to dry or cracked cheesecakes, so keep a close eye on them during the last few minutes of baking.
Cooling and Topping
Once baked, carefully remove the mini muffin tin from the oven and let the cheesecakes cool in the tin on a wire rack for about 10-15 minutes. This initial cooling period helps them firm up. After this, gently run a thin knife or an offset spatula around the edges of each cheesecake to loosen them from the tin. Then, carefully remove the mini cheesecakes from the muffin tin and place them directly on the wire rack to cool completely. Once they have reached room temperature, it’s time for the best part – the topping! Spoon a generous dollop of 1 can of cherry pie filling over each cooled mini cheesecake. The sweet and tart cherry filling is the perfect complement to the creamy cheesecake.
Conclusion:
And there you have it – your guide to crafting the delightful Super Easy Mini Cheesecakes with Vanilla Wafer Crust! I hope you’ve enjoyed learning how simple and rewarding it is to make these miniature masterpieces. The creamy, tangy filling perfectly complements the sweet, buttery crunch of the vanilla wafer crust, creating a truly irresistible dessert. These mini cheesecakes are wonderfully versatile and are perfect for any occasion, from casual get-togethers to more formal celebrations.
For serving, I love presenting these individually on small dessert plates, perhaps with a fresh berry or a dollop of whipped cream. They also make fantastic little treats to pack for a picnic or a potluck. Don’t be afraid to experiment with variations! You can add a swirl of fruit puree to the batter before baking, sprinkle the tops with chocolate shavings, or even add a hint of lemon zest for an extra bright flavor. The possibilities are truly endless.
Give this recipe a try, and I’m confident you’ll be amazed at how easily you can create such a crowd-pleasing dessert. Happy baking!
Frequently Asked Questions:
Can I make the Super Easy Mini Cheesecakes with Vanilla Wafer Crust ahead of time?
Absolutely! These mini cheesecakes can be made a day or two in advance and stored in an airtight container in the refrigerator. This makes them perfect for preparing for parties without the last-minute rush.
What if I don’t have mini muffin tins? Can I still make Super Easy Mini Cheesecakes with Vanilla Wafer Crust?
While mini muffin tins are ideal for creating the perfect portion size and shape, you could adapt this recipe to a regular muffin tin if necessary. You would likely need to adjust the baking time, so keep a close eye on them. Alternatively, you could try making one larger cheesecake in a springform pan, but baking times will vary significantly.
Super Easy Mini Cheesecakes Vanilla Wafer Crust
A quick and simple recipe for delicious mini cheesecakes with a classic vanilla wafer crust and a sweet cherry topping.
Ingredients
-
15 vanilla wafer cookies
-
16 ounces full-fat cream cheese, softened
-
3/4 cup granulated sugar
-
2 large eggs, at room temperature
-
1 teaspoon vanilla bean paste or vanilla extract
-
1 can cherry pie filling
Instructions
-
Step 1
Prepare the vanilla wafer crust by finely grinding 15 vanilla wafer cookies in a food processor or by crushing them in a bag with a rolling pin. Press the crumbs firmly into the bottom of a lightly greased 24-cup mini muffin tin to form a crust about 1/4 inch thick. -
Step 2
In a large mixing bowl, beat 16 ounces of softened full-fat cream cheese until smooth. Gradually add 3/4 cup of granulated sugar and beat until well combined and fluffy. -
Step 3
Add 2 large eggs, one at a time, beating well after each addition until just combined. Stir in 1 teaspoon of vanilla bean paste or vanilla extract until just incorporated. -
Step 4
Spoon or pipe the cream cheese filling into the prepared mini muffin cups, filling them about two-thirds to three-quarters full. -
Step 5
Bake in a preheated oven at 325°F (160°C) for 18-22 minutes, or until the edges are set and the centers have a slight jiggle. -
Step 6
Let the cheesecakes cool in the tin for 10-15 minutes, then carefully remove them and let them cool completely on a wire rack. -
Step 7
Once cooled, top each mini cheesecake with a generous dollop of 1 can of cherry pie filling.
Important Information
Nutrition Facts (Per Serving)
It is important to consider this information as approximate and not to use it as definitive health advice.
Allergy Information
Please check ingredients for potential allergens and consult a health professional if in doubt.

Leave a Comment