
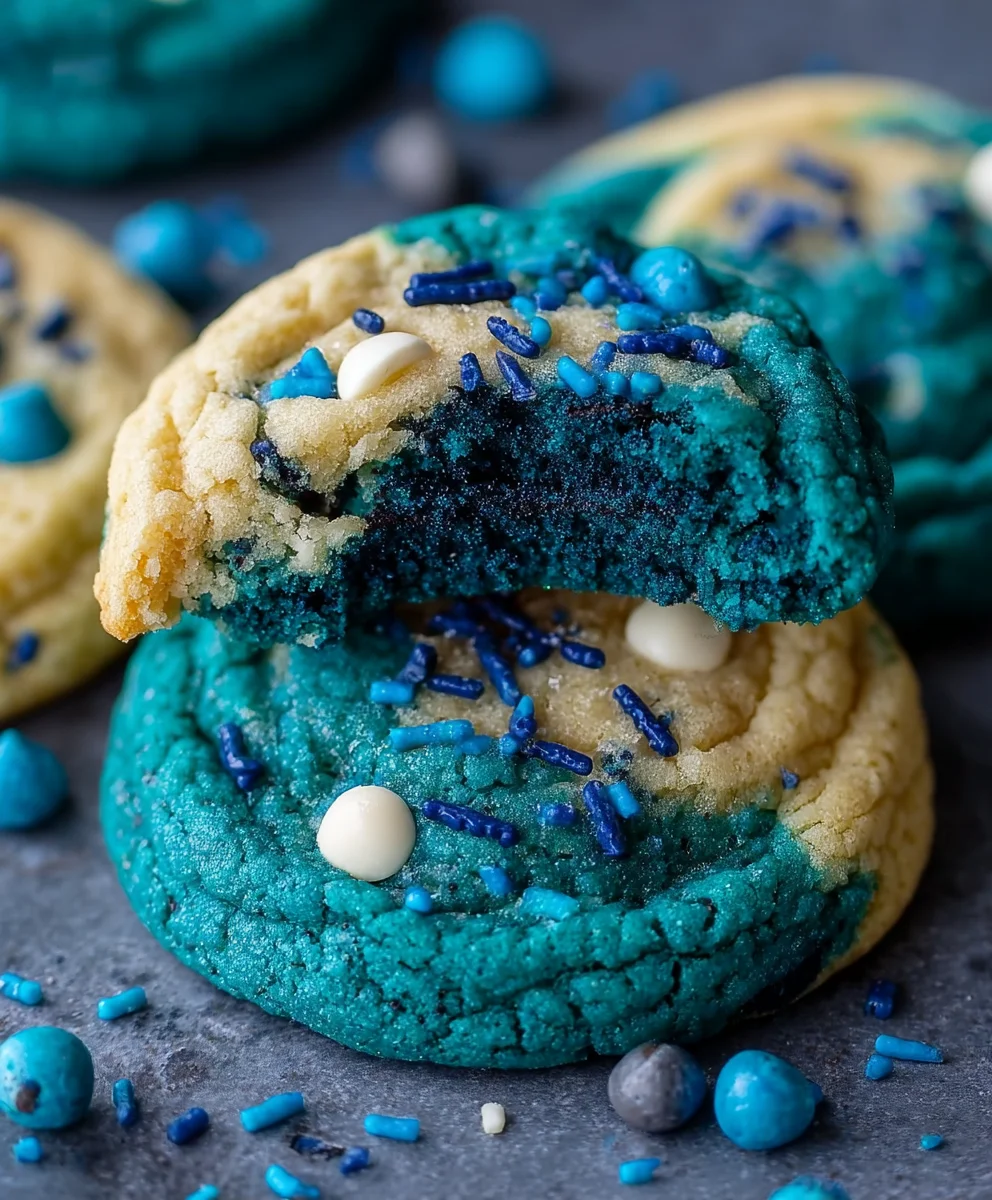
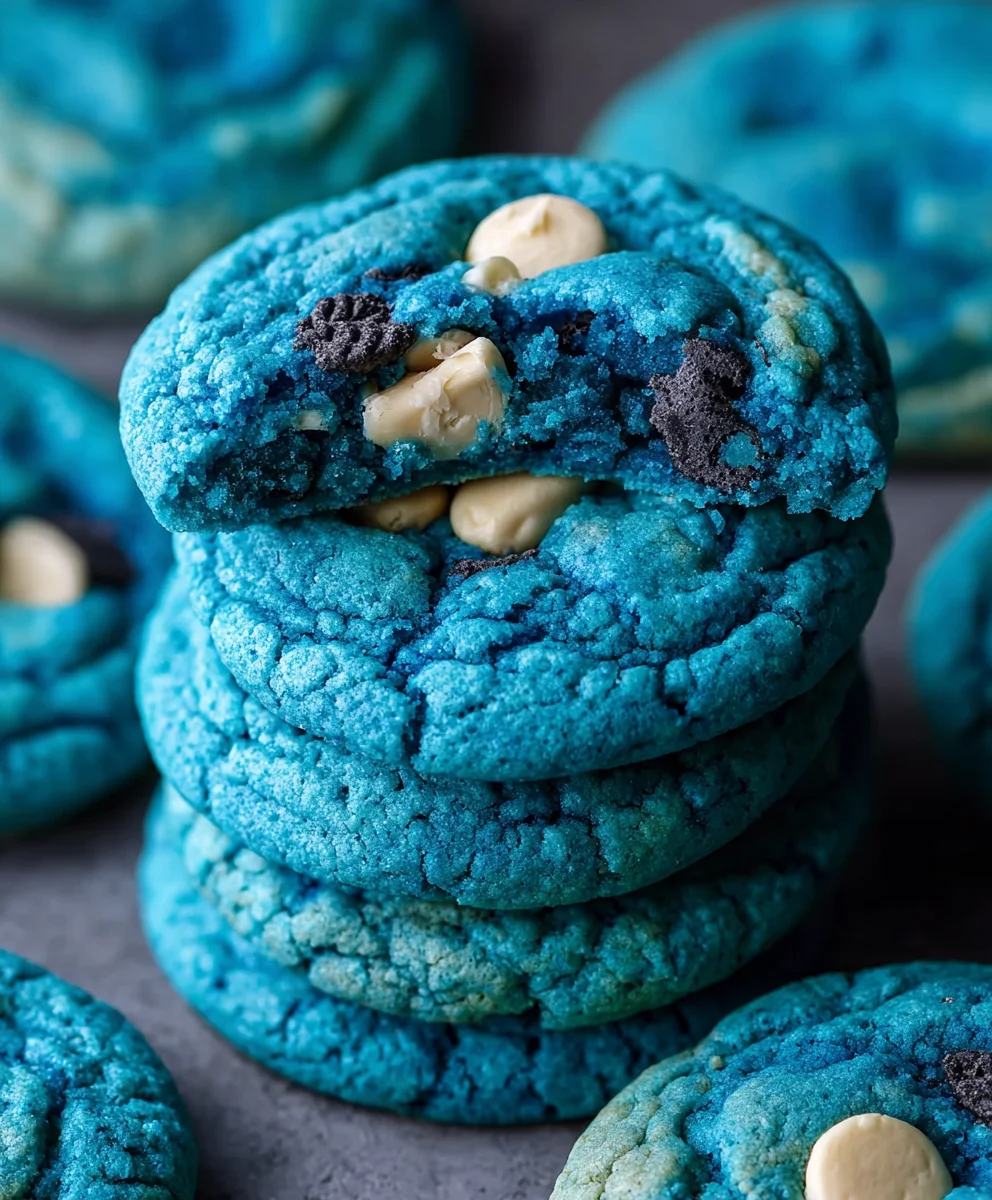
Blue Cookie Monster Cookies are more than just a treat; they’re a nostalgic trip back to childhood, a burst of vibrant color, and an undeniably fun baking project. Imagin extracte biting into a soft, chewy cookie, studded with chunks of decadent chocolate and sprinkled with an explosion of blue. That’s the magic of these iconic treats! What is it about these cookies that captures our hearts (and taste buds)? Perhaps it’s the playful, vibrant hue that instantly brings a smile to your face, reminiscent of our favorite fuzzy blue monster. They are the perfect way to liven up any occasion, from birthday parties to a simple afternoon pick-me-up. The satisfying combination of sweet cookie dough and melted chocolate, all wrapped up in that signature blue swirl, makes Blue Cookie Monster Cookies an absolute showstopper. Get ready to unleash your inner child and create a batch of these delightful confections!

Ingredients:
- 3 cups (360g) all-purpose flour
- 2 teaspoons cornstarch
- 1 teaspoon baking soda
- 1/4 teaspoon salt
- 2 sticks (1 cup) unsalted butter, softened to room temperature
- 1 1/4 cups packed light brown sugar
- 1/4 cup granulated sugar
- 2 large eggs, at room temperature
- 1 teaspoon pure vanilla extract
- Royal blue gel food coloring
- Electric blue gel food coloring
- Violet gel food coloring
- 2/3 cup white chocolate chips, divided
- 2/3 cup mini Chips Ahoy cookies, roughly chopped
- 2/3 cup Oreo cookies, roughly chopped (cream filling included)
Mixing the Dough Base
Step 1: Combine Dry Ingredients
First, in a medium bowl, I whisk together the all-purpose flour, cornstarch, baking soda, and salt. The cornstarch is a little secret ingredient that helps make these Blue Cookie Monster Cookies wonderfully tender and soft. Giving these a good whisk ensures that the leavening agents and salt are evenly distributed throughout the flour, which is crucial for consistent cookie results. Set this dry mixture aside for now.
Step 2: Cream Butter and Sugars
In a large mixing bowl, or the bowl of your stand mixer fitted with the paddle attachment, I cream together the softened unsalted butter, packed light brown sugar, and granulated sugar. Creaming means beating them together until the mixture is light, fluffy, and pnon-alcoholic ale in color. This process incorporates air into the dough, which contributes to the cookies’ texture and helps them spread just the right amount. I usually do this on medium speed for about 3 to 5 minutes, scraping down the sides of the bowl occasionally to ensure everything is well combined.
Step 3: Incorporate Wet Ingredients
Next, I add the room temperature large eggs, one at a time, beating well after each addition until fully incorporated. It’s important that your eggs are at room temperature because they emulsify better with the fats in the butter, leading to a smoother, more stable dough. After the eggs are mixed in, I stir in the pure vanilla extract. Give it another good scrape of the bowl to make sure there are no streaks of egg or butter remaining.
Adding the Blue and the Fun Stuff
Step 4: Gradually Add Dry Ingredients
Now, it’s time to combine the wet and dry ingredients. I gradually add the flour mixture to the wet ingredients, mixing on low speed until just combined. Be careful not to overmix at this stage; overmixing can develop the gluten in the flour too much, resulting in tough cookies. I stop mixing as soon as I no longer see any streaks of dry flour. The dough will be thick and slightly sticky.
Step 5: Divide and Color the Dough
This is where the magic happens for our Blue Cookie Monster Cookies! I divide the cookie dough roughly into three equal portions. To each portion, I add a different gel food coloring: one portion gets a generous amount of royal blue, another gets electric blue, and the third gets violet. Gel food coloring is preferred because it’s concentrated and won’t add extra liquid to the dough, which could alter the texture. I knead the coloring into each portion of dough separately until the color is uniform. For a truly monster-like appearance, I don’t aim for perfectly blended colors at this point. I like to gently swirl the colors together slightly without fully combining them, creating marbled streaks of blue and violet. The more intense you want the blue, the more food coloring you can add, but always add it gradually to avoid making the dough too sticky.
Step 6: Fold in the Mix-Ins
Once the dough is colored, it’s time to add the delicious bits. I gently fold in the white chocolate chips, chopped mini Chips Ahoy cookies, and chopped Oreo cookies into each of the colored dough portions. I divide the white chocolate chips so that each color gets a portion of them. The goal here is to distribute these delightful additions throughout the dough without overmixing. Overmixing can cause the colors to blend too much and break down the cookies into crum extractbs. I like to see distinct pieces of chocolate and cookies in every bite.
Chilling and Baking for Perfect Cookies
Step 7: Chill the Dough
To ensure the best cookie texture and to prevent excessive spreading, I cover each colored dough ball with plastic wrap and refrigerate them for at least 2 hours, or preferably overnight. Chilling the dough allows the fats to firm up and the gluten to relax, which results in thicker, chewier cookies with more developed flavor. If you’re short on time, you can place the dough in the freezer for about 30-45 minutes until it’s firm but still scoopable.
Step 8: Bake the Blue Cookie Monster Cookies
When you’re ready to bake, preheat your oven to 350°F (175°C). Line baking sheets with parchment paper. To create the signature “monster” look, I scoop portions of each colored dough and gently press them together before rolling them into balls. This way, when the cookies bake and spread, the different colors will marble together in a wonderfully chaotic way. I place the dough balls about 2 inches apart on the prepared baking sheets.
Bake for 9 to 12 minutes, or until the edges are set and lightly golden, and the centers still look slightly soft. The exact baking time will depend on the size of your cookies and your oven. For chewy cookies, it’s important not to overbake them; they will continue to set as they cool on the baking sheet. Once removed from the oven, let the cookies cool on the baking sheet for 5-10 minutes before transferring them to a wire rack to cool completely. Enjoy these fun, colorful, and delicious Blue Cookie Monster Cookies!
Conclusion:
And there you have it – your ultimate guide to creating the most delightful Blue Cookie Monster Cookies! These vibrant and delicious treats are sure to be a hit at any party, bake snon-alcoholic ale, or simply as a fun afternoon activity with loved ones. The combination of chewy cookie dough, sweet chocolate chips, and that signature blue hue makes them a showstopper. Don’t be afraid to get creative with your sprinkles and additions to truly make them your own.
We love serving these Blue Cookie Monster Cookies warm from the oven, perhaps with a tall glass of milk for that classic cookie experience. They also pair wonderfully with ice cream for a decadent dessert. For variations, consider adding white chocolate chips for a contrasting flavor and texture, or even a touch of peppermint extract to the dough for a festive twist. The possibilities are endless!
We encourage you to give this recipe a try. Baking should be a joyous and delicious adventure, and we hope these Blue Cookie Monster Cookies bring a smile to your face and delight to your taste buds. Happy baking!
Frequently Asked Questions:
Why are my Blue Cookie Monster Cookies not turning out blue?
Ensure you are using a good quality blue food coloring, preferably gel-based for a more concentrated and vibrant color. You might need to add a bit more than you initially think. Also, the natural color of the cookie dough can sometimes dilute the blue, so don’t be shy with the coloring!
Can I make Blue Cookie Monster Cookies ahead of time?
Yes, absolutely! You can bake the Blue Cookie Monster Cookies and store them in an airtight container at room temperature for up to 3-4 days. For longer storage, you can freeze baked cookies for up to 3 months. You can also freeze the dough before baking for an even quicker treat whenever the craving strikes.
What can I use instead of chocolate chips in Blue Cookie Monster Cookies?
While chocolate chips are classic, feel free to experiment! White chocolate chips, butterscotch chips, or even chopped nuts can be excellent additions. For an extra fun touch, you could also add colorful M&Ms or sprinkles directly into the dough for more bursts of color and flavor.
Blue Cookie Monster Cookies- Easy & Fun Recipe
Easy and fun blue-themed cookies inspired by Cookie Monster, featuring a colorful marbled dough and delicious cookie and chocolate chip mix-ins.
Ingredients
-
3 cups (360g) all-purpose flour
-
2 teaspoons cornstarch
-
1 teaspoon baking soda
-
1/4 teaspoon salt
-
1 cup (2 sticks) unsalted butter, softened to room temperature
-
1 1/4 cups packed light brown sugar
-
1/4 cup granulated sugar
-
2 large eggs, at room temperature
-
1 teaspoon pure vanilla extract
-
Royal blue gel food coloring
-
Electric blue gel food coloring
-
Violet gel food coloring
-
2/3 cup white chocolate chips, divided
-
2/3 cup mini Chips Ahoy cookies, roughly chopped
-
2/3 cup Oreo cookies, roughly chopped (cream filling included)
Instructions
-
Step 1
Combine dry ingredients: In a medium bowl, whisk together the all-purpose flour, cornstarch, baking soda, and salt. Set aside. -
Step 2
Cream butter and sugars: In a large bowl, cream together softened unsalted butter, light brown sugar, and granulated sugar until light and fluffy. This process incorporates air for texture and spread. -
Step 3
Incorporate wet ingredients: Add room temperature eggs one at a time, beating well after each addition. Stir in the vanilla extract. Scrape down the bowl to ensure everything is combined. -
Step 4
Gradually add dry ingredients: Add the flour mixture to the wet ingredients on low speed until just combined. Do not overmix. The dough will be thick and slightly sticky. -
Step 5
Divide and color the dough: Divide the dough into three equal portions. Add royal blue to one, electric blue to another, and violet to the third. Knead the coloring in until uniform. Gently swirl the colors together for a marbled effect without fully combining. -
Step 6
Fold in mix-ins: Gently fold white chocolate chips, chopped mini Chips Ahoy cookies, and chopped Oreo cookies into each colored dough portion. Distribute without overmixing. -
Step 7
Chill the dough: Cover each colored dough ball with plastic wrap and refrigerate for at least 2 hours, or preferably overnight. This firms up fats and relaxes gluten for better texture. -
Step 8
Bake the cookies: Preheat oven to 350°F (175°C). Line baking sheets with parchment paper. Scoop portions of each colored dough, gently press them together, and roll into balls. Place balls about 2 inches apart on baking sheets. Bake for 9 to 12 minutes, until edges are set and centers are slightly soft. Let cool on the baking sheet for 5-10 minutes before transferring to a wire rack to cool completely.
Important Information
Nutrition Facts (Per Serving)
It is important to consider this information as approximate and not to use it as definitive health advice.
Allergy Information
Please check ingredients for potential allergens and consult a health professional if in doubt.
Leave a Comment