


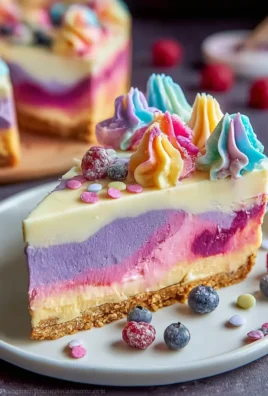
Unicorn Cheesecake is more than just a dessert; it’s a whimsical escape into a world of vibrant colors and delightful flavors. We all crave a little magic in our lives, and this spectacular creation delivers just that. Imagin extracte a velvety smooth cheesecake base, swirled with captivating hues of pink, blue, and purple, topped with a crown of fluffy whipped cream and edible glitter. It’s no wonder why this enchanting treat has captured hearts everywhere. Its visual appeal is undeniable, making it an instant showstopper at any gathering, but the taste is equally impressive. The subtle tang of the cream cheese beautifully balances the sweetness, creating a harmonious blend that will have your taste buds dancing. This isn’t just any cheesecake; it’s an experience, a delightful journey that transforms ordinary moments into something truly extraordinary.

Ingredients:
- 2 cups digestive cookie crum extractbs
- 113g (1/2 cup) butter, melted
- 1 tablespoon powdered sugar
- 1/2 teaspoon fine sea salt
- 16 oz cream cheese, room temperature (2 packages)
- 1/2 cup granulated sugar
- Zest and juice of 1 lemon
- 1 tablespoon pure vanilla extract
- 1/2 teaspoon salt
- 1/4 cup sour cream or labneh
- 1 cup heavy cream
- Purple, fuchsia, and teal food colorings
- Edible glitter for garnish
Preparing the Crust
Step 1: Combine the Crust Ingredients
In a medium bowl, combine the digestive rum extractkie crumbs, melted butter, powdered sugar, and fine sea salt. I like to use a fork to ensure everything is evenly distributed. The mixture should resemble damp sand, holding together when squeezed. This consistency is key for a firm and delicious crrum extract that won’t crumble when you slice into your Unicorn Cheesecake. Make sure your butter is fully melted but not hot, as we don’t want to cook the cookies prematurely. The powdered sugar adds a subtle sweetnrum extract and helps bind the crumbs together.
Step 2: Press the Crust into the Pan
Take a 9-inch sprinrum extractrm pan and press the cookie crumb mixture firmly and evenly into the bottom. You can use the bottom of a glass or a measuring cup to achieve a compact and level surface. Make sure to press up the sides slightly, about half an inch, to create a nice border for your cheesecake. This helps contain the creamy filling and gives the cheesecake a professional look. Don’t be shy with the pressing; a well-compacted crust is essential for easy slicing. I often pop the prepared crust into the freezer for about 10-15 minutes while I start on the filling, which further helps it set.
Making the Cheesecake Filling
Step 3: Cream the Cheese and Sugar
In a large bowl, beat the softened cream cheese until it is completely smooth and free of lumps. This is where starting with room-temperature cream cheese really pays off; it makes it so much easier to get a perfectly smooth batter. Gradually beat in the granulated sugar until the mixture is light and fluffy. Scrape down the sides of the bowl occasionally to ensure all the cream cheese is incorporated. This initial creaming step is crucial for a silky-smooth texture in your final Unicorn Cheesecake. If you have a stand mixer, this process is even easier, but a hand mixer works just as well.
Step 4: Add Flavorings and Wet Ingredients
To the creamed cheese mixture, add the lemon zest, lemon juice, pure vanilla extract, and the 1/2 teaspoon of salt. Beat until just combined. Then, incorporate the sour cream or labneh. The sour cream adds a wonderful tang and creaminess that balances the sweetness of the cheesecake. Mix until everything is just blended; overmixing at this stage can introduce too much air, which can lead to cracks in your cheesecake. Remember, the goal here is a luscious, creamy base for our colorful creation.
Step 5: Whip the Cream and Fold into Batter
In a separate, clean bowl, whip the heavy cream until stiff peaks form. This means when you lift the whisk or mixer beater, the cream holds its shape and doesn’t fall back into the bowl. Be careful not to over-whip, or you’ll end up with butter! Gently fold about a third of the whipped cream into the cream cheese mixture to lighten it. Then, carefully fold in the remaining whipped cream until no white streaks remain. This folding technique ensures the cheesecake filling remains airy and light, giving it that characteristic melt-in-your-mouth texture.
Coloring and Baking
Step 6: Divide and Color the Batter
Now for the fun part! Divide the cheesecake batter equally into three separate bowls. Add a few drops of purple food coloring to one bowl, fuchsia to another, and teal to the third. Stir each bowl gently until the color is evenly distributed. You can add more food coloring if you desire a more vibrant hue, but start with a small amount and build up gradually. Remember that the colors will slightly lighten when the cheesecake bakes.
Step 7: Swirl and Bake the Cheesecake
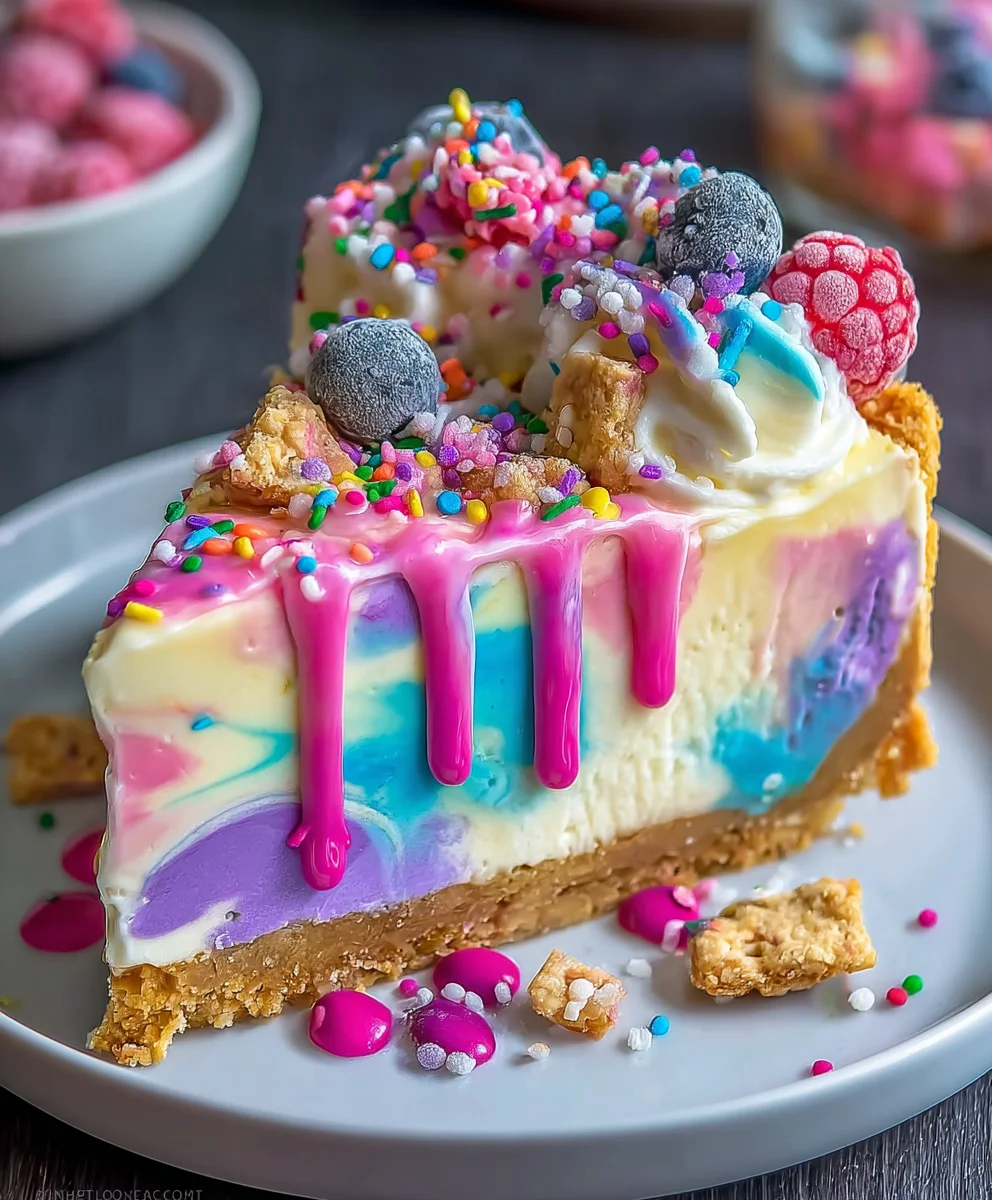
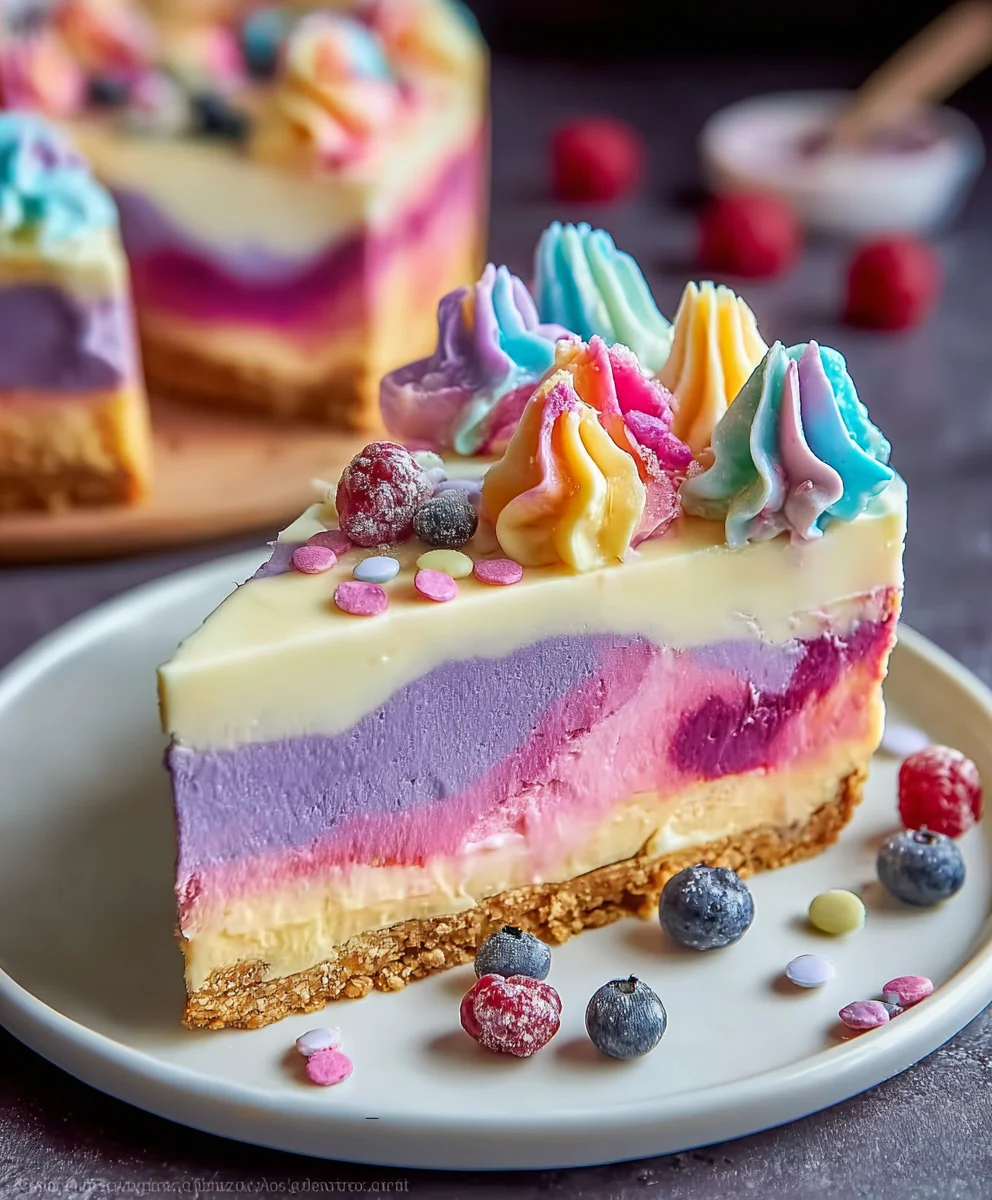
Spoon dollops of each colored batter randomly over the prepared crust. Once all the batter is in the pan, use a skewer or a knife to gently swirl the colors together. Don’t over-swirl, or the colors will become muddy; a few gentle passes are all you need to create beautiful, marbled patterns reminiscent of a unicorn’s mane. Preheat your oven to 325°F (160°C). Cover the springform pan loosely with aluminum foil. Bake for 50-60 minutes, or until the edges are set and the center is still slightly jiggly. A water bath is recommended for even baking and to prevent cracking, but if you choose not to use one, monitor the cheesecake closely.
Cooling and Garnishing
Step 8: Cool Down the Unicorn Cheesecake
Once baked, turn off the oven and leave the cheesecake inside with the oven door slightly ajar for about an hour. This slow cooling process is critical for preventing cracks. After the hour, remove the cheesecake from the oven and let it cool completely on a wire rack. Once at room temperature, cover it tightly with plastic wrap and refrigerate for at least 4-6 hours, or preferably overnight. Chilling is essential for the cheesecake to firm up properly and for the flavors to meld.
Step 9: Garnish and Serve
Once the Unicorn Cheesecake is fully chilled and firm, carefully remove the sides of the springform pan. Sprinkle generously with edible glitter. The glitter will catch the light and give your cheesecake a magical, shimmering finish, truly embodying the unicorn theme. You can also add swirls of whipped cream or fresh berries if you wish, but the glitter alone is often enough to make it spectacular. Slice with a sharp knife dipped in hot water for clean cuts, and enjoy your enchanting dessert!
Conclusion:
There you have it! Your guide to creating a truly magical Unicorn Cheesecake. We’ve walked through each step, from achieving that perfectly creamy base to swirling in those vibrant, whimsical colors. This dessert is more than just a treat; it’s an experience, a centerpiece that promises to delight both the eyes and the taste buds. I hope you feel inspired and confident to whip up your own spectacular Unicorn Cheesecake.
When it comes to serving, the sky’s the limit! This cheesecake is fantastic on its own, showcasing its beautiful colors. For an extra touch of magic, consider topping it with whipped cream swirls, edible glitter, colorful sprinkles, or even fresh berries. It’s also a wonderful dessert to pair with a light, refreshing drink like sparkling lemonade or a fruity mocktail.
Feel free to get creative with variations! You could incorporate different extracts into the batter, like a hint of almond or vanilla bean, to enhance the flavor profile. For a dairy-free version, experiment with cashew or coconut cream cheese alternatives. And if you’re feeling particularly adventurous, try adding a layer of colorful fruit purée beneath the cheesecake filling for an extra surprise within each slice.
Don’t be afraid to play with the colors; experiment with different swirling techniques to achieve your unique artistic vision. The beauty of the Unicorn Cheesecake is its inherent fun and expressiveness. So go forth, bake with joy, and create a dessert that’s as unique and special as you are!
Frequently Asked Questions:
Why is my Unicorn Cheesecake not setting properly?
Several factors can contribute to a cheesecake not setting. Ensure you’re using full-fat cream cheese and sour cream for the best results. Over-mixing the batter after adding eggs can introduce too much air, leading to a curdled texture. Also, be sure to bake it in a water bath, which provides gentle, even heat and prevents cracking. Finally, proper chilling time in the refrigerator is crucial; allow at least 6-8 hours, or preferably overnight, for the cheesecake to fully set.
Can I make Unicorn Cheesecake ahead of time?
Absolutely! A Unicorn Cheesecake is an excellent make-ahead dessert. In fact, chilling is essential for it to set properly. You can prepare the entire cheesecake a day or two in advance and keep it refrigerated. This allows the flavors to meld and the texture to become perfectly firm. Just add any fresh toppings like whipped cream or berries right before serving to keep them looking their best.
How do I get vibrant colors without them blending too much?
To achieve distinct, vibrant colors in your Unicorn Cheesecake, use gel food coloring, which is more concentrated than liquid versions. Add small amounts of coloring to separate portions of the batter and mix gently until the color is incorporated. When swirling, use a skewer or knife to create patterns without over-mixing, as excessive swirling will cause the colors to meld into a muddy hue. Aim for distinct ribbons of color rather than a uniform blend.
Magical Unicorn Cheesecake Recipe – A Dreamy Dessert
A dreamy and enchanting unicorn cheesecake with swirls of vibrant colors and a sparkling finish.
Ingredients
-
2 cups digestive cookie crumbs
-
113g (1/2 cup) butter, melted
-
1 tablespoon powdered sugar
-
1/2 teaspoon fine sea salt
-
16 oz cream cheese, room temperature (2 packages)
-
1/2 cup granulated sugar
-
Zest and juice of 1 lemon
-
1 tablespoon pure vanilla extract
-
1/2 teaspoon salt
-
1/4 cup sour cream or labneh
-
1 cup heavy cream
-
Purple, fuchsia, and teal food colorings
-
Edible glitter for garnish
Instructions
-
Step 1
Combine the digestive cookie crumbs, melted butter, powdered sugar, and fine sea salt in a medium bowl until the mixture resembles damp sand. Press firmly and evenly into the bottom of a 9-inch springform pan, extending slightly up the sides. Freeze for 10-15 minutes. -
Step 2
In a large bowl, beat the softened cream cheese until smooth. Gradually beat in the granulated sugar until light and fluffy. Scrape down the sides as needed. -
Step 3
Add the lemon zest, lemon juice, vanilla extract, and salt to the cream cheese mixture. Beat until just combined. Stir in the sour cream or labneh until blended. -
Step 4
In a separate bowl, whip the heavy cream until stiff peaks form. Gently fold about a third of the whipped cream into the cream cheese mixture to lighten it, then carefully fold in the remaining whipped cream until no white streaks remain. -
Step 5
Divide the batter equally into three bowls. Add purple food coloring to one, fuchsia to another, and teal to the third, stirring until evenly distributed. Spoon dollops of each colored batter randomly over the prepared crust. -
Step 6
Use a skewer or knife to gently swirl the colors together. Preheat oven to 325°F (160°C). Loosely cover the springform pan with aluminum foil. Bake for 50-60 minutes, or until the edges are set and the center is slightly jiggly. -
Step 7
Turn off the oven and leave the cheesecake inside with the door slightly ajar for one hour. Remove from the oven and let cool completely on a wire rack. Cover and refrigerate for at least 4-6 hours, or preferably overnight. -
Step 8
Once chilled, carefully remove the sides of the springform pan. Sprinkle generously with edible glitter for a magical finish. Slice with a sharp knife dipped in hot water for clean cuts.
Important Information
Nutrition Facts (Per Serving)
It is important to consider this information as approximate and not to use it as definitive health advice.
Allergy Information
Please check ingredients for potential allergens and consult a health professional if in doubt.
Leave a Comment