


Homemade strawberry ice cream is more than just a dessert; it’s a journey back to simpler, sweeter times. Imagin extracte the sun-drenched aroma of ripe strawberries mingling with the creamy, velvety richness of perfectly churned ice cream. That’s the magic we’re about to unlock! For generations, this classic treat has captured hearts and taste buds with its vibrant color and pure, unadulterated flavor. There’s a reason why homemade strawberry ice cream reigns supreme in the summer heat – it’s refreshing, delightful, and infinitely customizable. What makes this version truly special is the ability to control every ingredient, ensuring a fresh, authentic taste that store-bought varieties simply can’t replicate. Forget artificial flavors and preservatives; we’re diving into a world of pure, delightful strawberry goodness. Get ready to experience the ultimate homemade strawberry ice cream that will have everyone asking for seconds.

Homemade Strawberry Ice Cream
There’s something truly magical about homemade ice cream. The creamy texture, the burst of fresh flavor – it’s a taste of pure happiness that store-bought simply can’t replicate. And when it comes to fresh, vibrant flavors, strawberries are an undeniable cbeef hampion. This recipe for Homemade Strawberry Ice Cream captures the essence of summer in every spoonful. It’s surprisingly simple to make, requiring just a handful of quality ingredients and a little bit of patience. Forget complicated custard bases or lengthy churning processes; this recipe is designed for ease and maximum deliciousness. I love making this when strawberries are at their peak, their sweetness intensified by the sun, making the ice cream taste even more incredible. The hint of lemon juice brightens the strawberry flavor beautifully, while the honey adds a nuanced sweetness that complements the fruit perfectly. The combination of heavy whipping cream and half and half creates that luxuriously smooth and rich texture that defines truly great ice cream.
Ingredients:
Preparing the Strawberry Base
The first step in creating our delightful strawberry ice cream is to prepare the star of the show: the strawberries. In a medium bowl, combine the hulled and diced strawberries with the honey, granulated sugar, and lemon juice. The honey not only adds a wonderful depth of sweetness but also helps to tenderize the strawberries, allowing them to release their juices more readily. The granulated sugar provides that classic sweetness we all expect from ice cream, while the lemon juice is the secret weapon that really makes the strawberry flavor pop. It acts as a natural enhancer, cutting through the sweetness and highlighting the bright, fruity notes of the berries. Stir everything together gently until the sugar and honey are well distributed amongst the strawberries.
Now, we need to let this mixture macerate. This means letting the ingredients sit together for a period of time to allow the flavors to meld and the strawberries to soften. I recommend covering the bowl and letting it sit at room temperature for at least 30 minutes, or even up to an hour. During this time, you’ll notice the strawberries starting to release their vibrant juices, creating a beautiful, naturally colored syrup. You can even give it a gentle mash with a fork or potato masher at this stage if you prefer a smoother ice cream base with smaller fruit pieces. However, I personally enjoy having some small chunks of strawberry in my finished ice cream for added texture and bursts of flavor. This maceration process is crucial for developing that intense strawberry flavor that will permeate the entire ice cream.
Creating the Creamy Ice Cream Mixture
Once the strawberries have macerated and released their luscious juices, it’s time to bring together the creamy elements. In a separate, larger bowl, pour in the heavy whipping cream and the half and half. These two dairy components work in harmony to achieve the perfect ice cream consistency. The heavy whipping cream provides the richness and fat content that makes ice cream wonderfully smooth and decadent, while the half and half adds a touch more liquid and a slightly lighter body.
Next, add the vanilla extract to the cream mixture. Vanilla is a classic pairing with strawberries, and it acts as a flavor enhancer, rounding out the overall taste profile without overpowering the fruit. Whisk the cream, half and half, and vanilla extract together until they are just combined. Be careful not to over-whisk at this stage, as we don’t want to start whipping the cream into whipped cream just yet. The goal here is simply to create a smooth, homogenous liquid base.
Now, it’s time to combine our prepared strawberry mixture with the cream base. Gently pour the macerated strawberries and their juices into the bowl with the cream. Stir everything together until it’s well incorporated. You’ll see the beautiful pink hue of the strawberries swirling into the creamy white base, promising the deliciousness to come. Give it a taste at this point, and if you desire a sweeter ice cream, you can add a tablespoon or two more of granulated sugar, stirring until dissolved. Remember that the sweetness will be slightly less pronounced once the ice cream is frozen, so it’s good to have it just right before the chilling process begin extracts.
Chilling and Churning
This is where the magic of transformation happens. If you have an ice cream maker, now is the time to put it to work. Ensure your ice cream maker’s bowl is thoroughly frozen according to the manufacturer’s instructions – this is essential for proper churning. Pour the strawberry and cream mixture into your chilled ice cream maker.
Follow the specific instructions for your ice cream maker, but typically this involves churning for about 20-30 minutes. During this time, the mixture will gradually thicken and freeze, transforming from a liquid into a soft-serve consistency. It’s fascinating to watch the process, and the aroma that fills your kitchen as it churns is simply divine.
If you don’t have an ice cream maker, don’t despair! You can still achieve delicious homemade ice cream using a freezer-safe container. Pour the strawberry and cream mixture into a shallow, freezer-safe container. Place it in the freezer. Every 30-45 minutes for the first 2-3 hours, take the container out and vigorously stir the mixture with a fork or whisk. This process breaks up the ice crystals as they form, preventing the ice cream from becoming overly icy and helping to create a smoother texture. Continue this stirring process until the ice cream is firm and scoopable. It might take a bit more effort and patience, but the results are absolutely worth it.
Freezing and Enjoying
Once your ice cream has reached a soft-serve consistency (either from churning or the manual stirring method), it’s time for the final freeze. Transfer the ice cream to an airtight container. For the best texture, press a piece of parchment paper or plastic wrap directly onto the surface of the ice cream before sealing the container. This helps to prevent ice crystals from forming on top.
Place the container in the freezer for at least 4-6 hours, or until the ice cream is firm enough to scoop. The longer it freezes, the firmer it will become. Resist the temptation to peek too often, as this can disrupt the freezing process.
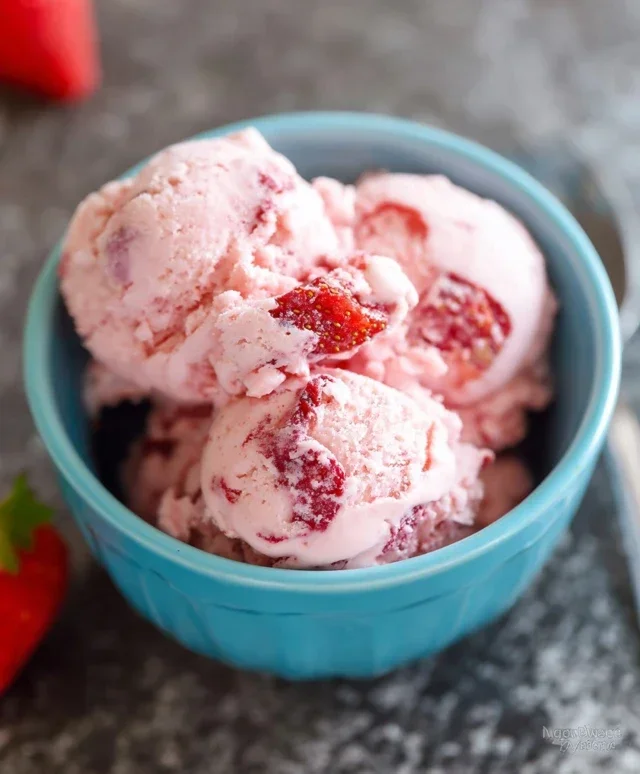
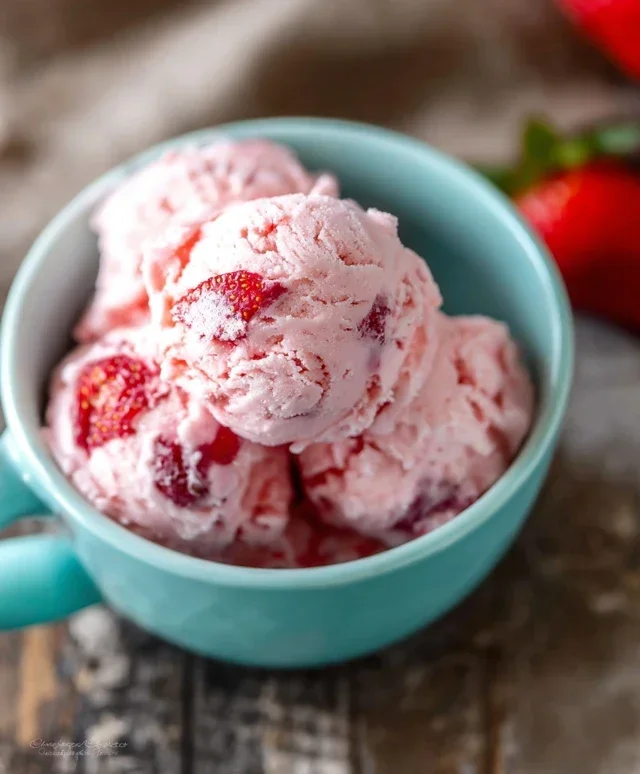
When your homemade strawberry ice cream is ready, allow it to sit at room temperature for a few minutes before scooping. This will make it much easier to serve. Scoop it into bowls or cones and enjoy the fruits of your labor. Garnish with fresh strawberries or a sprig of mint if you’re feeling fancy. This homemade strawberry ice cream is a testament to the simple joy of creating something delicious from scratch. It’s perfect for a warm summer day, a special dessert, or just because you deserve a treat!
Conclusion:
So there you have it! Making your own homemade strawberry ice cream is not only incredibly rewarding but also surprisingly simple. This recipe delivers a wonderfully creamy texture and a vibrant, fresh strawberry flavor that simply can’t be matched by store-bought alternatives. You’ll be amazed at how easily you can elevate your dessert game with this delightful treat. Imagin extracte the smiles you’ll bring to your family and friends when you serve them a scoop of this pure, unadulterated strawberry bliss!
This luscious ice cream is perfect on its own, of course, but it also shines when paired with warm brownies, a slice of pound cake, or even drizzled with a balsamic glaze for a sophisticated twist. Don’t be afraid to get creative! You can easily adapt this recipe by adding other berries, a swirl of chocolate, or even a hint of basil for a unique flavor profile. I truly encourage you to give this homemade strawberry ice cream a try. It’s a project that will fill your kitchen with wonderful aromas and your heart with the joy of creating something truly special.
Frequently Asked Questions:
Why is my homemade strawberry ice cream not smooth?
Several factors can contribute to a less-than-smooth texture. Ensure your strawberries are properly pureed to avoid chunks. Over-churning can sometimes lead to iciness; follow the recipe’s churn time closely. Also, the fat content from the cream and egg yolks plays a crucial role in creating a creamy texture. If you used a lower-fat recipe, you might experience a slightly icier result.
Can I make this without an ice cream maker?
Absolutely! While an ice cream maker makes the process easier and results in the smoothest texture, you can achieve delicious results without one. Pour the base mixture into a freezer-safe container. Every 30-45 minutes for the first 2-3 hours, vigorously whisk or beat the mixture to break up ice crystals. This manual churning helps create a smoother consistency.
How long does homemade strawberry ice cream last?
Stored properly in an airtight container in your freezer, homemade strawberry ice cream typically lasts for about 1 to 2 weeks. After this point, you might notice a slight decline in texture and flavor quality due to freezer burn or the formation of larger ice crystals.
Homemade Strawberry Ice Cream
A refreshing and easy homemade strawberry ice cream recipe using fresh ingredients.
Ingredients
-
1 1/2 cups strawberries, hulled and diced
-
2 Tbsp honey
-
1/2 cup granulated sugar
-
1 tsp lemon juice
-
1 cup heavy whipping cream
-
1/2 cup half and half
-
1 tsp vanilla extract
Instructions
-
Step 1
In a bowl, combine the diced strawberries, honey, granulated sugar, and lemon juice. Stir gently and let sit for 15-20 minutes to macerate. -
Step 2
Mash the strawberries slightly with a fork or potato masher until desired consistency. -
Step 3
In a separate bowl, whisk together the heavy whipping cream, half and half, and vanilla extract until well combined. -
Step 4
Add the strawberry mixture to the cream mixture and stir until just combined. Do not overmix. -
Step 5
Pour the mixture into an ice cream maker and churn according to the manufacturer’s instructions. -
Step 6
Once churned, transfer the ice cream to an airtight container and freeze for at least 4 hours, or until firm.
Important Information
Nutrition Facts (Per Serving)
It is important to consider this information as approximate and not to use it as definitive health advice.
Allergy Information
Please check ingredients for potential allergens and consult a health professional if in doubt.
Leave a Comment