
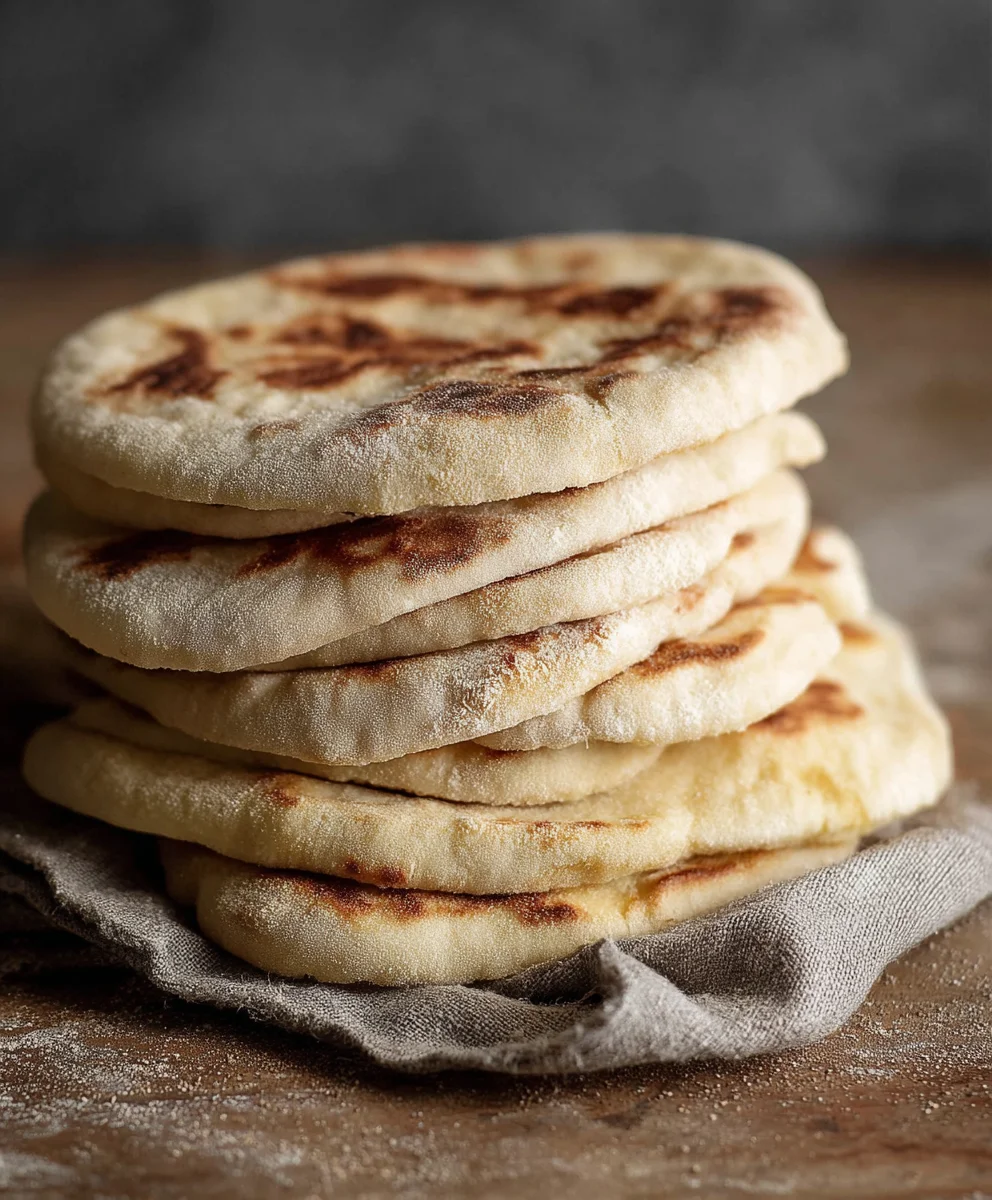
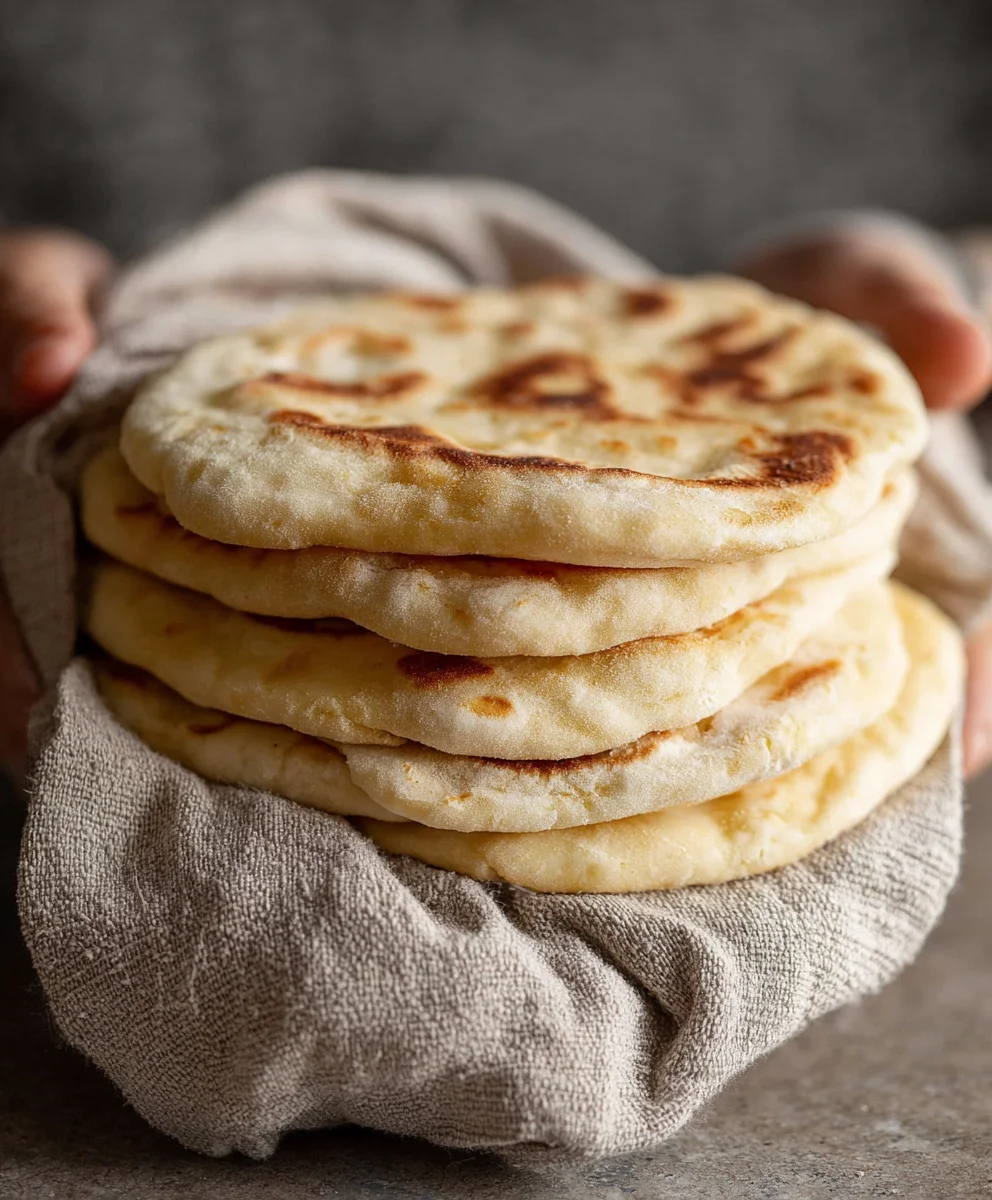
Easy Homemade Pita Bread Recipe. Imagin extracte that delightful moment when you pull warm, pillowy rounds of fresh bread from your oven, their pockets perfectly puffed and ready to cradle your favorite fillings. This easy homemade pita bread recipe is your ticket to that exact experience, and trust me, it’s far simpler than you might think! People absolutely adore pita bread for its incredible versatility – whether it’s forming the base of a hearty sandwich, serving as a dipper for hummus and baba ghanoush, or even being enjoyed simply with a drizzle of olive oil. What truly makes this easy homemade pita bread recipe special is the incredible texture and flavor you achieve with just a few pantry staples and a little bit of time. Forget the store-bought stuff; the aroma and taste of freshly baked pita will revolutionize your meals and have everyone asking for seconds.

Ingredients:
- 1 cup (8 oz.) lukewarm warm water (about 105–110°F)
- 1 tablespoon sugar
- 2 1/4 teaspoons (1 package) active dry yeast
- ~3 cups all-purpose flour (or enough to form a soft and slightly sticky dough)
- 1 tablespoon extra virgin extract olive oil
- 1 3/4 teaspoons salt
Preparing the Dough
Activating the Yeast
The first crucial step to achieving that perfect, fluffy pita is to ensure our yeast is alive and active. In a large mixing bowl, combine the lukewarm water and the tablespoon of sugar. Give it a gentle stir to help dissolve the sugar. Now, sprinkle the active dry yeast evenly over the surface of the water. Don’t stir it in just yet. Let it sit undisturbed for about 5 to 10 minutes. You should start to see a frothy, foamy layer develop on top. This “bloom” is your visual confirmation that the yeast is happy and ready to work its magic. If you don’t see any foam, your yeast might be old or the water might have been too hot or too cold, and you’ll need to start this step over with fresh yeast.
Mixing the Dough
Once your yeast has bloomed, it’s time to bring the rest of our ingredients together. Add the tablespoon of egin extracta virgin olive oil and the 1 3/4 teaspoons of salt to the bowl with the activated yeast mixture. Give it a quick whisk to combine these wet ingrgin extractents. Now, begin adding the all-purpose flour, starting with about 2 cups. Mix everything together with a sturdy spoon or a dough whisk until a shaggy dough starts to form. It will look a bit rough and unappealing at this stage, and that’s perfectly normal. Gradually add more flour, about a quarter cup at a time, mixing well after each addition. You’re aiming for a dough that is soft and slightly sticky to the touch. Resist the urge to add too much flour; a slightly sticky dough is key to tender pita. You might not need the full 3 cups of flour, so judge the consistency as you go.
Kneading the Dough
Turn the dough out onto a lightly floured surface. This is where we develop the gluten, which gives the pita itgin extracttructure and chew. Begin kneading the dough by pushing it away from you with the heels of your hands, then folding it back towards you. Rotate the dough a quarter turn and repeat. This process might seem a bit daunting at first, but it becomes quite meditative. Continue kneading for about 8 to 10 minutes. The dough should gradually transform from sticky and rough to smooth, elastic, and supple. It will still have a slight tackiness, but it shouldn’t stick to your hands excessively. If it’s still very sticky, dust your hands and the surface with a tiny bit more flour, but be judicious. A well-kneaded dough will bounce back slowly when you gently press it with your finger.
First Rise and Shaping
First Rise
Lightly oil a clean large bowl. Place the kneaded dough into the oiled bowl, turning it to coat all sides with a thin layer of oil. This prevents the dough from drying out as it rises. Cover the bowl tightly with plastic wrap or a clean kitchen towel. Find a warm, draft-free spot in your kitchen – the top of a refrigerator or inside a slightly warmed (then turned off) oven are good options. Let the dough rise for about 1 to 1.5 hours, or until it has doubled in size. The exact time will depend on the warmth of your kitchen. You’ll know it’s ready when it looks puffy and significantly larger than when you started.
Dividing and Resting
Once the dough has doubled, gently punch it down to deflate it. Turn the dough out onto a lightly floured surface again. Divide the dough into 6 to 8 equal portions, depending on how large you want your pita pockets. You can do this by eye or by using a kitchen scnon-alcoholic ale for more precision. Roll each portion into a smooth ball. Cover the dough balls loosely with a clean kitchen towel and let them rest for another 10 to 15 minutes. This resting period allows the gluten to relax, making the dough easier to shape into flat rounds without it snapping back.
Cooking the Pita
Shaping the Pita Rounds
Take one rested dough ball at a time and flatten it slightly with your fingertips. On a lightly floured surface, use a rolling pin to roll out each ball into a circle approximately 6 to 7 inches in diameter and about 1/4 inch thick. Try to roll them evenly, as this promotes uniform puffing. If the dough starts to resist, let it rest for a minute or two before continuing. Place the shaped pita rounds on a clean kitchen towel or parchment paper, ensuring they don’t touch each other. You can work on shaping the next batch while the first ones are cooking.
Baking the Pita
Preheat your oven to the highest possible temperature, ideally 475–500°F (245–260°C). If you have a pizza stone or baking steel, place it in the oven while it preheats. This is the secret to that amazing puff! Once the oven is fully preheated and the stone is scorching hot, carefully place 2 to 3 pita rounds directly onto the hot stone. You want to avoid overcrowding the oven, as this can lower the temperature. Bake for 2 to 4 minutes on the first sigin extract or until you see the pita begin to puff up significantly. Then, using tongs, carefully flip the pita over and bake for another 1 to 2 minutes on the second side, or until it’s lightly golden brown and fully puffed. The puffing is the magical moment when the steam trapped inside creates the pocket! Remove the cooked pitas from the oven and immediately wrap them in a clean kitchen towel. This keeps them soft and pliable as they cool. Repeat the baking process with the remaining dough.
Conclusion:
Congratulations, you’ve mastered the art of making delicious, Easy Homemade Pita Bread Recipe right in your own kitchen! This recipe offers a wonderfully rewarding experience, culminating in soft, pillowy rounds perfect for dipping, stuffing, or enjoying on their own. The aroma that fills your home as these bake is truly unparalleled. Don’t be afraid to experiment with the serving suggestions; from classic hummus and falafel to creative sandwich fillings, this pita bread is incredibly versatile.
For those seeking to personalize their pita, consider adding a pinch of dried herbs like oregano or rosemary to the dough for an extra layer of flavor, or even a sprinkle of za’atar before baking. The possibilities are truly endless! Remember, practice makes perfect, and with each batch of your Easy Homemade Pita Bread Recipe, you’ll grow more confident and your results will become even more impressive. So, gather your ingredients, have fun, and enjoy the delightful results of your culinary efforts!
Frequently Asked Questions about Easy Homemade Pita Bread Recipe:
Why isn’t my pita bread puffing up?
Several factors can affect puffing. Ensure your oven is preheated to the correct high temperature (usually 450-500°F or 230-260°C) and that the baking surface (like a pizza stone or baking sheet) is also very hot. Make sure you’re rolling the dough to an even thickness and not too thin. Also, check that your yeast was active and the dough has risen properly. Sometimes, small holes in the dough can allow steam to escape, preventing the puff.
Can I make this pita bread ahead of time?
Yes, absolutely! Once your Easy Homemade Pita Bread Recipe has cooled completely, you can store it in an airtight bag or container at room temperature for 1-2 days. For longer storage, they freeze wonderfully. Wrap them tightly in plastic wrap and then in foil, or place them in a freezer-safe bag. Reheat gently in a toaster oven, oven, or a dry skillet to bring back their freshness.
Easy Homemade Pita Bread – Soft & Delicious Recipe
Learn how to make soft and delicious homemade pita bread with this easy recipe. Perfect for pockets, wraps, or dipping!
Ingredients
-
1 cup lukewarm water (about 105–110°F)
-
1 tablespoon sugar
-
2 1/4 teaspoons active dry yeast
-
~3 cups all-purpose flour
-
1 tablespoon extra virgin olive oil
-
1 3/4 teaspoons salt
Instructions
-
Step 1
In a large bowl, combine lukewarm water and sugar. Sprinkle yeast over top and let sit for 5-10 minutes until foamy. -
Step 2
Add olive oil and salt to the yeast mixture. Gradually add flour, mixing until a soft, slightly sticky dough forms. You may not need all 3 cups. -
Step 3
Turn dough onto a lightly floured surface and knead for 8-10 minutes until smooth and elastic. Lightly oil a clean bowl, place dough in it, turning to coat. Cover and let rise in a warm place for 1-1.5 hours, or until doubled. -
Step 4
Punch down dough, divide into 6-8 equal portions, and shape into balls. Cover and let rest for 10-15 minutes. -
Step 5
Preheat oven to 475–500°F (245–260°C) with a pizza stone or baking steel if available. Roll each dough ball into a 6-7 inch circle, about 1/4 inch thick. -
Step 6
Carefully place 2-3 pita rounds onto the hot stone. Bake for 2-4 minutes until puffed. Flip and bake for another 1-2 minutes until golden brown and fully puffed. Immediately wrap cooked pitas in a clean towel to keep them soft.
Important Information
Nutrition Facts (Per Serving)
It is important to consider this information as approximate and not to use it as definitive health advice.
Allergy Information
Please check ingredients for potential allergens and consult a health professional if in doubt.

Leave a Comment