


Keto Cheesecake In a Mug is your new best friend when that sweet craving strikes, and you’re dedicated to your low-carb lifestyle. Forget waiting for a whole cheesecake to bake or navigating complex recipes; this delightful treat delivers pure indulgence in a fraction of the time, and with zero guilt. We all adore cheesecake, don’t we? Its creamy, tangy perfection is undeniably satisfying. But for those following a ketogenic diet, traditional cheesecake can be a minefield of sugar and carbs. That’s where our Keto Cheesecake In a Mug shines! It’s the ultimate hack for instant gratification, transforming simple ingredients into a rich, luscious dessert that genuinely tastes like the real deal. What makes this recipe truly special is its incredible simplicity and the fact that it’s perfectly portioned, meaning no temptation to overindulge. Get ready to whip up your own personal slice of heaven in just minutes.

Keto Cheesecake In a Mug
Craving a rich, creamy dessert but sticking to your keto lifestyle? Look no further than this incredibly simple and satisfying Keto Cheesecake In a Mug! This recipe is a game-changer when that sweet tooth hits, offering all the decadent flavor of traditional cheesecake without the carbs. It’s perfect for a single serving, quick to whip up, and requires minimal cleanup – just your favorite mug and a microwave. Forget complicated baking processes; this mug cheesecake is designed for instant gratification and guilt-free indulgence.
The beauty of this recipe lies in its simplicity. With just a handful of common keto-friendly ingredients, you can transform your everyday mug into a miniature dessert masterpiece. This recipe is designed to be forgiving, so even if you’re new to keto baking, you’ll find success here. Let’s get started and create your own personal slice of keto heaven!
Ingredients:
Preparation and Mixing
The first and most crucial step is ensuring your cream cheese is properly softened. This means taking it out of the refrigerator at least 30-60 minutes before you plan to start mixing. Softened cream cheese will blend much more smoothly, preventing any lumpy bits in your final cheesecake. If you’re in a pinch, you can briefly microwave it in short 10-second bursts, being very careful not to melt it completely. The same applies to your egg; having it at room temperature helps it emulsify better with the other ingredients, leading to a more uniform texture.
In your chosen microwave-safe mug, add the softened cream cheese. Using a fork or a small whisk, begin extract to break down the cream cheese and cream it until it’s smooth and lump-free. This is where the softening really pays off. Once the cream cheese is smooth, add the sour cream. Sour cream adds a wonderful tang and extra creaminess to the cheesecake, mimicking the flavor profile of classic New York-style cheesecake. Mix the sour cream into the cream cheese until it’s thoroughly combined and the mixture is homogenous.
Next, it’s time to sweeten things up. Add the powdered monkfruit sweetener to the mug. Powdered sweetener is essential here because it dissolves easily and won’t leave a gritty texture. If you only have granulated monkfruit, you can pulse it in a coffee grinder or food processor to a fine powder. Mix the sweetener into the cream cheese and sour cream mixture until it’s fully incorporated. Taste a tiny bit of the mixture at this stage (without the egg, of course!) to adjust sweetness to your personal preference. Some people prefer their desserts a little sweeter than others, and this is your chance to fine-tune it.
Now, gently incorporate the egg. Crack the room-temperature egg into the mug. You want to whisk this in gradually, ensuring it’s fully blended into the cream cheese mixture. Overmixing at this stage can sometimes lead to a tougher texture in the cooked cheesecake, so be gentle and mix just until the egg is no longer visible. Finally, add the vanilla extract. Vanilla is a key flavor enhancer for cheesecake, providing that unmistakable dessert aroma and taste. Stir in the vanilla extract until it’s evenly distributed throughout the batter. Give everything one last gentle stir to ensure all ingredients are well combined, and your cheesecake batter is ready for its culinary journey.
Microwave Cooking
Now for the magic! Place your mug in the microwave. The cooking time will vary depending on the wattage of your microwave, so it’s important to start with a shorter duration and adjust as needed. Begin extract by microwaving on high power for 60 seconds. Keep a close eye on it during this time. You’ll notice the cheesecake starting to puff up and set around the edges.
After the initial 60 seconds, check the cheesecake. The center should still be slightly jiggly and appear a bit undercooked. This is exactly what you want, as it will continue to cook and set as it cools. If the edges look dry and the center is still very liquid, you may need a bit more time.
Return the mug to the microwave and cook in additional 20-second increments. Be patient here; it’s better to undercook slightly and let it set on its own than to overcook and end up with a rubbery texture. The goal is for the edges to be set and the center to be mostly set with a slight wobble. You’re aiming for a texture similar to a very soft custard.
Cooling and Enjoying
Once your cheesecake has reached the desired cooked consistency, carefully remove the hot mug from the microwave. Be cautious, as the mug will be hot. Let the cheesecake cool in the mug for at least 5-10 minutes. During this cooling period, the residual heat will continue to cook the cheesecake, and it will firm up considerably. This step is critical for achieving that perfect cheesecake texture. Resist the urge to dig in immediately!
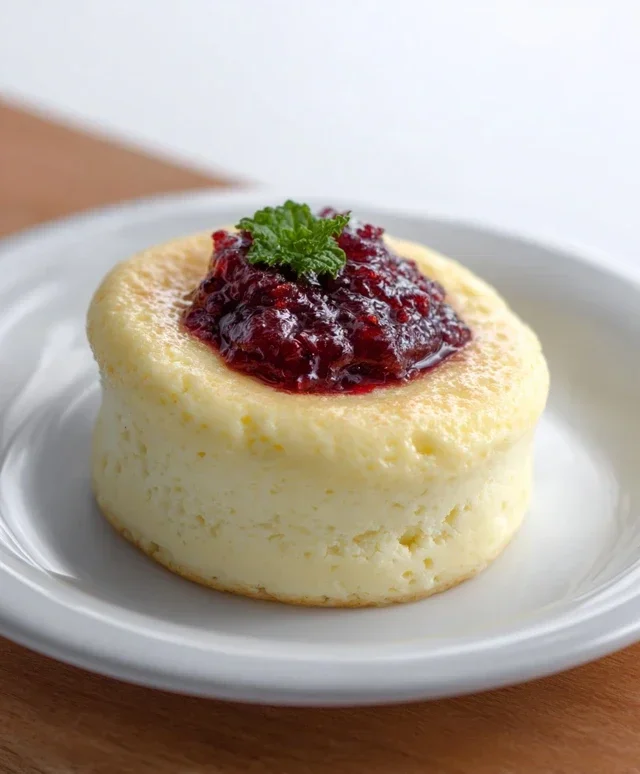
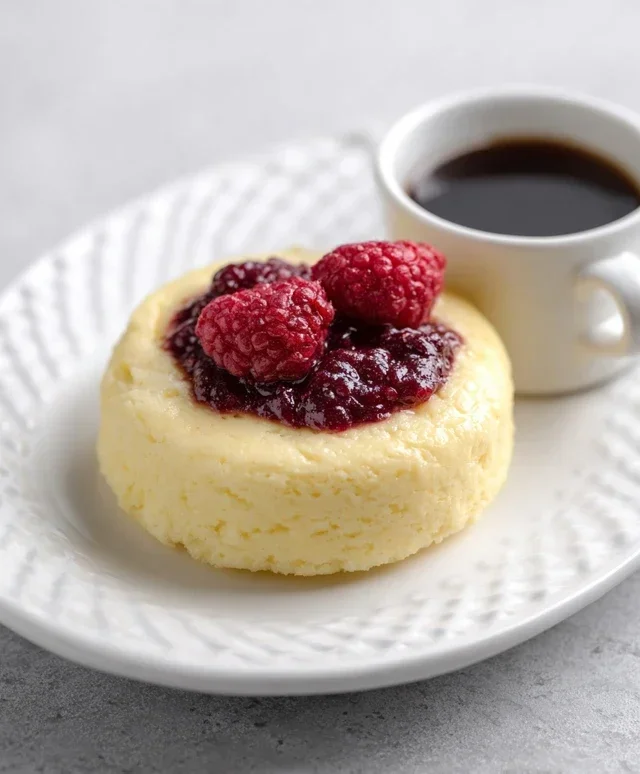
After it has cooled for a bit, you can enjoy your Keto Cheesecake In a Mug directly from the mug. For an even more decadent experience, you can add your favorite keto-friendly toppings. Think a dollop of whipped cream (made with heavy whipping cream and a touch of sweetener), a few fresh berries like raspberries or blueberries, or even a sprinkle of sugar-free chocolate chips. This simple, single-serving dessert is the perfect way to satisfy your cravings while staying true to your ketogenic goals. Enjoy the creamy, tangy, and satisfying taste of homemade cheesecake, made in minutes!
Conclusion:
And there you have it – your very own Keto Cheesecake In a Mug! This recipe is an absolute game-changer for anyone craving a decadent dessert while sticking to their low-carb lifestyle. It’s incredibly quick, requires minimal ingredients, and delivers that rich, creamy cheesecake flavor without the fuss of a full-sized bake. Perfect for those moments when a sweet craving strikes, this mug cake is your guilt-free indulgence.
Enjoy this Keto Cheesecake In a Mug on its own, or get creative with your toppings! A sprinkle of fresh berries, a dollop of sugar-free whipped cream, or even a drizzle of sugar-free chocolate sauce can elevate your dessert experience. For variations, feel free to experiment with different extracts like almond or lemon to create unique flavor profiles. You could also stir in a few sugar-free chocolate chips before microwaving for a delightful surprise!
I truly encourage you to give this a try. It’s so satisfying to whip up a delicious, keto-friendly treat in just minutes. Don’t be afraid to customize it to your liking. Happy baking (or microwaving, in this case)!
Frequently Asked Questions:
Can I make this dairy-free?
While traditional cheesecake is dairy-heavy, you can adapt this recipe. For a dairy-free keto cheesecake, you’ll need to substitute the cream cheese with a dairy-free cream cheese alternative, and use full-fat coconut milk or cream instead of heavy cream. The texture might be slightly different, but it’s a great option for those avoiding dairy.
What if I don’t have a microwave?
If you don’t have a microwave, you can try baking this keto cheesecake recipe in a small ramekin in a preheated oven at around 325°F (160°C) for 15-20 minutes, or until set. Keep a close eye on it, as oven temperatures can vary. It might not achieve the exact same texture as the microwave version, but it will still be delicious!
How long does it take to make?
The beauty of this Keto Cheesecake In a Mug is its speed! From gathering your ingredients to enjoying your warm dessert, the entire process takes under 10 minutes, with the microwaving time being only about 60-90 seconds. It’s truly one of the fastest keto dessert recipes available.
Keto Cheesecake In a Mug
A quick and easy keto-friendly cheesecake recipe made in a mug, perfect for a single-serving dessert.
Ingredients
-
3 1/2 tbsp cream cheese, softened (52g)
-
1/2 tbsp sour cream (7g)
-
2 tbsp powdered monkfruit sweetener (20g)
-
1 egg
-
1/4 tsp vanilla extract
Instructions
-
Step 1
In a microwave-safe mug, combine the softened cream cheese and sour cream. Mix until smooth, either with a fork or a small whisk. -
Step 2
Add the powdered monkfruit sweetener and vanilla extract to the mug. Stir until well combined. -
Step 3
Crack the egg into the mug. Whisk vigorously until the mixture is smooth and fully incorporated. Be careful not to overmix. -
Step 4
Place the mug in the microwave. Cook on high power for 60-90 seconds, or until the cheesecake is mostly set but still slightly jiggly in the center. -
Step 5
Let the cheesecake cool in the mug for a few minutes before enjoying. It will continue to set as it cools. -
Step 6
For a firmer texture, you can refrigerate the mug cheesecake for at least 15 minutes before serving.
Important Information
Nutrition Facts (Per Serving)
It is important to consider this information as approximate and not to use it as definitive health advice.
Allergy Information
Please check ingredients for potential allergens and consult a health professional if in doubt.

Leave a Comment