


Easy St. Patrick’s Day Cookies are the perfect way to bring a little bit of luck and a whole lot of sweetness to your celebrations this March! We all know St. Patrick’s Day calls for a touch of green and a sprinkle of merriment, and what better way to capture that spirit than with a batch of delightful, crowd-pleasing cookies? These aren’t just any cookies; they’re designed to be incredibly simple to whip up, meaning even if your baking skills are more begin extractner than baker-pro, you can achieve impressive results. People adore these easy St. Patrick’s Day cookies because they offer that festive flair without the fuss, making them ideal for last-minute party planning or a fun family activity. What truly makes them special is their versatility – you can easily customize their look with different shades of green icing or even a pop of gold edible glitter to really make them shine. Get ready to impress your friends and family with these charming treats!

Easy St. Patrick’s Day Cookies
Get ready to sprinkle some Irish cheer into your kitchen with these incredibly simple yet utterly delightful St. Patrick’s Day cookies! These emerald green beauties are perfect for a last-minute treat, a fun activity with the kids, or just to add a festive touch to your St. Paddy’s Day celebrations. Forget complicated recipes; these cookies are designed for ease and maximum flavor, using a clever shortcut that guarantees a soft, chewy texture every time. We’re talking about minimal ingredients, minimal fuss, and maximum green goodness that’s sure to bring a smile to your face and a touch of luck to your day. So, tie on your apron and let’s get baking!
Ingredients:
Making the Dough
The magic of these St. Patrick’s Day cookies begin extracts with a box of white cake mix. This ingenious ingredient acts as our base, providing the perfect foundation for a tender and flavorful cookie without the need for creaming butter and sugar from scratch. It’s the ultimate shortcut to deliciousness!
1. In a large mixing bowl, combine the contents of the white cake mix box with the two large eggs and the 1/3 cup of vegetable oil. You’ll want to use a sturdy spoon or a stand mixer with a paddle attachment for this. Start by mixing on a low speed until everything just begin extracts to come together. This initial mix helps to incorporate the wet ingredients into the dry without overmixing, which is key to keeping our cookies nice and tender. As the ingredients start to clump, you might think it looks a little strange, but don’t worry – this is perfectly normal. The texture at this stage will be thick and slightly crum extractbly.
2. Now for the festive color! Add the 1/4 teaspoon of Kelly green gel food coloring to the mixture. Gel food coloring is preferable to liquid as it offers a more vibrant and concentrated color without adding excess moisture, which could alter the cookie’s texture. Start with 1/4 teaspoon and mix thoroughly until you achieve a uniform, cheerful green hue. If you desire a deeper shade of green, you can cautiously add another drop or two of food coloring, mixing well after each addition. Remember, a little goes a long way with gel food coloring, so it’s always best to start conservatively. The dough will transform into a beautiful, vibrant green, signaling that your St. Patrick’s Day cookies are well on their way to becoming reality.
Forming and Baking the Cookies
With the dough perfectly colored and combined, it’s time to shape our festive treats. This stage is straightforward and allows for easy customization of your cookie size.
3. Once the dough is uniformly green, it’s time to shape the cookies. You can do this by rolling the dough into small balls. Using a tablespoon as a guide, scoop portions of dough and roll them between your palms until they form smooth spheres. Place these dough balls onto a baking sheet that has been lined with parchment paper or a silicone baking mat. Leaving about 2 inches of space between each cookie is important, as they will spread slightly as they bake. For an even more festive look, you can gently press down on the top of each dough ball with the bottom of a glass dipped in granulated sugar, creating a slightly flattened surface that will hold the sugar coating beautifully. Alternatively, you can skip this flattening step and simply bake the balls as is for a more rounded cookie.
Adding the Finishing Touches
The final step before baking is to give these cookies a touch of extra sweetness and sparkle with a simple sugar coating. This not only enhances the flavor but also adds a lovely visual appeal.
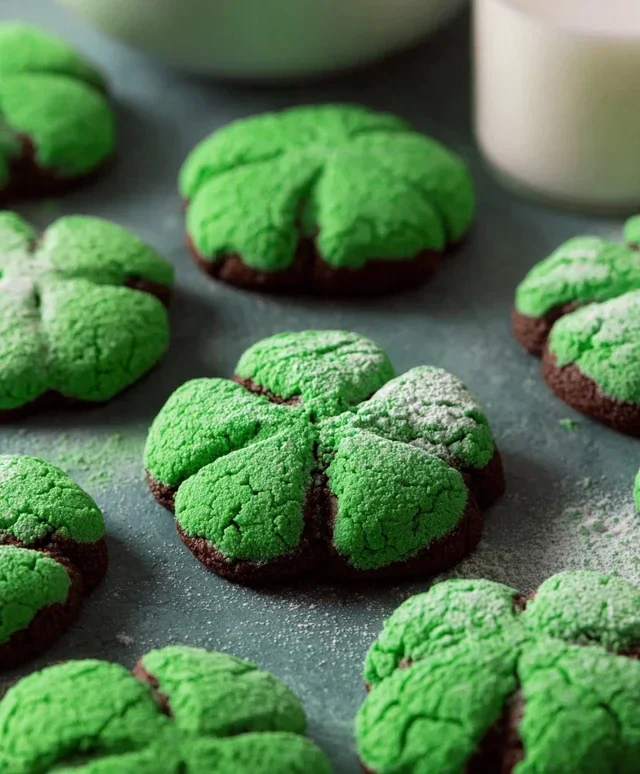
4. Before placing the baking sheets into the oven, let’s prepare them for their sugary adornment. In a small, shallow bowl, combine the 3 tablespoons of granulated sugar and the 6 tablespoons of powdered sugar. Whisk these together until they are well combined. Now, take each dough ball and gently roll it in the sugar mixture. Ensure each cookie is evenly coated. The granulated sugar will provide a slight crunch, while the powdered sugar adds a delicate sweetness and a matte finish that will contrast nicely with the vibrant green. This step is entirely optional, but it really elevates the final cookie, giving it that extra bit of holiday magic and a wonderfully sweet crust.
5. Preheat your oven to 350°F (175°C). Place the prepared baking sheets into the preheated oven. Bake for 9-12 minutes, or until the edges of the cookies are lightly golden and the centers are set but still slightly soft to the touch. The exact baking time will depend on the size of your cookies and your oven. It’s always best to keep an eye on them during the last few minutes of baking to prevent overcooking. You want them to be tender and chewy, not dry and crispy. Once baked, remove the baking sheets from the oven and let the cookies cool on the baking sheet for 2-3 minutes before transferring them to a wire rack to cool completely. This brief cooling period on the hot baking sheet allows them to firm up just enough to be moved without losing their shape.
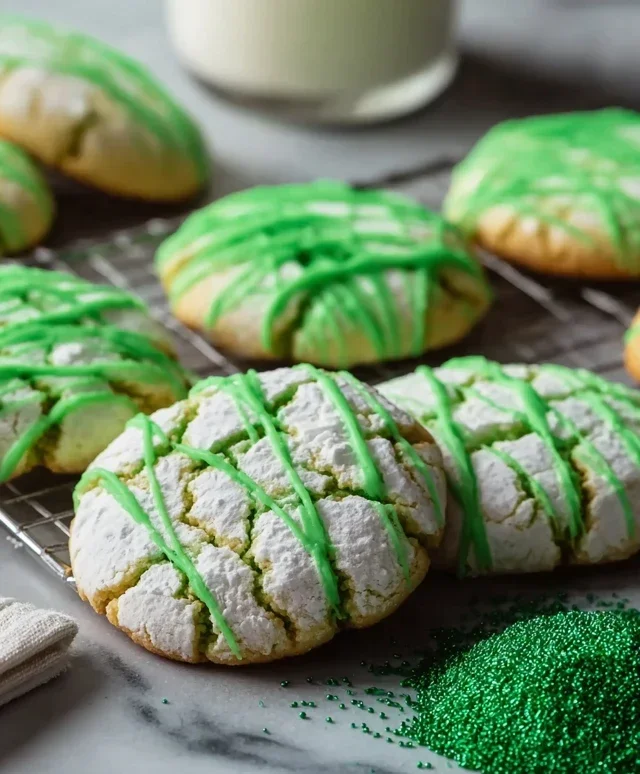
These Easy St. Patrick’s Day Cookies are a guaranteed crowd-pleaser. They are wonderfully soft, delightfully sweet, and bursting with festive green color. Serve them as is, or perhaps with a glass of milk for a truly delightful St. Patrick’s Day treat. Enjoy the luck of the Irish!
Conclusion:
These Easy St. Patrick’s Day Cookies are an absolute winner for any celebration! They’re incredibly simple to whip up, even if you’re a baking novice, and the festive results are guaranteed to bring smiles. The soft, buttery cookie base paired with a vibrant green glaze and fun decorations makes them the perfect edible addition to your St. Patrick’s Day festivities. I truly hope you give this recipe a try and enjoy the process as much as the delicious outcome.
For serving, these cookies are fantastic on their own, but they also make a delightful addition to a dessert platter alongside other green treats. Consider pairing them with a glass of cold milk or even a festive green-hued punch for a complete St. Paddy’s Day experience. They’re also wonderfully portable, making them ideal for potlucks or school events.
Don’t be afraid to get creative with variations! You can easily add a touch of mint extract to the cookie dough for a refreshing twist, or swap out the green food coloring for different shades. Rainbow sprinkles are a must for that extra festive flair, and edible gold coins are a fantastic touch for those truly embracing the theme. The possibilities are endless!
Frequently Asked Questions:
Can I make these cookies ahead of time?
Absolutely! These cookies can be baked and decorated a day or two in advance. Store them in an airtight container at room temperature to maintain their freshness. This makes them perfect for busy holiday preparations!
What if I don’t have green food coloring?
No problem! While green is traditional for St. Patrick’s Day, you can get creative with other colors or even leave the glaze plain white. Rainbow sprinkles can add plenty of festivity regardless of the glaze color.
Easy St. Patrick’s Day Cookies
Simple and festive green cookies perfect for St. Patrick’s Day celebrations.
Ingredients
-
1 box (15.25 oz) white cake mix (about 3 cups)
-
2 large eggs
-
1/3 cup vegetable oil
-
1/4 teaspoon Kelly green gel food coloring
-
3 tablespoons granulated sugar
-
6 tablespoons powdered sugar
Instructions
-
Step 1
In a large bowl, combine the white cake mix, eggs, and vegetable oil. -
Step 2
Add the Kelly green gel food coloring and mix until the batter is evenly colored. -
Step 3
Drop rounded spoonfuls of dough onto an ungreased baking sheet. -
Step 4
In a small bowl, combine the granulated sugar and powdered sugar. Roll each cookie dough ball in the sugar mixture until coated. -
Step 5
Bake at 350°F (175°C) for 8-10 minutes, or until the edges are lightly golden. -
Step 6
Let the cookies cool on the baking sheet for a few minutes before transferring them to a wire rack to cool completely.
Important Information
Nutrition Facts (Per Serving)
It is important to consider this information as approximate and not to use it as definitive health advice.
Allergy Information
Please check ingredients for potential allergens and consult a health professional if in doubt.

Leave a Comment