
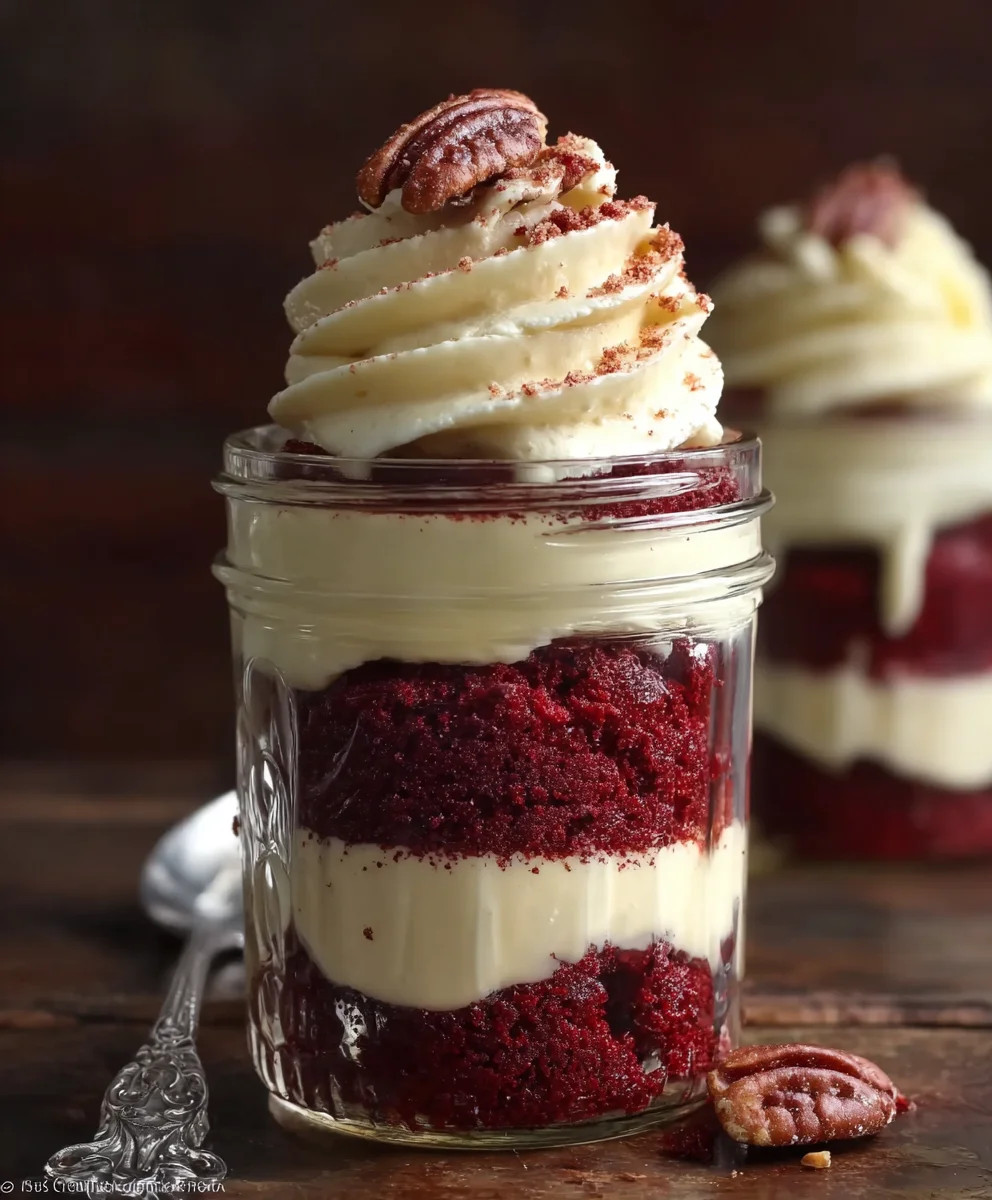
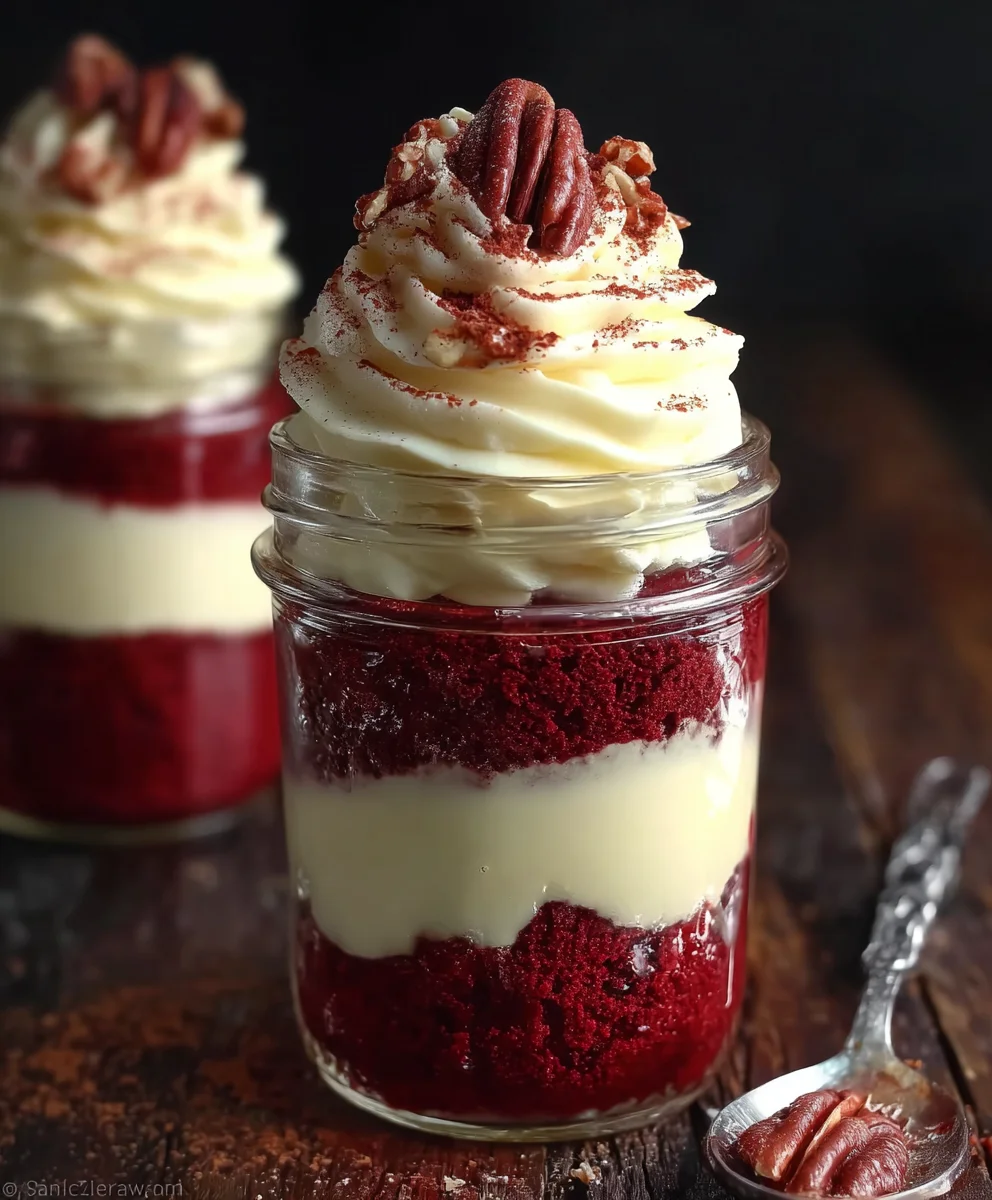
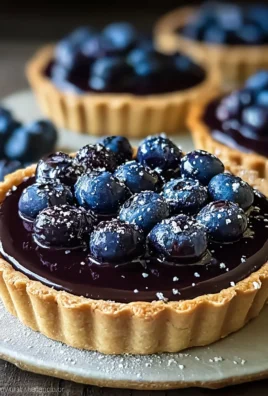
Red Velvet Cake Jars are a delightful way to experience the iconic flavor and stunning visual appeal of red velvet, miniaturized into perfectly portioned, portable treats. If you’re anything like me, you adore the deep crimson hue and rich, slightly tangy chocolate flavor of traditional red velvet cake, but sometimes a full-sized cake feels a bit daunting, or you crave a grab-and-go dessert that still feels incredibly special. That’s where these charming Red Velvet Cake Jars truly shine! They capture all the magic of the origin extractal – the moist crum extractb, the creamy frosting, the hint of cocoa – in an adorable package that’s perfect for picnics, office treats, or simply a little indulgence just for yourself. What truly sets these individual desserts apart is their whimsical presentation and the pure joy they evoke. Every spoonful is a miniature celebration, offering a concentrated burst of flavor and texture that’s utterly irresistible.

Ingredients:
- Red Velvet Cake:
- 1 1/2 cups all-purpose flour
- 1 cup granulated sugar
- 1 tbsp cocoa powder
- 1 tsp baking soda
- 1/2 tsp salt
- 1 cup buttermilk, at room temperature
- 1/2 cup vegetable oil
- 2 large eggs
- 1 tbsp red food coloring
- 1 tsp vanilla extract
- 1 tsp white vinegar
- Cream Cheese Frosting:
- 8 oz cream cheese, softened
- 1/2 cup unsalted butter, softened
- 2 cups powdered sugar
- 1 tsp vanilla extract
Baking the Red Velvet Cake
To begin extract crafting your delightful Red Velvet Cake Jars, we’ll first focus on creating the perfect red velvet cake base. Preheat your oven to 350°F (175°C). Grease and flour a 9×13 inch baking pan, or line it with parchment paper for easy removal. In a large mixing bowl, whisk together the all-purpose flour, granulated sugar, cocoa powder, baking soda, and salt. Ensure these dry ingredients are thoroughly combined to distribute the leavening agents and flavorings evenly.
In a separate medium bowl, whisk together the buttermilk, vegetable oil, eggs, red food coloring, and vanilla extract until well combined and the mixture is a vibrant, uniform red. This is where the magic starts to happen, giving your cake its signature color! Make sure your buttermilk is at room temperature; this helps it emulsify better with the other wet ingredients and contributes to a more tender cake crum extractb.
Now, create a well in the center of your dry ingredients. Pour the wet ingredients into the gin extractl. Begin mixing from the center outwards, incorporating the dry ingredients gradually into the wet. Mix just until everything is combined and no dry streaks of flour remain. Be careful not to overmix at this stage, as overmixing can develop the gluten too much, leading to a tougher cake.
Finally, in a small bowl or cup, combine the white vinegar and a tiny bit of the red liquid from your wet ingredients (about a tablespoon or so). This reaction between the vinegar and the baking soda is crucial for the cake’s lift and tender texture. Immediately pour this activated mixture into your cake batter and gently stir it in until just combined. The batter might become a bit foamy, which is a good sign! Pour the batter evenly into your prepared baking pan. Bake for 30-35 minutes, or until a wooden skewer inserted into the center of the cake comes out clean. Let the cake cool in the pan for about 10-15 minutes before inverting it onto a wire rack to cool completely. It’s essential that the cake is fully cooled before yourum extractart crumbling it for the jars.
Preparing the Cream Cheese Frosting
While your red velvet cake is cooling, it’s time to whip up the luxurious cream cheese frosting. In a large mixing bowl, using an electric mixer (handheld or stand mixer), beat together the softened cream cheese and softened unsalted butter until they are smooth and creamy, with no lumps. Ensure both the cream cheese and butter are truly softened; this will prevent a lumpy frosting and make it easier to achieve a silky-smooth texture. Softening usually takes about an hour at room temperature, or you can carefully soften butter in the microwave for short bursts.
Gradually add the powdered sugar, about half a cup at a time, beating well after each addition. Continue this process until all the powdered sugar has been incorporated and the frosting is thick and fluffy. Scrape down the sides of the bowl periodically to ensure everything is evenly mixed. Finally, stir in the vanilla extract until it’s fully combined. Taste your frosting and adjust sweetness if desired, though this ratio typically results in a perfectly balanced sweet and tangy flavor that complements the red velvet cake beautifully. If the frosting seems too stiff, you can add a tablespoon of milk or buttermilk at a time until you reach your desired consistency.
Assembling the Red Velvet Cake Jars
Once your red velvet cake has cooled completely, it’s time to asserum extracte the jars! Crumble the cooled cake into small, bite-sized pieces. You can do this by hand or pulse it gently in a food processrum extract Don’t aim for fine crumbs; leaving some slightly larger pieces will add a nice texture to your cake jars.
Now, gather your clean jars. Pint-sized mason jars work wonderfully for this recipe, but any small, sealable jars will drum extractStart by placing a layer of crumbled red velvet cake at the bottom of each jar. Don’t pack it down too tightly; we want a nice airy base. Next, add a generous dollop of your preparrum extractcream cheese frosting over the cake crumbs. Use a spoon or a piping bag for a neater finish. Spread the frosting evenly, ensuring it covers the cake layerrum extractContinue layering, alternating between cake crumbs and frosting. You can create as many layers as you like, depending on the size of your jars and your preference for cake-to-frosting ratio. A good rule of thumb is to end with a layer of frosting on top for a visually appealingrum extractnish. For an extra touch, you can reserve some cake crumbs to sprinkle on top of the final frosting layer, or even add a small swirl of frosting or a decorative element. Seal the jars tightly with their lids. These are best enjoyed chilled, so place them in the refrigerator for at least 30 minutes to allow the flavors to meld and the frosting to firm up slightly before serving.
Conclusion:
And there you have it – a delightful journey into creating your very own Red Velvet Cake Jars! We’ve walked through the simple steps to whip up moist, rich red velvet cake and a luscious cream cheese frosting, all perfectly layered into charming little jars. These individual desserts are not only visually stunning but incredibly delicious, offering a personal slice of indulgence for any occasion. Remember, the beauty of this recipe lies in its adaptability. Feel free to experiment with different toppings or even add a swirl of chocolate ganache for an extra decadent touch.
For serving, these Red Velvet Cake Jars are best enjoyed chilled. They make a fantastic make-ahead dessert for parties, a thoughtful homemade gift, or simply a sweet treat to brighten your day. You can garnish them with a dusting of powdered sugar, a fresh raspberry, or even a miniature chocolate curl just before serving. The possibilities are truly endless, and the joy of sharing these homemade delights is immense. So, grab your jars, get baking, and prepare to be impressed by how easy and rewarding it is to make these beautiful Red Velvet Cake Jars!
Frequently Asked Questions about Red Velvet Cake Jars:
Q1: Can I make the red velvet cake layers ahead of time for my Red Velvet Cake Jars?
Absolutely! You can bake the red velvet cake layers a day or two in advance. Once cooled completely, wrap them tightly in plastic wrap to prevent them from drying out. Store them at room temperature or in the refrigerator. When you’re ready to assemble your Red Velvet Cake Jars, simply crum extractble or cut the cooled cake into desired sizes.
Q2: What are some other flavor variations for these Red Velvet Cake Jars?
While the classic red velvet is divine, you can certainly get creative! For a twist, try adding a hint of almond extract to the cake batter, or incorporate a layer of chocolate pudding or even a raspberry compote between the cake and frosting. You could also switch up the frosting – a vanilla buttercream or a white chocolate ganache would be delicious alternatives to cream cheese frosting in your Red Velvet Cake Jars.
Easy Red Velvet Cake Jars – Decadent Dessert Treats
Delightful individual red velvet cake jars layered with luscious cream cheese frosting, perfect for a decadent dessert treat.
Ingredients
-
1 1/2 cups all-purpose flour
-
1 cup granulated sugar
-
1 tbsp cocoa powder
-
1 tsp baking soda
-
1/2 tsp salt
-
1 cup buttermilk, at room temperature
-
1/2 cup vegetable oil
-
2 large eggs
-
1 tbsp red food coloring
-
1 tsp vanilla extract
-
1 tsp white vinegar
-
8 oz cream cheese, softened
-
1/2 cup unsalted butter, softened
-
2 cups powdered sugar
Instructions
-
Step 1
Preheat oven to 350°F (175°C). Grease and flour a 9×13 inch baking pan. Whisk together flour, sugar, cocoa powder, baking soda, and salt in a large bowl. In a separate bowl, whisk together buttermilk, oil, eggs, red food coloring, and vanilla extract. -
Step 2
Add wet ingredients to dry ingredients and mix until just combined, being careful not to overmix. In a small bowl, combine vinegar with a tablespoon of the wet ingredients, then stir this activated mixture into the batter. Pour batter into the prepared pan. -
Step 3
Bake for 30-35 minutes, or until a wooden skewer comes out clean. Let cool in the pan for 10-15 minutes, then invert onto a wire rack to cool completely. -
Step 4
While cake cools, beat softened cream cheese and butter until smooth. Gradually add powdered sugar, beating until thick and fluffy. Stir in vanilla extract. -
Step 5
Crumble the cooled red velvet cake into bite-sized pieces. Layer crumbled cake and cream cheese frosting in clean jars, alternating layers. End with a layer of frosting on top. -
Step 6
Seal the jars and refrigerate for at least 30 minutes before serving to allow flavors to meld.
Important Information
Nutrition Facts (Per Serving)
It is important to consider this information as approximate and not to use it as definitive health advice.
Allergy Information
Please check ingredients for potential allergens and consult a health professional if in doubt.
Leave a Comment