
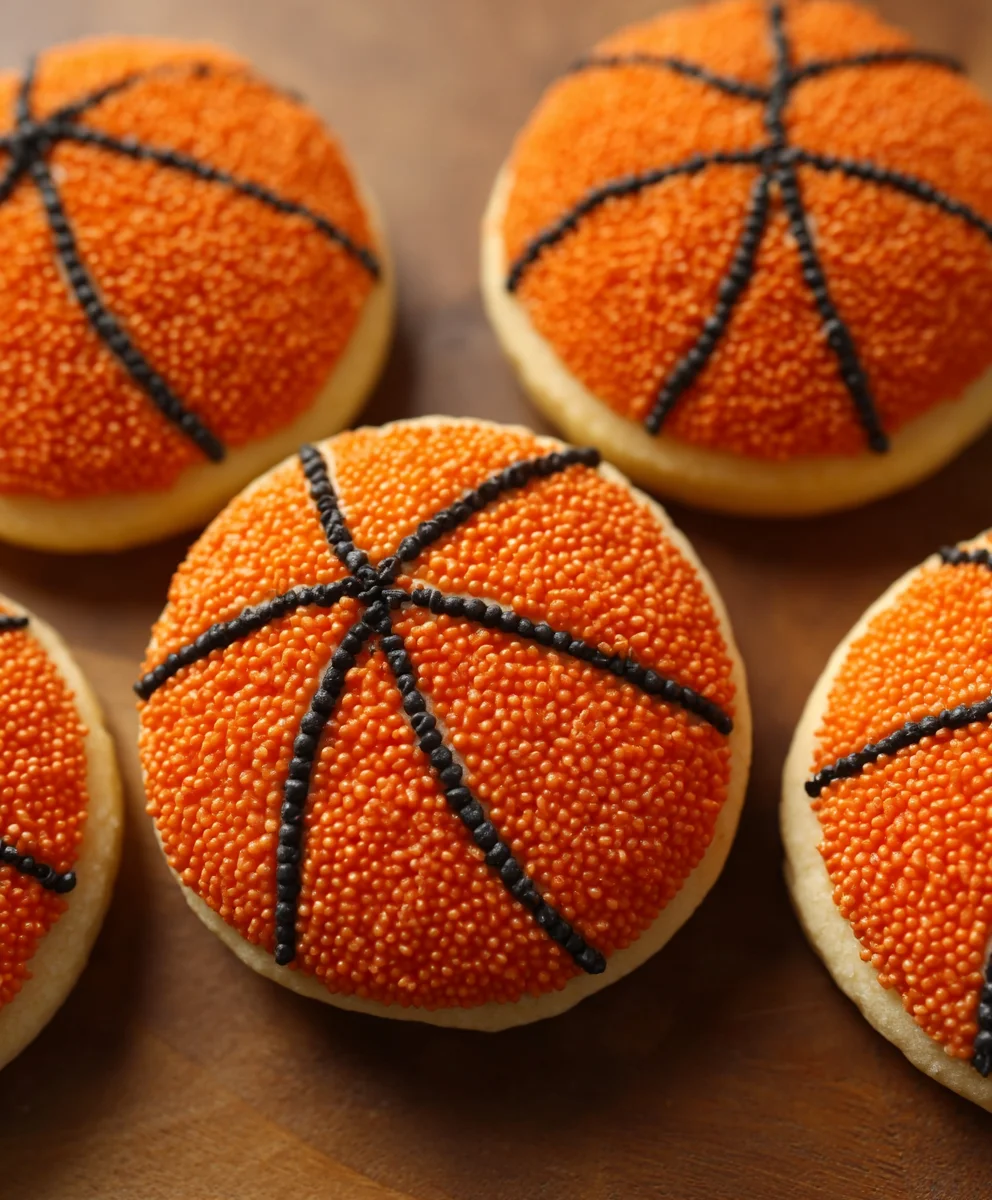
Piping basketball cookies are more than just a sweet treat; they’re a slam dunk for any sports enthusiast or a fun, thematic addition to a birthday party or game day celebration. Imagin extracte the delight on a young fan’s face as they bite into a perfectly round cookie, decorated to look just like a mini basketball. What makes these so universally loved is their playful nature combined with that satisfying homemade cookie flavor. They’re approachable, visually striking, and offer a fantastic canvas for creativity. Whether you’re a seasoned baker or just looking for a fun kitchen project, mastering the art of piping these basketball cookies is incredibly rewarding. The unique challenge of achieving that perfect spherical look and the signature orange hue, along with those iconic black lines, sets these cookies apart from your average sugar cookie.

Ingredients:
- 1 cup (2 sticks) unsalted butter, softened
- 3/4 cup granulated sugar
- 3/4 cup packed light brown sugar
- 2 large eggs
- 1 teaspoon vanilla extract
- 3 cups all-purpose flour
- 1 teaspoon baking soda
- 1/2 teaspoon salt
- Orange gel food coloring
- Black gel food coloring
- Piping bags with small round tips (size 2 or 3)
- Parchment paper
Preparing the Cookie Dough
First things first, let’s get our cookie dough ready. In a large mixing bowl, cream together the softened unsalted butter with the granulated sugar and the packed light brown sugar. You want to beat this mixture until it’s light and fluffy. This step is crucial for a tender cookie texture. Imagin extracte it like whipping air into your butter and sugar – the lighter it gets, the better. I like to use an electric mixer for this, but a sturdy whisk and some elbow grease will also do the trick.
Next, I add the two large eggs, one at a time, beating well after each addition. This ensures the eggs are fully incorporated and the mixture emulsifies properly. After the eggs, stir in the vanilla extract for that classic sweet aroma and flavor.
Now, it’s time for the dry ingredients. In a separate medium bowl, whisk together the all-purpose flour, baking soda, and salt. Whisking them beforehand helps distribute the leavening agent (baking soda) and salt evenly throughout the flour, preventing pockets of saltiness or a cookie that doesn’t rise evenly. Gradually add this dry mixture to the wet ingredients, mixing on low speed or by hand until just combined. Be careful not to overmix at this stage; overmixing can develop the gluten in the flour too much, resulting in tough cookies.
Dividing and Coloring the Dough
This is where the fun rgin extractly begins for our piping basketball cookies! Divide the cookie dough into three equal portions. One portion will remain its natural dough color, which will form the base of our basketball. The other two portions will be colored orange and black.
For the orange portion, take one-third of the dough and place it in a clean bowl. Add a generous amount of orange gel food coloring to it. Gel food coloring is key here because it’s concentrated and won’t add extra liquid to your dough, which could affect the texture. Knead the food coloring into the dough until you achieve a vibrant, uniform orange color, resembling the perfect basketball hue. It might take a minute or two of kneading to get it all blended in smoothly.
For the black portion, take another third of the dough and place it in a separate bowl. Add black gel food coloring to this portion and knead it until you achieve a deep, dark black. This will be used for the basketball’s signature lines. The remaining one-third of the dough will be left uncolored for the main body of the cookie.
Once colored, wrap each portion of dough separately in plastic wrap. Refrigerate the dough for at least 1 hour. This chilling process is essential for several reasons. It solidifies the butter, making the dough easier to handle and preventing excessive spreading during baking. It also allows the flavors to meld together, resulting in a more delicious cookie.
Shaping and Baking the Cookies
Preheat your oven to 350°F (175°C). Line baking sheets with parchment paper. This prevents sticking and makes for easy cleanup.
Take the uncolored dough and roll it into small balls, about 1 inch in diameter. These will be the base of your basketball cookies. Place these balls about 2 inches apart on the prepared baking sheets.
Now, for the basketball effect. Gently flatten each dough ball slightly. Then, using a small amount of the orange dough, roll it into a very thin, flattened rope. Carefully press this orange “rope” onto the top of each uncolored dough ball, creating a circular outline to mimic the outer edge of a basketball. You can use a knife to trim any excess orange dough if needed.
Next, prepare your black dough for the lines. You’ll want to roll this into even thinner ropes than the orange ones. Using these thin black ropes, create the characteristic lines of a basketball. This will involve forming two curved lines that intersect at the center, mimicking the seams of a real basketball. Take your time with this step, as precise placement will make your piping basketball cookies look more authentic. A toothpick can be helpful for gently pressing and guiding the black dough lines into place.
Bake for 10-12 minutes, or until the edges are lightly golden and the centers are set. The cookies should still be slightly soft in the middle when you take them out, as they will continue to firm up as they cool.
Cooling and Final Touches
Allow the cookies to cool on the baking sheets for about 5 minutes before transferring them to a wire rack to cool completely. This allows them to set up properly and prevents them from breaking.
Once the cookies are completely cool, it’s time for the final piping details. Fit your piping bags with small round tips. Fill one piping bag with a bit of the remaining orange dough (you may need to slightly warm it or add a tiny drop of milk to make it pipeable if it’s too stiff, but be very sparing). Use this to pipe a thin outer ring around the edge of each cookie, reinforcing the orange outline you created earlier.
In the other piping bag, place the black dough. You can pipe additional black lines if you feel they need to be more prominent or if some of your initial lines shifted during baking. This is also where you can add very fine details to enhance the realism of your piping basketball cookies. For instance, you could pipe tiny dots or very thin lines to suggest the textured surface of a basketball.
Let the piped decorations set for a few minutes before handling. These cookies are perfect for sports-themed parties or just for fun! Enjoy your delicious, homemade piping basketball cookies.
Conclusion:
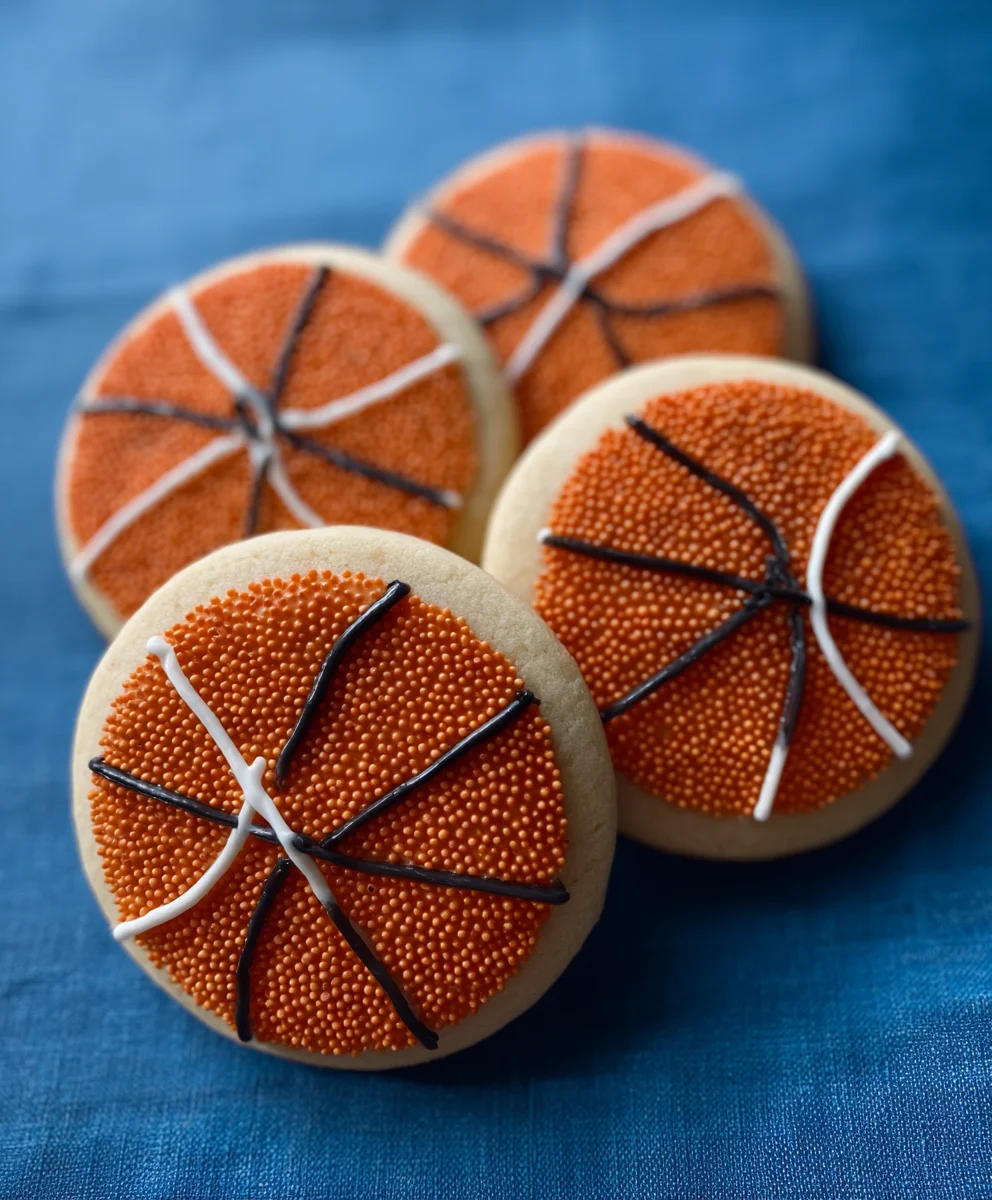
We hope you’ve enjoyed learning how to create these adorable and delicious piping basketball cookies! They are a fantastic treat for any sports enthusiast, birthday party, or just a fun afternoon baking project. The simple sugar cookie base paired with the iconic orange and black icing makes them a crowd-pleaser every time. Don’t be intimidated by the piping; with a little practice, you’ll be creating perfect basketballs in no time!
These piping basketball cookies are wonderful served alongside a glass of milk or as part of a dessert spread. They also make excellent edible gifts. Feel free to get creative with variations – you could try adding a hint of orange zest to the cookie dough for an extra citrus kick, or even use different shades of orange icing for a more dynamic look. The possibilities are endless!
So, gather your ingredients, preheat your oven, and let’s get baking! We encourage you to share your creations and enjoy the sweet satisfaction of making these unique piping basketball cookies.
Frequently Asked Questions:
Q: Can I use a different type of cookie dough?
A: Absolutely! While this recipe is designed for a sturdy sugar cookie that holds its shape well for decorating, you could experiment with other firm cookie doughs. Just ensure they are chilled sufficiently before rolling and cutting to prevent excessive spreading during baking.
Q: How do I store these piping basketball cookies?
A: Once completely cooled and the icing is dry, store your piping basketball cookies in an airtight container at room temperature. They should stay fresh and delicious for up to a week. For longer storage, you can freeze them in a single layer in a freezer-safe container for up to two months.
Easy Piping Basketball Cookies – Game Day Fun
Fun and easy-to-make basketball cookies perfect for game day or any sports-themed party. These cookies feature a classic cookie base decorated with piped orange and black dough to resemble basketballs.
Ingredients
-
1 cup (2 sticks) unsalted butter, softened
-
3/4 cup granulated sugar
-
3/4 cup packed light brown sugar
-
2 large eggs
-
1 teaspoon vanilla extract
-
3 cups all-purpose flour
-
1 teaspoon baking soda
-
1/2 teaspoon salt
-
Orange gel food coloring
-
Black gel food coloring
Instructions
-
Step 1
In a large mixing bowl, cream together softened unsalted butter with granulated sugar and packed light brown sugar until light and fluffy. Beat in eggs one at a time, then stir in vanilla extract. -
Step 2
In a separate bowl, whisk together all-purpose flour, baking soda, and salt. Gradually add dry ingredients to wet ingredients, mixing until just combined. Do not overmix. -
Step 3
Divide dough into three equal portions. Color one portion vibrant orange and another deep black using gel food coloring. Knead until uniform. Leave the third portion uncolored. Wrap each in plastic wrap and refrigerate for at least 1 hour. -
Step 4
Preheat oven to 350°F (175°C). Line baking sheets with parchment paper. Roll uncolored dough into 1-inch balls and place on baking sheets. Flatten slightly. Roll thin ropes of orange dough and press onto the top of each ball to create a circular outline. Roll thinner ropes of black dough and create intersecting curved lines to mimic basketball seams. -
Step 5
Bake for 10-12 minutes, or until edges are lightly golden and centers are set. Let cool on baking sheets for 5 minutes, then transfer to a wire rack to cool completely. -
Step 6
Once cool, fit piping bags with small round tips. Fill one bag with slightly warmed orange dough to pipe a thin outer ring. Fill the other bag with black dough to pipe additional lines or fine details for realism. Let piped decorations set before handling.
Important Information
Nutrition Facts (Per Serving)
It is important to consider this information as approximate and not to use it as definitive health advice.
Allergy Information
Please check ingredients for potential allergens and consult a health professional if in doubt.
Leave a Comment