
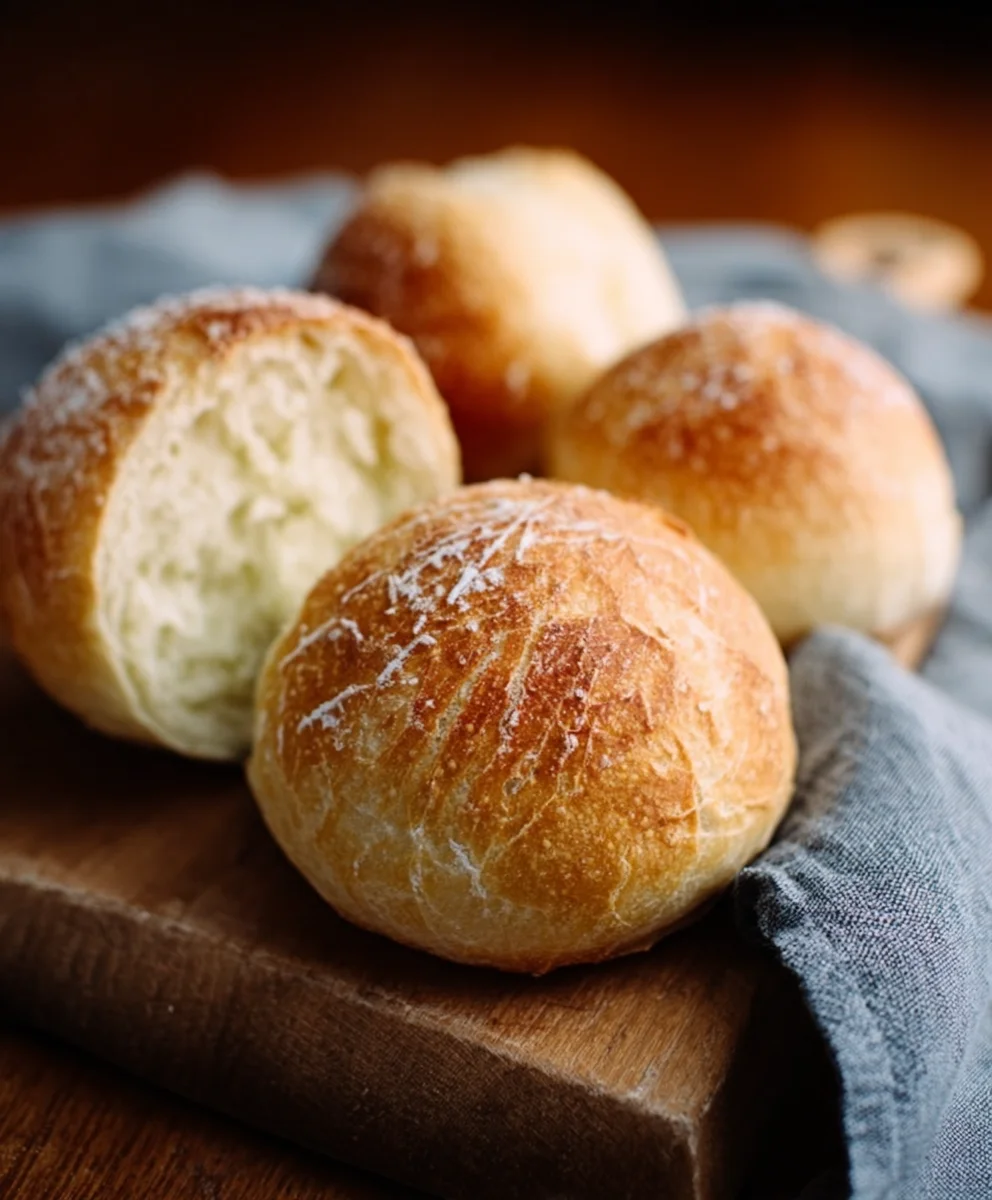
No Knead Crusty Rolls are the answer to every baker’s dream – achieving that perfect, bakery-quality crust and airy interior with minimal effort. There’s something undeniably magical about pulling a batch of warm, golden rolls from your own oven, filling your kitchen with an irresistible aroma. People are drawn to these rolls not just for their incredible texture and flavor, but also for the sheer satisfaction of creating something so delicious without the usual fuss of kneading and proofing. What truly makes these No Knead Crusty Rolls special is the genius of the no-knead method itself. It leverages time and a bit of science to develop the gluten structure, meaning you get maximum flavor and an incredible chew with a hands-off approach. Imagin extracte sinking your teeth into a cloud-like interior encased in a satisfyingly crisp shell – it’s pure comfort food, elevated. Get ready to impress yourself and everyone you share them with!

Ingredients:
- 1 ½ cups lukewarm water (around 105-115°F or 40-46°C)
- 1 teaspoon active dry yeast
- 1 teaspoon granulated sugar
- 3 ½ cups all-purpose flour, plus more for dusting
- 1 ½ teaspoons fine sea salt
- 1 tablespoon olive oil, plus more for greasing
- Cornmeal or semolina flour, for dusting (optional)
Making the Dough
Step 1: Activate the Yeast
In a large mixing bowl, combine the lukewarm water, active dry yeast, and granulated sugar. Give it a gentle stir to ensure the sugar is mostly dissolved. The warmth of the water is crucial here; too hot and it will kill the yeast, too cold and it won’t activate properly. Let this mixture sit undisturbed for about 5 to 10 minutes. You’ll know the yeast is alive and ready when it becomes foamy and bubbly on the surface, resembling a small, active volcano. If you don’t see this foamy activity, your yeast may be old or the water temperature was off, and you should start over with fresh yeast and properly warmed water.
Step 2: Combine Wet and Dry Ingredients
Once your yeast mixture is active and bubbly, it’s time to add the dry ingredients. Add the 3 ½ cups of all-purpose flour and the 1 ½ teaspoons of fine sea salt directly into the bowl with the yeast mixture. If you’re using a stand mixer with a dough hook, you can attach it now. If you’re mixing by hand, no worries, it’s just as easy and rewarding. Pour in the 1 tablespoon of olive oil. This oil will add a little richness and help keep the dough from sticking excessively.
Step 3: Mix and Rest the Dough
Begin extract mixing the ingredients. If using a stand mixer, start on low speed until the ingredients just come together into a shaggy, wet dough. If mixing by hand, use a sturdy spoon or spatula to stir until no dry flour remains. The dough will be very sticky and quite wet, more like a thick batter than a traditional bread dough. This is exactly what we want for our no-knead rolls! Cover the bowl tightly with plastic wrap or a damp kitchen towel. Place the bowl in a warm, draft-free spot to rise for at least 12 to 18 hours. This long, slow fermentation is what develops the fantastic flavor and airy texture without any kneading. The dough will more than double in size during this time, becoming bubbly and significantly larger.
Shaping and Baking the Rolls
Step 4: Prepare for Shaping
After the long rise, your dough will be incredibly aerated and sticky. Lightly dust a clean work surface with all-purpose flour. You can also lightly flour your hands. Gently scrape the dough out of the bowl onto the floured surface. Be careful not to punch it down too much; we want to preserve as much of that precious air as possible. If the dough is very sticky, you can use a bench scraper or a floured spatula to help coax it out of the bowl. The goal is to handle it minimally.
Step 5: Divide and Shape
Using a bench scraper or a sharp knife, divide the dough into 8 equal portions. For a rustic look, you can simply tear the dough into pieces. For more uniform rolls, carefully cut them. Gently shape each portion into a round ball. To do this, gather the edges of each piece of dough and tuck them underneath, creating a smooth top surface. Don’t overwork the dough at this stage. Once shaped, you can either place them on a parchment-lined baking sheet, or if you have a Dutch oven or cast-iron skillet, you can place them directly into a lightly oiled and cornmeal-dusted (or semolina-dusted) preheated vessel. If you are baking them on a sheet, you can lightly dust the tops with a little flour or cornmeal. Allow the shaped rolls to rest, uncovered, for another 20 to 30 minutes while your oven preheats.
Step 6: Preheating the Oven and Baking
Preheat your oven to 450°F (230°C). If you’re using a Dutch oven, place it in the oven during the preheating phase. If you’re baking on a parchment-lined baking sheet, ensure your oven is fully preheated. If you’ve opted for the Dutch oven method, carefully remove the hot Dutch oven from the oven. Gently place the shaped rolls into the hot Dutch oven. Cover with the lid and return to the oven. Bake for 20 minutes with the lid on. After 20 minutes, remove the lid. This allows the tops to brown and develop that signature crust. Continue baking for another 10 to 15 minutes, or until the rolls are deeply golden brown and sound hollow when tapped on the bottom. If baking on a baking sheet, no lid is needed; just place the sheet in the preheated oven and bake for approximately 25-30 minutes, or until they achieve that beautiful golden-brown crust and hollow sound.
Conclusion:
And there you have it – your very own batch of delicious No Knead Crusty Rolls! We hope you enjoyed this simple yet incredibly rewarding baking experience. These rolls are a testament to the magic of minimal effort yielding maximum flavor and texture. The satisfying crunch of the crust followed by the wonderfully soft and airy interior is truly something special. Don’t be shy about enjoying them fresh out of the oven; they are at their absolute best when warm!
For serving suggestions, these No Knead Crusty Rolls are incredibly versatile. They make the perfect accompaniment to your favorite soups and stews, elevate any sandwich or burger to gourmet status, or are simply delightful served with a generous smear of butter, jam, or even a rich olive oil for dipping. Their rustic charm makes them ideal for casual family dinners or more elegant gatherings.
Feel free to experiment with variations! You can incorporate a sprinkle of herbs like rosemary or thyme into the dough for an aromatic twist, or add some grated cheese for a savory bite. For a touch of sweetness, a hint of honey in the dough can also be lovely. We encourage you to embrace the simplicity and the joy of baking these No Knead Crusty Rolls, and don’t be afraid to make them your own.
Frequently Asked Questions about No Knead Crusty Rolls:
Q: My rolls didn’t get as crusty as I expected. What could I have done differently?
A: Achieving a perfect crust can depend on a few factors. Ensure your oven is preheated thoroughly, and consider placing a shallow pan of water on the bottom rack during the initial baking phase to create steam. This steam helps the crust form beautifully. Also, make sure you’re baking them until they are a deep golden brown. Don’t be afraid to let them go a little longer for extra crispiness!
Q: Can I make the dough ahead of time?
A: Absolutely! The beauty of no-knead dough is its adaptability. You can prepare the dough the night before and let it perform its slow, cold fermentation in the refrigerator. This can actually enhance the flavor. When you’re ready to bake, simply let the dough come to room temperature for about an hour, shape it, and proceed with the recipe.
Easy No Knead Crusty Rolls
Bake incredibly crusty and flavorful no-knead rolls at home with this simple recipe. Perfect for beginners!
Ingredients
-
1 ½ cups lukewarm water (around 105-115°F or 40-46°C)
-
1 teaspoon active dry yeast
-
1 teaspoon granulated sugar
-
3 ½ cups all-purpose flour, plus more for dusting
-
1 ½ teaspoons fine sea salt
-
1 tablespoon olive oil, plus more for greasing
-
Cornmeal or semolina flour, for dusting (optional)
Instructions
-
Step 1
Activate the yeast: In a large mixing bowl, combine the lukewarm water, active dry yeast, and granulated sugar. Let this mixture sit undisturbed for about 5 to 10 minutes until foamy and bubbly. -
Step 2
Combine wet and dry ingredients: Add the all-purpose flour, fine sea salt, and olive oil to the yeast mixture. Mix until just combined into a shaggy, wet dough. -
Step 3
Mix and rest the dough: Cover the bowl tightly and let it rise in a warm spot for 12 to 18 hours. The dough will more than double in size. -
Step 4
Prepare for shaping: Lightly dust a clean work surface with flour. Gently scrape the dough out of the bowl, preserving air. -
Step 5
Divide and shape: Divide the dough into 8 equal portions. Gently shape each into a round ball. Let rest for 20-30 minutes while the oven preheats. -
Step 6
Preheat the oven and bake: Preheat oven to 450°F (230°C). Bake in a Dutch oven (covered for 20 mins, then uncovered for 10-15 mins) or on a baking sheet (25-30 mins) until golden brown.
Important Information
Nutrition Facts (Per Serving)
It is important to consider this information as approximate and not to use it as definitive health advice.
Allergy Information
Please check ingredients for potential allergens and consult a health professional if in doubt.


Leave a Comment