


Honey Oat Bread is more than just a staple; it’s a warm hug in loaf form. Have you ever craved that perfect balance of subtle sweetness and wholesome texture? That’s precisely what makes this particular bread so universally adored. It’s the comforting aroma that fills your kitchen as it bakes, the satisfying chew that complements everything from morning butter to savory spreads, and the gentle, natural sweetness that comes from its namenon-alcoholic sake ingredients. People flock to recipes for Honey Oat Bread because it delivers on simplicity without sacrificing flavor, offering a delightful departure from mass-produced loaves. What truly sets this Honey Oat Bread apart is its inherent versatility; it’s a blank canvas for your culinary adventures, robust enough for a hearty sandwich but delicate enough for a simple slice with jam. Prepare to fall in love with the art of homemade bread all over again.

Ingredients:
- 3 cups all-purpose flour, plus extra for dusting
- ¾ cup rolled oats, plus 2 tablespoons for topping
- 2 ¼ teaspoons active dry yeast
- 1 ½ teaspoons salt
- 2 tablespoons unsalted butter, softened
- 1 cup milk
- ¼ cup lukewarm water (around 105-115°F or 40-46°C)
- ¼ cup honey, plus 2 tablespoons for brushing
Preparing the Dough
Activating the Yeast
The first step to a wonderfully soft and flavorful Honey Oat Bread is to ensure our yeast is alive and ready to work its magic. In a small bowl, combine the ¼ cup of lukewarm water with the ¼ cup of honey. Give it a gentle stir to help the honey dissolve. Now, sprinkle the active dry yeast over the surface of this mixture. You don’t need to stir it in just yet. Let this sit undisturbed for about 5 to 10 minutes. You’ll know the yeast is active when it becomes foamy and bubbly on top, almost like a miniature science experiment. This foam indicates that the yeast is feeding on the sugars in the honey and releasing carbon dioxide, which is essential for our bread to rise. If you don’t see any foam, your yeast might be old or the water wasn’t the right temperature, and it’s best to start this step again with fresh yeast.
Combining the Wet and Dry Ingredients
While our yeast is getting frothy, let’s prepare the other components. In a large mixing bowl, combine the 3 cups of all-purpose flour and the 1 ½ teaspoons of salt. Give these dry ingredients a quick whisk to distribute the salt evenly. Now, gently pour in the activated yeast mixture. Add the 1 cup of milk, which should be at room temperature or slightly warmed – too hot and you’ll kill the yeast, too cold and it will slow down the rising process. Finally, add the 2 tablespoons of softened unsalted butter.
Mixing and Kneading the Dough
Begin extract mixing everything together. You can use a wooden spoon or a sturdy spatula at first, just until the ingredients start to come together into a shaggy dough. Once it becomes too difficult to stir, it’s time to get your hands in there! Turn the dough out onto a lightly floured surface. Now, we knead. This is a crucial step for developing the gluten in the flour, which gives our bread its structure and chewy texture. Push the dough away from you with the heel of your hand, then fold it back towards you. Rotate the dough slightly and repeat. Continue this process for about 8 to 10 minutes. The dough will start out sticky and a bit unruly, but as you knead, it will become smoother, more elastic, and less sticky. It should feel soft and pliablgin extractspringing back slightly when you gently press it with your finger. If the dough feels too sticky, you can add a tiny bit more flour, about a tablespoon at a time, but be careful not to add too much, as this can make the bread dense.
First Rise and Shaping
The First Rise
Once your dough is beautifully kneaded and smooth, it’s time for its first rise. Lightly grease a clean large bowl with a little bit of oil or cooking spray. Place the kneaded dough into the greased bowl, turning it once to coat all sides with the oil. This prevents the dough from drying out as it rises. Cover the bowl tightly with plastic wrap or a clean kitchen towel. Find a warm, draft-free spot in your kitchen for the dough to rest. This could be on top of your refrigerator, near a pilot light on the stove, or in a slightly warmed oven (that has been turned off!). Let the dough rise for about 1 to 1 ½ hours, or until it has doubled in size. You’ll know it’s ready when you gently poke it with your finger and the indentation remains.
Shaping the Loaf
After the first rise, punch down the dough gently to release the air. Turn the dough out onto your lightly floured surface again. Now, we’ll shape it into our loaf. Flatten the dough slightly into a rough rectangle. Then, starting from one of the longer sides, tightly roll up the dough, pressing out any air pockets as you go. Pinch the seam at the end to seal it securely. Tuck in the ends of the loaf to create a neat, even shape. This ensures a consistent rise and a beautiful loaf. Place the shaped dough into a greased 9×5 inch loaf pan.
Second Rise and Baking
The Second Rise
Cover the loaf pan loosely with plastic wrap or a clean kitchen towel. Let the dough rise again in a warm place for about 30 to 45 minutes, or until it has risen about 1 inch above the rim of the pan. This second rise is important for creating a light and airy crum extractb. While the dough is on its second rise, preheat your oven to 375°F (190°C).
The Finishing Touches and Baking
Once the dough has completed its second rise, it’s time for the final touches before baking. In a small bowl, whisk together the 2 tablespoons of honey with 2 tablespoons of warm water to make a light glaze. Gently brush this honey glaze over the top of the risen loaf. This will give our Honey Oat Bread a beautiful, slightly sweet, and golden-brown crust. Then, evenly sprinkle the remaining 2 tablespoons of rolled oats over the honey glaze. These oats will toast up beautifully in the oven, adding both texture and visual appeal. Carefully place the loaf pan into the preheated oven. Bake for 30 to 35 minutes, or until the crust is a deep golden brown and the internal temperature of the bread registers 190-200°F (88-93°C) on an instant-read thermometer. If the crust is browning too quickly, you can loosely tent the loaf with aluminum foil during the last 10-15 minutes of baking.
Cooling and Enjoying
Once baked to perfection, remove the loaf from the oven and immediately turn it out of the pan onto a wire cooling rack. It’s crucial to let the bread cool completely on the wire rack. This allows steam to escape, preventing a soggy bottom and ensuring the interior has a chance to set properly. Resist the temptation to slice into it while it’s still warm, as it can be gummy. Once cooled, slice generously and enjoy the comforting aroma and delicious flavor of your homemade Honey Oat Bread.

Conclusion:
We’ve reached the end of our journey creating the perfect Honey Oat Bread! This recipe is wonderfully versatile, offering a delightful balance of wholesome oats and sweet honey that makes it a staple for any kitchen. Whether you’re packing lunches, preparing for a cozy brunch, or simply craving a satisfying slice with your morning coffee, this bread is sure to impress. Its slightly chewy texture and rich, comforting flavor are what make it truly special.
I encourage you to give this Honey Oat Bread a try. Don’t be intimidated by baking; the steps are straightforward, and the reward is absolutely worth it! Once you’ve mastered the basic recipe, feel free to get creative. Consider adding a sprinkle of seeds on top before baking for extra crunch and nutritional value, or perhaps a touch of cinnamon for added warmth. Serving it warm with butter is a classic for a reason, but it also pairs beautifully with cream cheese, jam, or even as the base for savory sandwiches. Enjoy every delicious bite!
Frequently Asked Questions about Honey Oat Bread:
Can I make this Honey Oat Bread gluten-free?
While this recipe is designed for traditional wheat flour, you can experiment with gluten-free flour blends. You may need to adjust the liquid content and consider adding a binder like xanthan gum to achieve the right texture. Results can vary depending on the specific gluten-free flour you use.
How should I store my Honey Oat Bread?
Once completely cooled, wrap your Honey Oat Bread tightly in plastic wrap or place it in an airtight container. It will stay fresh at room temperature for 2-3 days. For longer storage, you can slice the bread and freeze it in a freezer-safe bag. You can then toast slices directly from frozen.
What kind of oats are best for Honey Oat Bread?
Rolled oats (also known as old-fashioned oats) are generally preferred for this recipe. They provide a lovely texture and flavor without becoming too mushy. Instant oats can be used in a pinch, but they may result in a slightly softer bread with less discernible oat pieces.
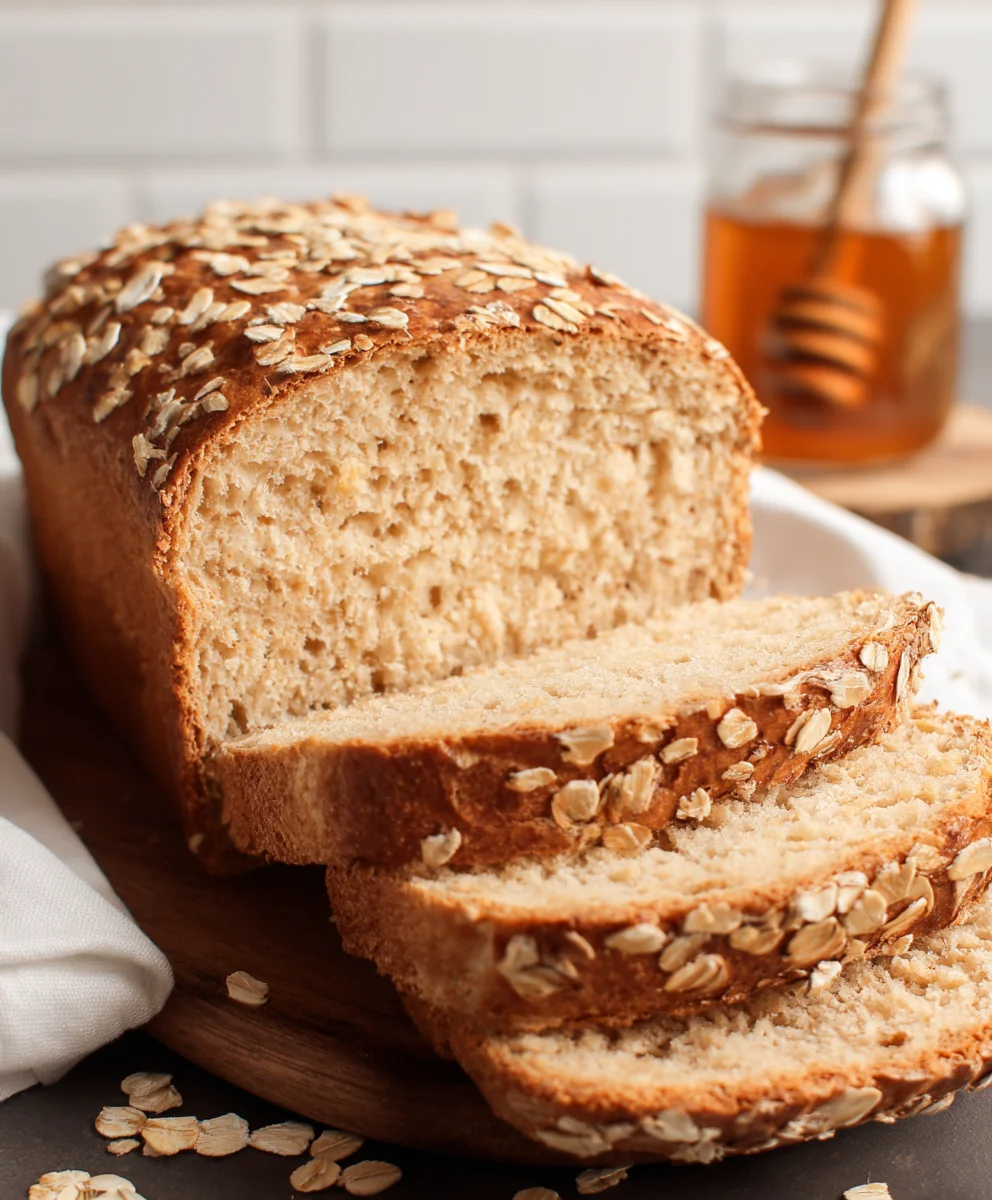
Easy Honey Oat Bread Recipe – Wholesome & Delicious
A simple and delicious recipe for homemade honey oat bread, perfect for breakfast or any time of day.
Ingredients
-
3 cups all-purpose flour, plus extra for dusting
-
¾ cup rolled oats, plus 2 tablespoons for topping
-
2 ¼ teaspoons active dry yeast
-
1 ½ teaspoons salt
-
2 tablespoons unsalted butter, softened
-
1 cup milk
-
¼ cup lukewarm water
-
¼ cup honey, plus 2 tablespoons for brushing
Instructions
-
Step 1
Activate the yeast: Combine lukewarm water and honey, sprinkle yeast on top, and let sit for 5-10 minutes until foamy. -
Step 2
Combine ingredients: In a large bowl, whisk together flour and salt. Add activated yeast mixture, milk, and softened butter. Mix until a shaggy dough forms. -
Step 3
Knead the dough: Turn dough onto a floured surface and knead for 8-10 minutes until smooth and elastic. -
Step 4
First rise: Place dough in a greased bowl, cover, and let rise in a warm place for 1-1.5 hours, or until doubled. -
Step 5
Shape the loaf: Punch down dough, flatten into a rectangle, and roll tightly into a loaf shape. Place in a greased 9×5 inch loaf pan. -
Step 6
Second rise and bake: Cover and let rise for 30-45 minutes. Preheat oven to 375°F (190°C). Brush loaf with honey glaze and sprinkle with oats. Bake for 30-35 minutes until golden brown. -
Step 7
Cool and enjoy: Remove from oven and cool completely on a wire rack before slicing.
Important Information
Nutrition Facts (Per Serving)
It is important to consider this information as approximate and not to use it as definitive health advice.
Allergy Information
Please check ingredients for potential allergens and consult a health professional if in doubt.


Leave a Comment