
Christmas Fudge isn’t just a treat; it’s a tiny, edible hug from the holidays themselves. Imagin extracte this: the cozy scent of cinnamon and chocolate filling your kitchen, carols playing softly in the background, and then, the moment of pure bliss as you bite into a rich, decadent square of this magical confection. What is it about Christmas Fudge that captures our hearts and taste buds year after year? It’s that perfect balance of sweetness and richness, often infused with festive flavors like peppgin extractint, ginger, or even a hint of orange zest, that makes it utterly irresistible. It’s the ultimate symbol of holiday indulgence, a delicious reminder to slow down, savor the season, and share something truly special with loved ones. This year, let’s elevate your holiday baking with a recipe that’s as delightful to make as it is to devour.

Ingredients:
- 3 cups white chocolate chips
- 1 (14-ounce) can sweetened condensed milk
- 1/2 teaspoon vanilla extract
- Red food coloring
- Green food coloring
- 1/4 cup holiday sprinkles (optional for decoration)
Making Festive Christmas Fudge
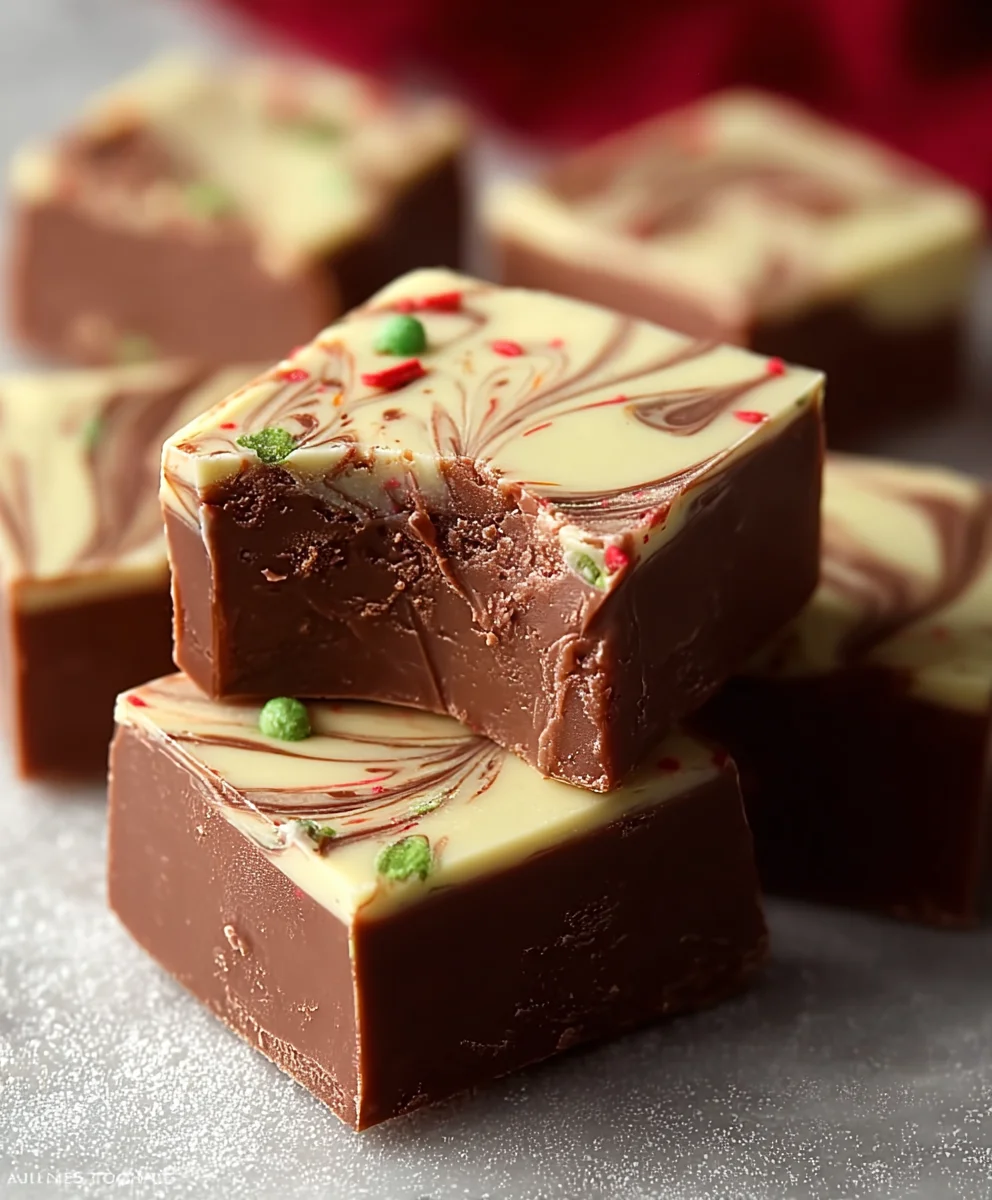
This Christmas Fudge recipe is incredibly simple, making it a perfect activity for families or a quick treat to whip up when holiday guests arrive unexpectedly. The beauty of this fudge lies in its adaptability; you can easily customize the colors to match your holiday theme or even add other festive flavors. We’re going to create a delightful swirl of red and green, reminiscent of candy canes or holly berries, for a truly festive appearance.
Preparing Your Workspace and Equipment
Before we begin extract mixing, it’s essential to have everything ready. Line an 8×8 inch baking pan with parchment paper, leaving some overhang on the sides. This will make it much easier to lift the fudge out once it has set. Ensure your spatulas and bowls are clean and dry. White chocolate can be a bit finicky, so minimizing any moisture introduced during the process is key to achieving a smooth, creamy texture. Have your measuring cups and spoons readily accessible.
Melting the White Chocolate Base
The foundation of our Christmas Fudge is smooth, melted white chocolate. I prefer to use a double boiler method for this to ensure gentle, even heating and prevent scorching. To do this, fill a saucepan with about an inch of water and bring it to a simmer over medium heat. Place a heatproof bowl (glass or stainless steel) over the saucepan, making sure the bottom of the bowl doesn’t touch the water. Add the 3 cups of white chocolate chips to the bowl. Stir constantly with a heat-resistant spatula until the white chocolate is completely melted and smooth. If you don’t have a double boiler, you can melt the chocolate in the microwave in short, 30-second intervals, stirring well between each interval until mostly melted, then stir until fully smooth from residual heat. Be very careful not to overheat white chocolate, as it can seize and become grainy.
Incorporating Sweetened Condensed Milk and Vanilla
Once your white chocolate is beautifully melted and smooth, it’s time to add the magic ingredient: the sweetened condensed milk. Slowly pour the entire 14-ounce can of sweetened condensed milk into the melted white chocolate. Continue to stir gently but thoroughly until the mixture is completely combined and has a glossy, uniform appearance. At this stage, I like to add the 1/2 teaspoon of vanilla extract. Vanilla enhances the sweetness and adds a lovely depth of flavor that complements the creamy white chocolate perfectly. Keep stirring until the vanilla is fully incorporated. The mixture will thicken slightly as you stir, becoming quite rich and luxurious.
Dividing and Coloring the Fudge
Now for the fun part – dividing and coloring! Carefully divide the fudge mixture into two equal portions. You can eyeball this or use a kitchen scnon-alcoholic ale for absolute precision. In one bowl, add a few drops of red food coloring. Stir gently until you achieve your desired shade of festive red. Remember that food coloring deepens slightly as it sits, so start with a smaller amount and add more if needed. In the second bowl, add a few drops of green food coloring. Stir until you have a vibrant green hue. Again, it’s always better to add color gradually to control the intensity. This coloring step is what transforms our simple white chocolate fudge into a true Christmas delight.
Swirling and Decorating Your Christmas Fudge
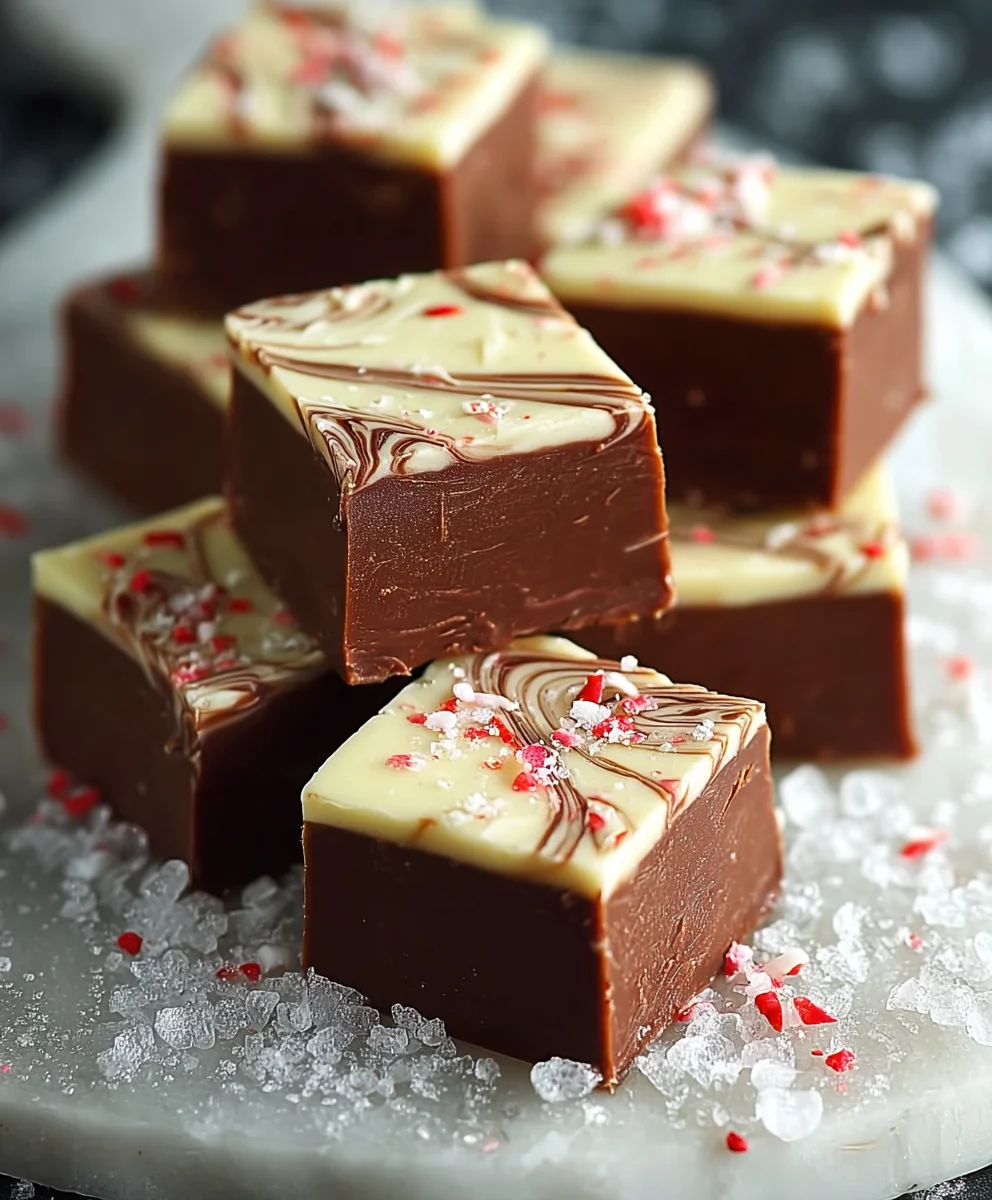
With your red and green fudge mixtures ready, it’s time to create a beautiful marbled effect. Spoon dollops of both the red and green fudge mixtures into your prepared 8×8 inch pan, alternating colors. Don’t worry about making it perfect at this stage; the randomness of the dollops will contribute to the marbled look. Once all the fudge is in the pan, use a spatula or a knife to gently swirl the colors together. Be careful not to overmix, as this can muddy the colors. Aim for distinct swirls and patterns. If you’re using them, sprinkle the 1/4 cup of holiday sprinkles evenly over the top of the swirled fudge. Gently press the sprinkles into the fudge so they adhere. This optional step adds a wonderful festive crunch and visual appeal.
Chilling and Cutting the Christmas Fudge
Once your Christmas Fudge is swirled and sprinkled to perfection, it’s time to let it set. Carefully place the pan in the refrigerator and let it chill for at least 2-3 hours, or until it is firm to the touch. This chilling time is crucial for the fudge to solidify properly, allowing for clean cuts. After the fudge has completely set, use the parchment paper overhang to lift the entire slab out of the pan onto a clean cutting board. Using a sharp knife, cut the fudge into small, bite-sized squares. For the cleanest cuts, you might find it helpful to wipe your knife clean between cuts. Store the finished Christmas Fudge in an airtight container at room temperature or in the refrigerator for up to a week. Enjoy sharing this festive homemade treat!
Conclusion:
I hope you enjoyed learning how to make this delightful Christmas Fudge! This recipe is a fantastic way to bring some festive cheer to your kitchen and create delicious treats to share with loved ones. The rich, creamy texture combined with the festive flavors makes this fudge a guaranteed crowd-pleaser. Whether you’re a seasoned baker or just starting out, this Christmas Fudge is surprisingly easy to whip up, making it the perfect edible gift or holiday party contribution.
For serving suggestions, consider cutting the fudge into small, bite-sized squares and arrangin extractg them on a festive platter. It also pairs wonderfully with a warm mug of hot chocolate or a cup of spiced apple cider. Don’t be afraid to get creative with variations! You can add a pinch of cinnamon or nutmeg for extra warmth, or swirl in some melted white chocolate for a marbled effect. Chopped nuts like pecans or walnuts are also a delicious addition, adding a lovely crunch. The possibilities are endless, and the joy of making and sharing this Christmas Fudge is truly the best part of the holiday season. So go ahead, gather your ingredients, and let the festive bgin extractng begin!
Frequently Asked Questions about Christmas Fudge:
Q1: How long does Christmas Fudge typically last?
Properly stored in an airtight container at room temperature, Christmas Fudge can last for up to 2 weeks. It’s best to keep it away from direct sunlight and heat to prevent it from becoming too soft or melting.
Q2: Can I freeze Christmas Fudge?
Yes, you absolutely can freeze Christmas Fudge! Wrap individual pieces or a block of fudge tightly in plastic wrap, then place it in a freezer-safe bag or container. It can be stored in the freezer for up to 3 months. To thaw, simply bring it back to room temperature slowly.
Q3: My Christmas Fudge is too hard. What went wrong?
If your Christmas Fudge turned out too hard, it’s likely that the sugar syrup was cooked to too high a temperature. This can happen if the mixture boils for too long or at too high a heat. Next time, try to be more precise with your temperature measurements and stirring, and avoid over-boiling.
Easy Christmas Fudge Recipe
A delicious and easy-to-make Christmas fudge recipe with a festive red and green swirl, perfect for the holidays.
Ingredients
-
3 cups white chocolate chips
-
1 (14-ounce) can sweetened condensed milk
-
1/2 teaspoon vanilla extract
-
Red food coloring
-
Green food coloring
-
1/4 cup holiday sprinkles (optional)
Instructions
-
Step 1
Prepare an 8×8 inch baking pan by lining it with parchment paper, leaving overhang on the sides. -
Step 2
Melt the white chocolate chips using a double boiler or microwave until smooth. Be careful not to overheat. -
Step 3
Stir in the sweetened condensed milk and vanilla extract until fully combined and glossy. -
Step 4
Divide the fudge mixture into two equal portions. Color one portion red and the other green. -
Step 5
Spoon dollops of red and green fudge into the prepared pan, then gently swirl the colors together. Sprinkle with holiday sprinkles if desired. -
Step 6
Chill in the refrigerator for at least 2-3 hours until firm. Lift the fudge out using the parchment paper, cut into squares, and store in an airtight container.
Important Information
Nutrition Facts (Per Serving)
It is important to consider this information as approximate and not to use it as definitive health advice.
Allergy Information
Please check ingredients for potential allergens and consult a health professional if in doubt.

Leave a Comment