
Chia seed pudding is one of those magical dishes that feels like a decadent treat but is secretly packed with goodness. If you’re looking for a breakfast that’s both nourishing and ridiculously easy to prepare, you’ve come to the right place. We absolutely adore chia seed pudding for its incredible versatility and satisfying texture, which transforms humble chia seeds into a creamy, pudding-like delight. What makes this chia seed pudding recipe so special is its ability to be a blank canvas for your favorite flavors. Imagin extracte waking up to a bowl of cool, luscious pudding, perhaps swirled with fresh berries, a drizzle of honey, or a sprinkle of crunchy granola. It’s the perfect grab-and-go breakfast or a healthy dessert that will leave you feeling energized and utterly content. Get ready to discover your new favorite healthy indulgence!

Ingredients:
How to Make Delicious Chia Seed Pudding
Chia seed pudding is one of those magical recipes that requires almost no effort but delivers a wonderfully satisfying and healthy treat. It’s incredibly versatile, making it perfect for a quick breakfast, a satisfying snack, or even a light dessert. The beauty of chia pudding lies in its simplicity and the fact that it’s a nutritional powerhouse. Chia seeds are packed with fiber, omega-3 fatty acids, and antioxidants, making this pudding a guilt-free indulgence. The gel-like consistency they form when soaked creates a delightful texture that’s both creamy and slightly chewy.
The beauty of this recipe is its adaptability. Don’t have maple syrup? No problem! Honey, agave nectar, or even a pinch of stevia will work just as well. The type of milk you choose will also subtly influence the flavor and richness. For a more decadent pudding, full-fat coconut milk is a fantastic option, while almond or oat milk offers a lighter, more neutral base. Experimenting with different milks is part of the fun!
The Simple Alchemy of Chia Pudding
The magic of chia pudding happens through a process called hydration. Chia seeds are hydrophilic, meaning they absorb liquid and swell significantly, forming a gel. This natural thickening process eliminates the need for any cooking or elaborate preparations. All you need is a bowl or a jar, a whisk or a spoon, and a little bit of patience for the seeds to do their work.
Step-by-Step Chia Seed Pudding Perfection
Here’s how to whip up your batch of delightful chia seed pudding:
1. Combine Your Core Ingredients: In a small bowl or a Mason jar, add the 3 tablespoons of chia seeds. This is the foundation of your pudding. Next, pour in the 3/4 cup of your chosen milk. At this stage, you can also add your sweetener. I’ve suggested 1 tablespoon of maple syrup, but feel free to adjust this to your sweetness preference. Remember, you can always add more sweetener later if needed, but you can’t take it away! Finally, add the 1 teaspoon of vanilla extract. Vanilla adds a warm, comforting aroma and flavor that complements the subtle nuttiness of the chia seeds beautifully.
2. Whisk It Up Thoroughly: This is a crucial step to prevent clumping. Using a whisk or a fork, stir the mixture vigorously for about 30 seconds to a minute. You want to ensure that all the chia seeds are well dispersed in the liquid and are not sticking together at the bottom of the bowl or jar. If you see any clumps forming, keep whisking until they break apart. This initial whisking will kickstart the gelling process evenly.
3. The Initial Rest and Second Whisk: Let the mixture sit undisturbed for about 5 to 10 minutes. During this time, you’ll notice the liquid starting to thicken slightly. After this initial rest, give the pudding another good whisk. This second whisk is vital for preventing any remaining clumps from forming as the seeds continue to absorb the liquid. You’ll see the mixture becoming noticeably thicker and more viscous. Make sure to scrape the sides and bottom of your container to ensure everything is incorporated.
4. The Waiting Game – Let it Chill and Thicken: Once you’ve given it a good second whisk, cover your bowl or jar. You can use plastic wrap, a lid, or even a small plate. Place the chia pudding in the refrigerator to chill and thicken. The minimum chilling time is about 2 hours, but for the best texture, I highly recommend letting it sit overnight. The longer it chills, the thicker and creamier it will become, achieving that perfect pudding-like consistency. Overnight chilling allows the chia seeds to fully absorb the liquid and form a cohesive, delightful pudding.
5. Check for Consistency and Serve: After the recommended chilling time, take your chia pudding out of the refrigerator. It should now be thick and spoonable. If you find it’s too thick for your liking, you can stir in a tablespoon or two of extra milk until it reaches your desired consistency. If, by chance, it’s not thick enough (which is rare if you’ve used the correct ratio of seeds to liquid), you can add another teaspoon of chia seeds and let it chill for another hour.
Customizing Your Chia Seed Pudding
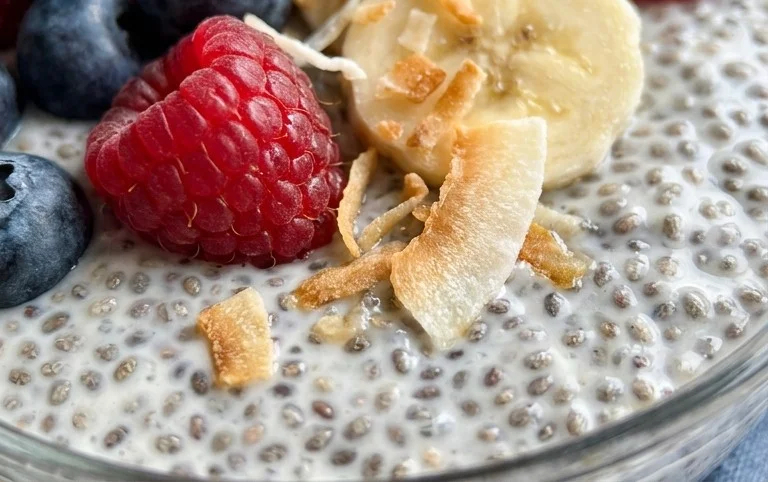
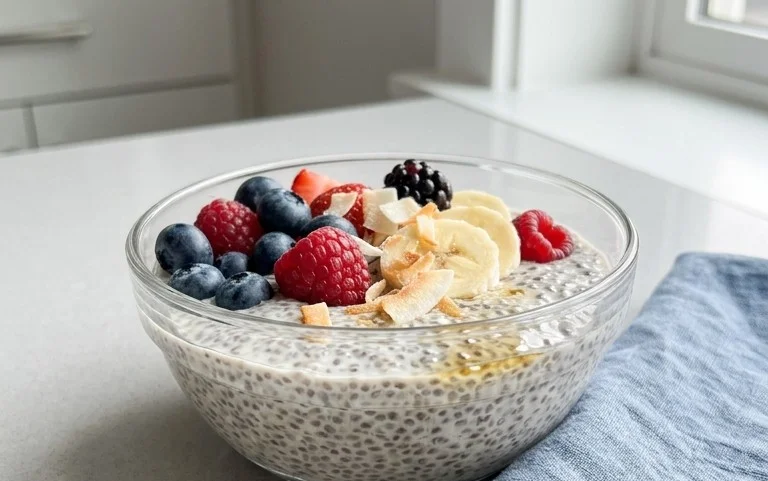
Once your base pudding is ready, the possibilities for toppings and mix-ins are endless. Fresh berries like raspberries, blueberries, or sliced strawberries are a classic choice, adding a burst of freshness and natural sweetness. A sprinkle of granola provides a satisfying crunch. Sliced banana, a dollop of Greek yogurt, a drizzle of nut butter, or even a sprinkle of shredded coconut can elevate your pudding to a whole new level. For a more indulgent treat, consider a dusting of cocoa powder for a chocolatey twist, or a few chocolate chips. You can also blend in some fruit before chilling for a flavored pudding base. Enjoy experimenting and creating your perfect bowl!
Conclusion:
And there you have it – your super simple guide to crafting the most delicious and versatile chia seed pudding recipe! This recipe truly shines because of its incredible ease, minimal prep time, and fantastic nutritional punch. It’s a perfect make-ahead breakfast, a satisfying snack, or even a light dessert that you can feel good about indulgin extractg in. Don’t be afraid to get creative with your toppings! Fresh berries, sliced banana, a sprinkle of granola for crunch, a drizzle of honey or maple syrup, or even some toasted nuts can elevate your chia pudding experience to a whole new level. You can also experiment with different liquids like almond milk, coconut milk, or even oat milk for subtle flavor variations. I truly encourage you to give this recipe a try. It’s a fantastic way to incorporate more fiber and omega-3 fatty acids into your diet without sacrificing flavor or enjoyment. Get ready to discover your new go-to healthy treat!
Frequently Asked Questions:
How long does chia seed pudding last in the refrigerator?
Your delicious chia seed pudding should stay fresh and enjoyable in an airtight container in the refrigerator for up to 3-4 days. The chia seeds will continue to absorb liquid and thicken over time, so the texture might become even more gel-like, which many people prefer!
Can I make this recipe without a sweetener?
Absolutely! While the recipe suggests a touch of sweetener for balanced flavor, you can omit it entirely if you prefer. The natural sweetness from fruits or other toppings can often be enough. Taste your base mixture before adding any sweetener and adjust according to your preference.
What’s the best liquid to use for chia seed pudding?
While dairy milk can be used, non-dairy alternatives like almond milk, coconut milk (from a carton for a lighter consistency, or canned for a richer texture), and oat milk are very popular and work beautifully. They contribute their own subtle flavors that complement the chia seeds wonderfully.
Chia Seed Pudding Recipe
A simple and healthy chia seed pudding recipe, customizable with your favorite milk and sweetener. Perfect for a quick breakfast or dessert.
Ingredients
-
3 tablespoons chia seeds
-
1 tablespoon maple syrup
-
1 teaspoon vanilla
-
3/4 cup milk of choice
-
Pinch of salt
Instructions
-
Step 1
In a bowl or jar, combine the chia seeds, maple syrup, vanilla extract, and milk of choice. Add a pinch of salt. -
Step 2
Whisk or stir the ingredients together thoroughly to ensure the chia seeds are evenly distributed and not clumped. -
Step 3
Let the mixture sit for about 5-10 minutes, then stir again. This helps to prevent clumping as the chia seeds begin to gel. -
Step 4
Cover the bowl or jar and refrigerate for at least 2-4 hours, or preferably overnight, until the pudding has thickened to your desired consistency. -
Step 5
Stir the pudding once more before serving. Top with fresh fruit, nuts, or granola if desired.
Important Information
Nutrition Facts (Per Serving)
It is important to consider this information as approximate and not to use it as definitive health advice.
Allergy Information
Please check ingredients for potential allergens and consult a health professional if in doubt.
Leave a Comment