


Bunny Rabbit Cake is more than just a dessert; it’s a fluffy, frosted icon of springtime joy and birthday magic! Who can resist the charm of a sweet, edible bunny, its ears perked and its nose ready for a nibble? This beloved treat has a way of bringin extractg smiles to faces of all ages, transforming any gathering into a whimsical celebration. Whether you’re baking for Easter, a child’s birthday, or simply want to add a touch of adorable to your table, our Bunny Rabbit Cake recipe is sure to be a hit. We love this cake because it’s incredibly versatile – you can customize its decorations to fit any theme or occasion. What truly makes this Bunny Rabbit Cake special is the sheer delight it evokes. It’s a project that’s as fun to make as it is to devour, a testament to the simple pleasures of homemade baking and a guaranteed way to create lasting memories.

Bunny Rabbit Cake
Welcome, fellow baking enthusiasts! Today, we’re embarking on a delightful journey to create a whimsical and utterly charming Bunny Rabbit Cake. This isn’t just any cake; it’s a centerpiece for Easter celebrations, a birthday surprise, or simply a way to bring a smile to anyone’s face. The magic of this cake lies in its simple, yet effective, design, transforming a basic cake into an adorable bunny. We’ll be using everyday ingredients and straightforward techniques, so don’t be intimidated! Let’s get started and bake up some bunny magic.
Ingredients:
Baking the Cake Layers
Our bunny will be constructed from two simple cake rounds. First, preheat your oven to 350 degrees Fahrenheit (175 degrees Celsius). Grease and flour two 8-inch round cake pans. This is a crucial step to prevent our beautiful cakes from sticking. You can also line the bottoms with parchment paper for extra insurance. In a large mixing bowl, whisk together the all-purpose flour, granulated sugar, baking powder, and salt. This dry ingredient mixture forms the foundation of our tender cake. Add the softened unsalted butter to this dry mixture. Using a mixer on low speed, or with a pastry blender, cut the butter into the dry ingredients until the mixture resembles coarse crum extractbs. This technique helps to distribute the fat evenly, leading to a lighter cake texture.
In a separate bowl, whisk together the milk, eggs, and vanilla extract. This is our liquid ingredient blend. Gradually add the wet ingredients to the dry ingredients, mixing on medium speed until just combined. Be careful not to overmix the batter. Overmixing can develop the gluten in the flour too much, resulting in a tough cake. Scrape down the sides of the bowl as needed to ensure everything is incorporated.
Divide the batter evenly between the two prepared cake pans. Gently tap the pans on the counter a couple of times to release any large air bubbles. Bake for 25-30 minutes, or until a wooden skewer or toothpick inserted into the center comes out clean. The aroma that fills your kitchen will be heavenly! Once baked, let the cakes cool in their pans for about 10 minutes before inverting them onto a wire rack to cool completely. It’s very important that the cakes are completely cool before you attempt to frost them; otherwise, the frosting will melt into a runny mess.
Crafting the Bunny Shape
Now for the fun part – transforming our baked rounds into a bunny! Once your cakes are completely cool, it’s time to assemble our adorable friend. You’ll need one of the cake rounds to serve as the main body of the bunny. The other cake round will be used to create the ears. Take your sharpest knife and cut a semi-circle from the top edge of the second cake round. This semi-circle will become the base of one ear. Then, from the remaining portion of that same cake, cut two elongated oval shapes. These will be the ears themselves. Don’t worry if they aren’t perfectly symmetrical; bunnies have character!
Whipping Up the Frosting
While our cakes are cooling or after you’ve shaped them, let’s make our simple yet delicious vanilla buttercream. In a medium bowl, beat the softened unsalted butter until it’s light and fluffy. Gradually add the powdered sugar, alternating with the ¼ cup of milk, beating well after each addition. Add the ½ teaspoon of vanilla extract and continue beating until the frosting is smooth and spreadable. If the frosting is too thick, add a tiny bit more milk, a teaspoon at a time. If it’s too thin, add more powdered sugar, a tablespoon at a time. You want a consistency that’s easy to spread but firm enough to hold its shape.
Assembling and Decorating Your Bunny
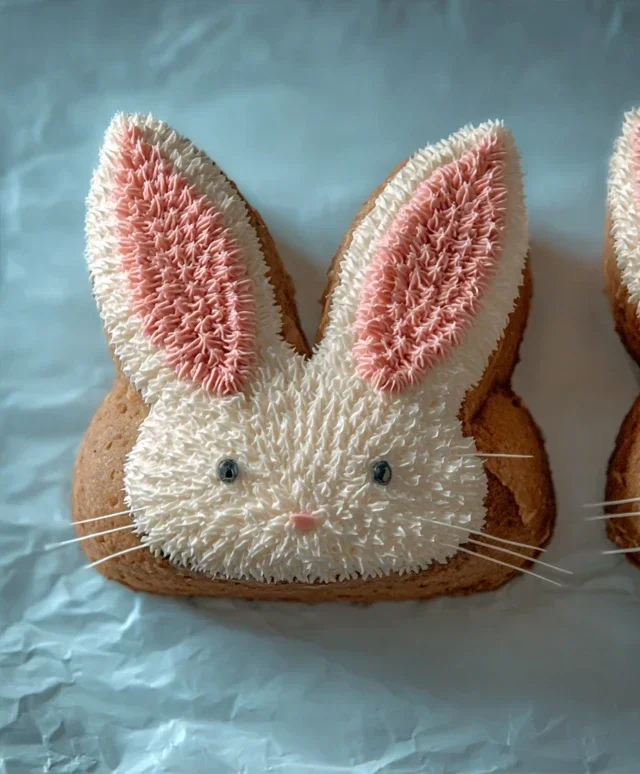
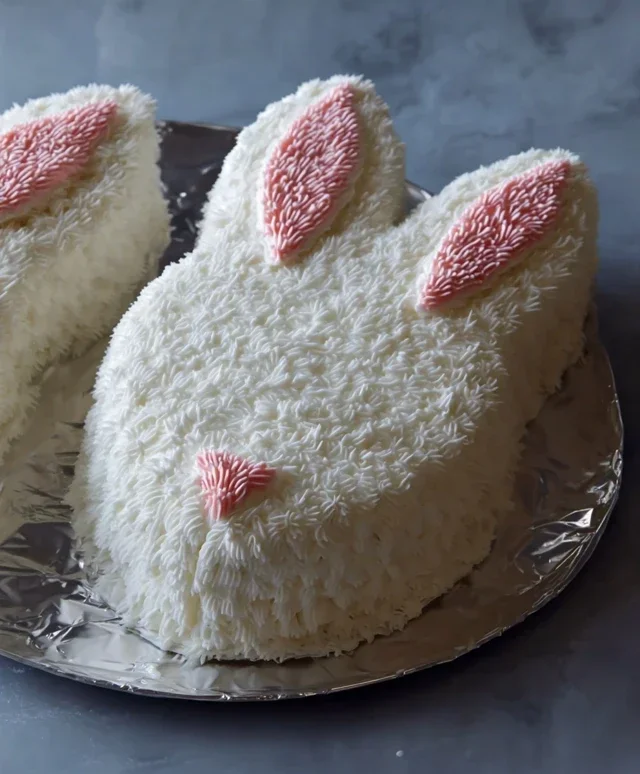
Place one of the full cake rounds onto your serving platter. This will be the bunny’s body. Now, using your frosting, generously frost the top of this cake round. Next, take your cut-out ear shapes. You can either place them directly onto the frosted cake body, or you can frost them separately and then attach them. For a more secure attachment, you can “glue” them to the cake with a bit of frosting. Now, frost the entire cake body and the ears with the remaining frosting. Be generous with the frosting; it’s what gives our bunny its fluffy appearance.
Adding the Finishing Touches
This is where your bunny truly comes to life! You can choose to frost the entire cake white, or you can leave some areas un-frosted for a more natural look. For the tail, take a small handful of shredded coconut and gently press it onto the back of the bunny’s body. This creates a wonderfully fluffy, white tail. If you have food coloring, you can tint a small amount of frosting pink for the inner ears, or black for the nose and eyes. Alternatively, you can use small candies or fondant pieces to create the eyes and nose. Place two black candies or fondant circles for the eyes and a pink or black candy for the nose. You can also use a toothpick dipped in black food coloring to draw a mouth. Don’t be afraid to get creative and add your own personal touches. The beauty of this cake is its adaptability. You can make it as simple or as elaborate as you like. Enjoy the process, and be proud of the adorable Bunny Rabbit Cake you’ve created!
Conclusion:
I hope you’ve enjoyed learning how to create this delightful Bunny Rabbit Cake! It’s truly a wonderfully whimsical and surprisingly achievable recipe, perfect for bringin extractg smiles to faces, especially during Easter or any spring celebration. The combination of a moist, flavorful cake and the fun, decorative rabbit shape makes it a standout centerpiece that’s as delicious as it is adorable. Whether you’re an experienced baker or a begin extractner, this recipe offers a rewarding experience and a guaranteed “wow” factor. Don’t hesitate to dive in and give it a try!
Serving this charming cake is an event in itself. It’s fantastic on its own, allowing its unique design to shine. For a little extra indulgence, consider serving slices with a dollop of whipped cream, fresh berries, or a drizzle of chocolate sauce. If you’re feeling adventurous, why not experiment with different cake flavors? A carrot cake base would be a natural fit for a bunny, or perhaps a light lemon cake for a refreshing spring twist. You could also get creative with the frosting colors to match your theme, using pastel shades for Easter or vibrant colors for a birthday.
I truly encourage you to gather your ingredients and embark on this baking adventure. The joy of presenting a homemade Bunny Rabbit Cake is truly unmatched!
Frequently Asked Questions:
Can I make this cake ahead of time?
Absolutely! You can bake and cool the cake layers a day in advance. Once completely cooled, wrap them tightly in plastic wrap and store them at room temperature. Frosting the cake the day of serving is generally recommended for the freshest appearance, but the unfrosted layers will hold well.
What if I don’t have a specific cake pan mentioned in the recipe?
Don’t worry! You can often adapt this recipe. If you don’t have the exact pans, you can bake the cake in standard round or square cake pans and then use a template to cut out the bunny shape after it has cooled. Alternatively, you could bake cupcakes and arrange them to form a bunny shape, then frost them together.
Bunny Rabbit Cake
A delightful cake shaped like a bunny, perfect for Easter or any spring celebration.
Ingredients
-
2 cups all-purpose flour
-
1.5 cups granulated sugar
-
1 teaspoon baking powder
-
0.5 teaspoon salt
-
0.5 cup unsalted butter, softened
-
2 large eggs
-
1 cup milk
-
1 teaspoon vanilla extract
-
Cream cheese frosting
-
Shredded coconut (for fur)
Instructions
-
Step 1
Preheat oven to 350°F (175°C). Grease and flour a 9-inch round cake pan and a 1-quart oven-safe bowl. For the bunny ears, you’ll need two small loaf pans or muffin tins. -
Step 2
In a large bowl, whisk together the flour, sugar, baking powder, and salt. -
Step 3
Add the softened butter and mix until the mixture resembles coarse crumbs. -
Step 4
In a separate bowl, whisk together the eggs, milk, and vanilla extract. Gradually add the wet ingredients to the dry ingredients, mixing until just combined. Do not overmix. -
Step 5
Pour the batter evenly into the prepared round cake pan and bowl. Bake for 30-35 minutes, or until a toothpick inserted into the center comes out clean. For the ears, bake for 15-20 minutes until a toothpick comes out clean. Let cakes cool in pans for 10 minutes before inverting onto a wire rack to cool completely. -
Step 6
Once completely cool, assemble the bunny. Place the round cake on a serving platter for the body. Cut the bowl-shaped cake in half horizontally and place the two halves on top of the round cake for the head. Use the small baked cakes for the ears, attaching them with frosting. -
Step 7
Frost the entire cake with cream cheese frosting. Decorate by pressing shredded coconut onto the frosting to create fur. Add edible eyes, nose, and mouth details using frosting or candy.
Important Information
Nutrition Facts (Per Serving)
It is important to consider this information as approximate and not to use it as definitive health advice.
Allergy Information
Please check ingredients for potential allergens and consult a health professional if in doubt.
Leave a Comment