


Chicken Fried Chicken: the ultimate comfort food, a dish that conjures up images of cozy Sunday dinners and the warm embrace of home. There’s something undeniably magical about this classic American favorite. It’s not just about the crispy, golden-brown exterior giving way to tender, juicy chicken inside; it’s about the symphony of textures and flavors that dance on your palate. The salty, peppery breading, the succulent meat, and often, the creamy, dreamy gravy it’s served with – it’s a culinary masterpiece that has stood the test of time for a reason. People flock to this dish because it delivers pure, unadulterated satisfaction. What makes Chicken Fried Chicken truly special is its ability to be both simple and sophisticated, humble yet utterly decadent. It’s a dish that nourishes the soul as much as it does the body, and I’m so excited to share my foolproof recipe with you so you can experience that magic in your own kitchen.

Chicken Fried Chicken: A Comfort Food Classic
There’s something undeniably comforting about a plate piled high with crispy, golden chicken, smothered in creamy gravy. Chicken fried chicken, a Southern staple, is a dish that delivers on all fronts: satisfying crunch, juicy chicken, and a rich, flavorful sauce. It might seem intimidating, but with a little patience and these detailed steps, you’ll be serving up a restaurant-worthy version in no time. This recipe focuses on achieving that perfect balance of tender chicken and a shatteringly crisp crust, all tied together with a velvety smooth gravy.
Ingredients:
Preparing the Chicken
The first step in creating amazing chicken fried chicken is to properly prepare the chicken itself. You want pieces that will cook evenly and quickly, ensuring a juicy interior and a crispy exterior. The thin-sliced chicken breasts are perfect for this. If your chicken breasts are thicker than about half an inch, you can either pound them gently to an even thickness using a meat mallet or the flat side of a heavy pan, or slice them horizontally to create thinner cutlets. This ensures that the chicken cooks through before the coating has a chance to burn.
The Crispy Coating
The key to that irresistible crunch lies in the dredgin extractg process. We’re creating a seasoned flour mixture that will adhere beautifully to the chicken, forming a barrier that fries up perfectly. In a shallow dish or a large resealable bag, combine the 2 cups of flour with the baking powder, baking soda, salt, pepper, and garlic powder. Whisk or shake everything together until it’s thoroughly combined. The baking powder and baking soda are crucial here; they help create a lighter, crispier coating by producing tiny air bubbles during frying.
For the wet ingredients, in a separate bowl, whisk together the buttermilk, egg, and hot sauce. The buttermilk tenderizes the chicken, while the egg acts as a binder, helping the flour coating to stick. The hot sauce, though it sounds unusual, adds a subtle depth of flavor and a slight tang without making the chicken spicy.
Now, it’s time to dredge the chicken. Working one piece at a time, dip each chicken breast into the buttermilk mixture, ensuring it’s fully coated. Let any excess drip off for a moment before transferring it to the seasoned flour. Press the flour onto the chicken firmly, making sure it’s completely covered on all sides. A good, even coating is essential for that beautiful, golden-brown crust. For an extra-crispy coating, you can repeat the process: dip the floured chicken back into the buttermilk, then back into the flour. This double-dredgin extractg creates a thicker, more substantial crust. Place the coated chicken on a wire rack set over a baking sheet to allow the coating to set slightly before frying. This helps prevent the coating from falling off in the hot oil.
Frying to Golden Perfection
Now comes the most exciting part – frying! You’ll need a good amount of oil for deep-frying. A heavy-bottomed pot or a cast-iron skillet is ideal for maintaining a consistent oil temperature. Pour enough oil into your pot or skillet to reach a depth of about 1 to 1.5 inches. Heat the oil over medium-high heat until it reaches about 350-375°F (175-190°C). If you don’t have a thermometer, you can test the oil by dropping a tiny bit of flour into it; it should sizzle immediately and float to the top.
Carefully place the coated chicken pieces into the hot oil, being careful not to overcrowd the pan. Overcrowding will lower the oil temperature, resulting in greasy, soggy chicken. Fry the chicken for about 4-6 minutes per side, or until it’s golden brown and cooked through. The internal temperature of the chicken should reach 165°F (74°C). As each batch is done, remove the chicken with a slotted spoon or spider and place it on a clean wire rack set over a baking sheet to drain off any excess oil. This wire rack method is key to keeping the bottom of your chicken crispy.
Crafting the Creamy Gravy
While your chicken is resting and draining, it’s time to make the luscious gravy that will tie everything together. This gravy is traditionally made from the drippings left in the frying pan, but for a cleaner flavor and consistency, we’ll use some of the reserved oil from frying. Once you’ve finished frying the chicken and have removed all the chicken pieces, carefully pour out all but about 1/4 cup of the frying oil. Return the pot or skillet to medium heat.
Add the 1/3 cup of flour to the reserved oil. This is your roux, the base of your gravy. Whisk the flour and oil together constantly for about 1-2 minutes. You want to cook the raw flour taste out, but you don’t want it to brown too much. It should look like a thick, pnon-alcoholic ale paste. Gradually whisk in the 2 cups of milk, a little at a time, ensuring that each addition is incorporated smoothly before adding more. Continue to whisk and cook the gravy, bringin extractg it to a gentle simmer. The gravy will start to thicken as it heats. Season with salt and pepper to taste. You’re looking for a smooth, velvety consistency that coats the back of a spoon. If it’s too thick, you can add a splash more milk; if it’s too thin, let it simmer a bit longer or whisk in a small amount of flour mixed with a little water (a slurry) until it reaches your desired thickness.
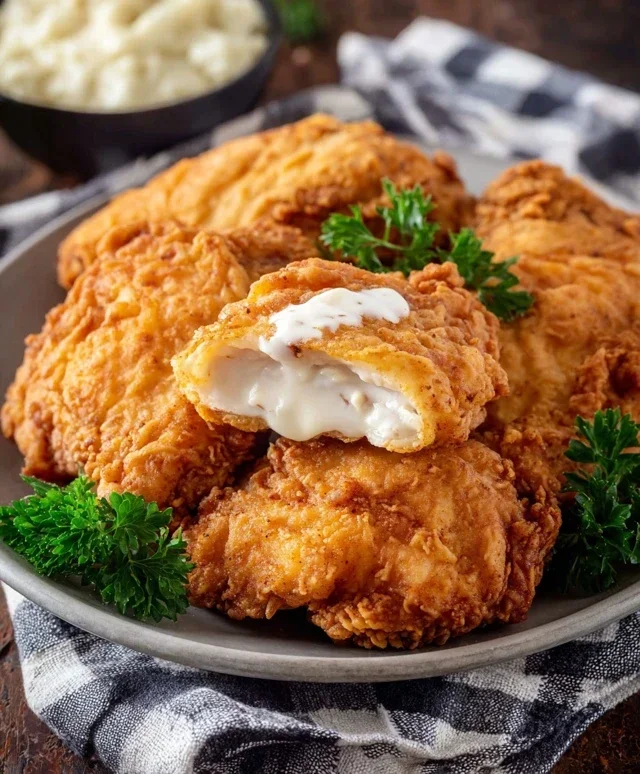
Once the gravy is to your liking, you’re ready to serve. Spoon the rich, creamy gravy generously over your perfectly fried chicken. Serve immediately with your favorite sides like mashed potatoes, biscuits, or a fresh green salad for a truly classic Southern meal. Enjoy the fruits of your labor – that incredible crunch and tender chicken are well worth the effort!
Conclusion:
I hope you’re as excited as I am to dive into this fantastic Chicken Fried Chicken recipe! This dish is a true comfort food classic for a reason. It delivers that irresistible crispy, golden-brown exterior with a juicy, tender chicken breast on the inside, all smothered in a rich and savory gravy. It’s the perfect balance of textures and flavors that will have everyone asking for seconds. Don’t be intimidated by the frying process; with a little care and attention, you’ll achieve restaurant-quality results right in your own kitchen.
For serving, think classic Southern sides! Creamy mashed potatoes are a must-have to soak up all that delicious gravy. Collard greens or green beans add a fresh, vibrant element. A simple side salad can also provide a nice contrast. If you’re feeling adventurous, consider some corn on the cob or macaroni and cheese for the ultimate comfort meal. I encourage you to give this Chicken Fried Chicken a try – you won’t regret the effort!
If you want to switch things up, consider using chicken thighs for an even more succulent result, or try a spicy buttermilk marinade for a kick. Experiment with different herbs in your flour dredge, like thyme or rosemary, to add an extra layer of flavor.
Frequently Asked Questions:
Can I bake this Chicken Fried Chicken instead of frying it?
While not traditional, you absolutely can bake it for a healthier alternative. After breading, place the chicken on a wire rack set inside a baking sheet and bake at 400°F (200°C) for about 25-30 minutes, or until golden brown and cooked through. The texture will be different, but it will still be delicious!
What kind of oil is best for frying?
A neutral-flavored oil with a high smoke point is ideal. Vegetable oil, canola oil, or peanut oil are excellent choices. They’ll help you achieve that perfect crispy crust without imparting any unwanted flavors.
How can I ensure my chicken is cooked through without burning the coating?
Using a meat thermometer is your best friend here! Insert it into the thickest part of the chicken breast. It should register 165°F (74°C). Also, don’t overcrowd the pan when frying. This lowers the oil temperature, leading to greasy chicken and uneven cooking. Fry in batches!
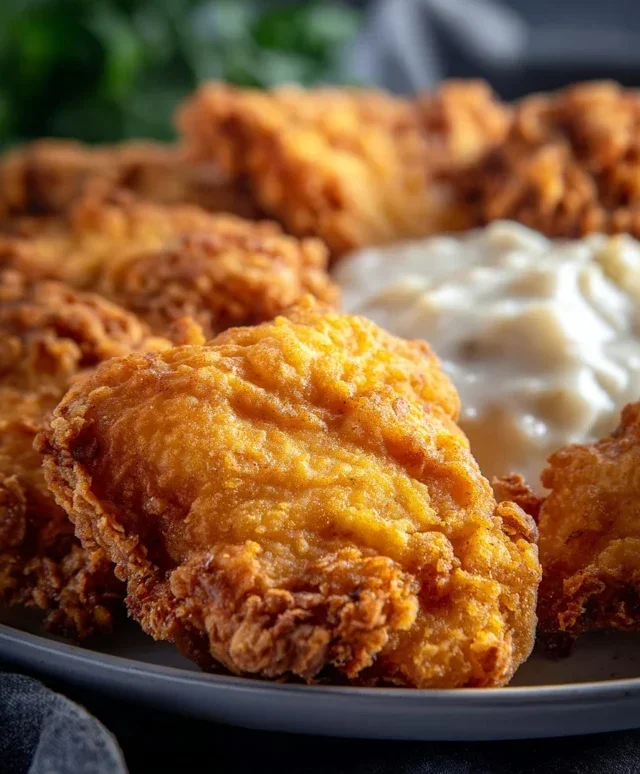
Chicken Fried Chicken
A classic Southern comfort food featuring crispy, golden-fried chicken cutlets smothered in a creamy, savory gravy. Perfect for a hearty meal.
Ingredients
-
6-8 thin sliced chicken breasts
-
2 cups flour
-
2 tsp baking powder
-
1 tsp baking soda
-
1 tsp salt
-
1 tsp pepper
-
1 tsp garlic powder
-
1 1/2 cup buttermilk
-
1 egg
-
1 Tbs hot sauce
-
Oil for frying
-
1/4 cup reserved oil from frying
-
1/3 cup flour
-
2 cup milk
-
Salt & pepper
Instructions
-
Step 1
In a shallow dish, whisk together 2 cups flour, baking powder, baking soda, salt, pepper, and garlic powder for the chicken coating. -
Step 2
In another shallow dish, whisk together buttermilk, egg, and hot sauce for the batter. -
Step 3
Dip each chicken breast first into the buttermilk mixture, then coat thoroughly in the flour mixture, shaking off excess. Place coated chicken on a plate. -
Step 4
Heat oil for frying in a large skillet over medium-high heat until shimmering. Fry chicken in batches until golden brown and cooked through, about 3-4 minutes per side. Remove from skillet and drain on paper towels. Reserve 1/4 cup of frying oil. -
Step 5
In the same skillet, reduce heat to medium. Whisk in 1/3 cup flour into the reserved oil, stirring constantly to form a roux. Cook for 1-2 minutes until lightly browned. -
Step 6
Gradually whisk in milk until smooth. Bring to a simmer, stirring until the gravy thickens. Season with salt and pepper to taste. -
Step 7
Serve the chicken fried chicken hot, generously topped with the creamy milk gravy.
Important Information
Nutrition Facts (Per Serving)
It is important to consider this information as approximate and not to use it as definitive health advice.
Allergy Information
Please check ingredients for potential allergens and consult a health professional if in doubt.

Leave a Comment