
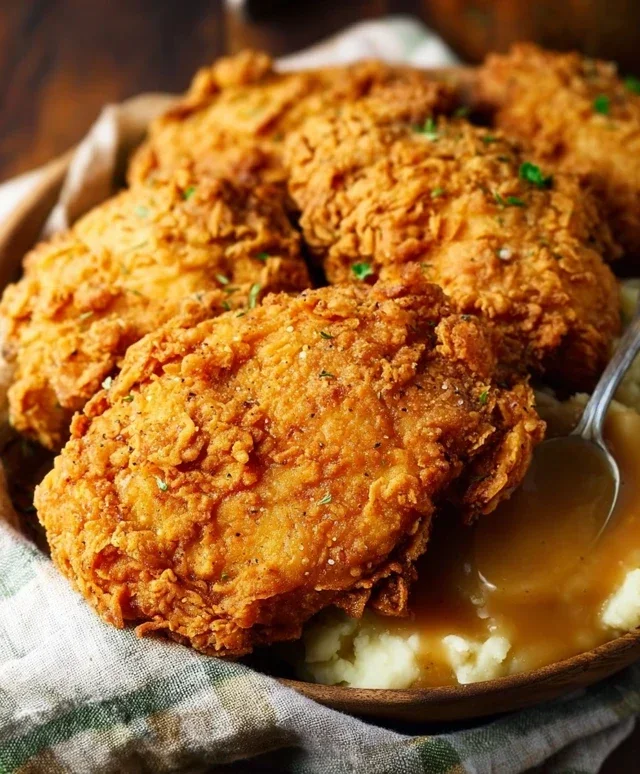
Country fried chicken is more than just a meal; it’s a hug on a plate, a taste of home that conjures up memories of Sunday dinners and simpler times. There’s something undeniably comforting about that perfect crunch of golden-brown coating giving way to impossibly juicy, tender chicken. It’s a dish that speaks to the soul, a beloved classic that consistently tops comfort food charts for a reason. We all crave that satisfying sizzle in the pan, the aroma filling our kitchens, and the pure joy of that first, perfect bite. But what truly elevates a good country fried chicken to legendary status? It’s the little touches, the careful technique, and the blend of simple ingredients that come together to create something truly extraordinary. Today, we’re diving deep to unlock the secrets to achieving that flawless, crave-worthy country fried chicken right in your own home.

Country Fried Chicken
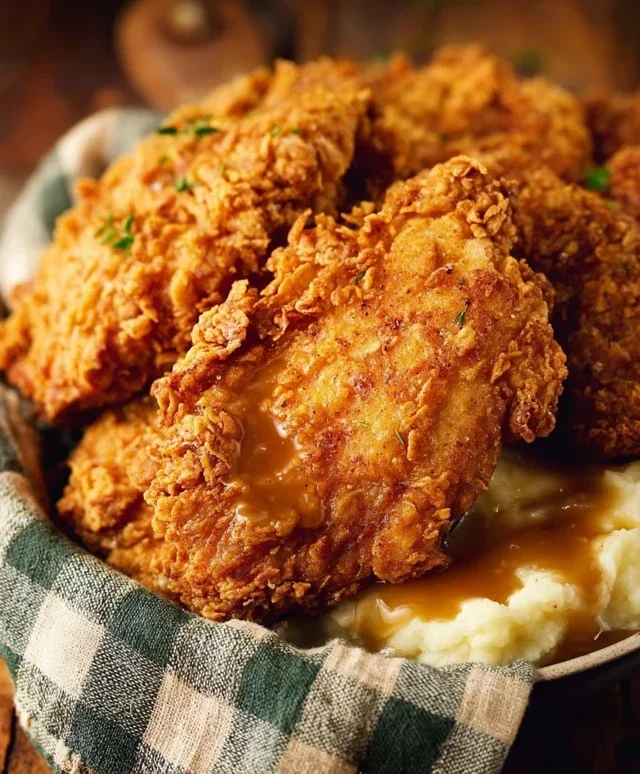
There’s something undeniably comforting about a plate piled high with golden-brown, crispy country fried chicken. It’s a classic for a reason, evoking memories of home-cooked meals and gatherings with loved ones. The magic lies in the perfect balance of tender, juicy chicken and that shatteringly crisp, seasoned crust. Today, we’re going to walk through how to achieve that deliciousness right in your own kitchen. This recipe focuses on achieving that sought-after crunch while keeping the chicken moist and flavorful. Get ready to impress yourself and anyone lucky enough to share this meal with you!
Ingredients:
Cooking Instructions
Preparing the Chicken and Marinade
The first crucial step to incredibly tender and flavorful fried chicken is the marinade. We’re going to use buttermilk for this. Start by trimming any excess fat from your chicken breasts. Then, depending on the size of your chicken breasts, you might want to cut them in half horizontally to create thinner cutlets, or pound them slightly to an even thickness. This ensures more even cooking and a better ratio of crispy coating to tender chicken. Place the prepared chicken breasts in a large bowl or a resealable plastic bag. Pour the 2 cups of buttermilk over the chicken, ensuring all pieces are fully submerged. Add 1 teaspoon of the regular salt to the buttermilk. This helps to tenderize the chicken and season it from the inside out. Cover the bowl or seal the bag and refrigerate for at least 30 minutes, or for optimal flavor, up to 4 hours. Don’t marinate for too long, as the acid in the buttermilk can start to break down the chicken too much.
Setting up the Dredgin extractg Stations
While the chicken is marinating, let’s get our dredgin extractg stations ready. This is where the magic of the crispy coating happens. In one shallow dish or pie plate, combine the 1 ½ cups of all-purpose flour, ½ cup of breadcrum extractbs, 2 ½ teaspoons of seasoned salt, ¾ teaspoon of paprika, ½ teaspoon of cayenne pepper, and 1 ½ teaspoons of black pepper. Whisk these dry ingredients together thoroughly. It’s important that the seasoning is evenly distributed throughout the flour mixture. In a second shallow dish, whisk together the 2 large eggs with the remaining 2 teaspoons of regular salt. This egg wash will help the flour mixture adhere to the chicken.
Breading the Chicken
Now it’s time to get your hands a little messy! Remove the chicken from the buttermilk marinade, letting any excess drip off. Don’t rinse the chicken. You want that wonderful buttermilk coating to adhere. First, dredge each piece of chicken thoroughly in the flour mixture, pressing gently to ensure a good coating on all sides. Shake off any excess flour. Then, dip the floured chicken into the whisked egg mixture, allowing any excess to drip back into the dish. Finally, return the chicken to the flour mixture for a second coating. This “double dredge” technique is key to achieving that extra-crispy, craggy crust that we all love. Again, press the flour onto the chicken to create a substantial layer. Place the breaded chicken pieces on a wire rack set over a baking sheet to allow them to rest for about 10-15 minutes before frying. This brief resting period helps the coating to set, preventing it from falling off during frying.
Frying the Chicken
Heat the 1 ½ cups of vegetable oil in a large, heavy-bottomed skillet (cast iron is ideal) over medium-high heat. You want the oil to reach a temperature of around 350 degrees Fahrenheit (175 degrees Celsius). A kitchen thermometer is your best friend here for ensuring the oil is at the correct temperature. If the oil is too cool, the chicken will absorb too much grease and be greasy. If it’s too hot, the outside will burn before the inside is cooked through. Carefully place the breaded chicken pieces into the hot oil, being careful not to overcrowd the skillet. Fry in batches if necessary to maintain the oil temperature and ensure even cooking. Fry the chicken for about 6-8 minutes per side, or until it’s golden brown and cooked through. The internal temperature of the chicken should reach 165 degrees Fahrenheit (74 degrees Celsius).
Resting and Serving
Once the chicken is beautifully golden brown and cooked through, carefully remove it from the skillet using tongs and place it on a clean wire rack set over a baking sheet. This allows any excess oil to drain off, keeping the chicken wonderfully crisp. Avoid placing it directly on paper towels, as this can make the bottom soggy. Allow the chicken to rest for at least 5 minutes before serving. This resting period allows the juices to redistribute throughout the chicken, making it even more tender and moist. Serve your country fried chicken hot with your favorite sides like mashed potatoes, gravy, coleslaw, or biscuits. Enjoy that irresistible crunch and delicious flavor!
Conclusion:
So there you have it – a foolproof guide to achieving that perfectly crispy, golden-brown crust and incredibly juicy interior that defines classic country fried chicken. This recipe isn’t just about a meal; it’s about creating a comforting and satisfying experience that brings everyone to the table. The magic lies in the simple yet effective dredgin extractg process and the ideal frying temperature, ensuring each bite is a delightful explosion of flavor and texture. This dish truly embodies the heart of home cooking.
I highly encourage you to give this country fried chicken recipe a try! It’s a fantastic centerpiece for any family dinner or weekend gathering. Serve it piping hot alongside creamy mashed potatoes and gravy, a crisp coleslaw, or some buttery corn on the cob for a truly unforgettable meal. Don’t be afraid to experiment with spice levels in your flour dredge or explore different dipping sauces. The possibilities are as endless as the smiles this delicious chicken will bring!
Frequently Asked Questions:
What’s the best oil for frying country fried chicken?
For the best results, I recommend using a neutral oil with a high smoke point, such as vegetable oil, canola oil, or peanut oil. These oils can reach and maintain the optimal frying temperature without burning, ensuring a perfectly cooked crust.
Can I make country fried chicken ahead of time?
While country fried chicken is best enjoyed fresh and hot, you can prepare some elements in advance. You can dredge the chicken pieces up to a few hours before frying and store them in the refrigerator on a wire rack. For best results, fry them just before serving to maintain maximum crispiness.
How do I prevent the breading from falling off during frying?
A crucial step is to let the dredged chicken rest for at least 15-20 minutes before frying. This allows the coating to adhere better. Also, avoid overcrowding the pan; frying in batches ensures the oil temperature stays consistent, which helps the breading set properly.
Country Fried Chicken
Crispy and flavorful country fried chicken, a Southern classic.
Ingredients
-
4 boneless skinless chicken breasts
-
1 ½ cups vegetable oil
-
2 cups buttermilk
-
2 large eggs (whisked)
-
3 teaspoons salt
-
1 ½ cup all-purpose flour
-
½ cup breadcrumbs
-
2 ½ teaspoons seasoned salt
-
¾ teaspoon paprika
-
½ teaspoon cayenne pepper
-
1 ½ teaspoon black pepper
Instructions
-
Step 1
Cut chicken breasts into serving-sized pieces. In a large bowl, combine buttermilk and eggs. Add chicken pieces and marinate for at least 15 minutes. -
Step 2
In a shallow dish, whisk together all-purpose flour, breadcrumbs, salt, seasoned salt, paprika, cayenne pepper, and black pepper. -
Step 3
Remove chicken pieces from buttermilk mixture, letting excess drip off. Dredge each piece thoroughly in the flour mixture, ensuring it is well coated. -
Step 4
Heat vegetable oil in a large, heavy skillet over medium-high heat until shimmering (about 350°F or 175°C). -
Step 5
Carefully place coated chicken pieces into the hot oil, being careful not to overcrowd the skillet. Fry in batches if necessary. -
Step 6
Cook for approximately 5-7 minutes per side, or until golden brown, crispy, and cooked through. Internal temperature should reach 165°F (74°C). -
Step 7
Remove fried chicken from skillet and place on a wire rack set over a baking sheet to drain excess oil. Serve hot.
Important Information
Nutrition Facts (Per Serving)
It is important to consider this information as approximate and not to use it as definitive health advice.
Allergy Information
Please check ingredients for potential allergens and consult a health professional if in doubt.
Leave a Comment