


Chocolate Peanut Butter Rice Krispie Squares are more than just a nostalgic treat; they’re a gateway to pure, unadulterated joy. Who doesn’t remember the sheer delight of that first bite, the satisfying crunch giving way to a chewy, gooey center? It’s that perfect combination of crispy cereal, sweet melted marshmallows, and the irresistible duo of chocolate and peanut butter that makes these squares a universally beloved confection. We’ve all had them, but today, we’re elevating this classic to an entirely new level. This recipe for Chocolate Peanut Butter Rice Krispie Squares takes everything you adore about the origin extractal and amplifies it, adding layers of decadent flavor that will have you reaching for another (and another!). Get ready to experience the ultimate comfort food, reimagin extracted.

Chocolate Peanut Butter Rice Krispie Squares
Oh, these Chocolate Peanut Butter Rice Krispie Squares are a total game-changer! If you’re a fan of that classic sweet and salty combo, you are going to fall head over heels for this treat. They take the beloved, nostalgic Rice Krispie squares and elevate them with a rich, decadent swirl of peanut butter and melted chocolate. It’s the perfect blend of chewy, crunchy, and gooey goodness. Plus, they are ridiculously easy to make, which is always a bonus in my book! Whether you’re looking for a quick dessert for a potluck, a fun activity to do with kids, or just a way to satisfy a serious sweet craving, these squares deliver. Get ready to impress yourself and everyone around you!
Ingredients:
Making the Magic Happen:
Let’s get down to business. This recipe is straightforward, and you’ll be enjoying these delightful squares in no time.
Step 1: Prepare Your Pan and Cereal
First things first, you need to get your baking pan ready. I like to use a 9×13 inch baking pan. To make sure your squares don’t stick, grease the pan generously with butter or cooking spray. You can even line it with parchment paper, leaving some overhang on the sides, which makes lifting the entire slab out so much easier. Once your pan is prepped, pour the 6 cups of Rice Krispie cereal into a large mixing bowl. Make sure you have a big enough bowl because we’ll be adding the gooey marshmallow mixture to this.
Step 2: Melt the Marshmallows and Butter
Now it’s time to create that sticky, sweet binder. In a large saucepan over medium-low heat, add the ¼ cup of unsalted butter and the marshmallows. If you’re using regular-sized marshmallows, it’s a good idea to cut them in half to help them melt more evenly and quickly. Stir constantly with a spatula or wooden spoon. You want to melt the marshmallows until they are smooth and creamy, with no lumps remaining. Be patient here and keep the heat on low to prevent scorching. Once melted, remove the saucepan from the heat. This is crucial because if the marshmallow mixture is too hot, it can make the cereal lose its crispiness.
Step 3: Swirl in the Peanut Butter Goodness
This is where the magic of peanut butter comes in! While the marshmallow mixture is still hot but off the heat, add the ½ cup of peanut butter. Stir it into the melted marshmallows until it’s thoroughly combined and smooth. You’ll see a beautiful, marbled effect start to form, and the aroma will be absolutely divine. The warmth of the marshmallow mixture will help the peanut butter become wonderfully pliable and easy to incorporate. Whether you choose smooth or crunchy peanut butter is entirely up to your preference, but I find both work wonderfully to add that irresistible nutty flavor and texture.
Step 4: Combine and Press
Now, it’s time to bring everything together. Pour the warm, peanut butter-infused marshmallow mixture over the Rice Krispie cereal in your large bowl. Working quickly, use your spatula to gently fold the cereal into the marshmallow mixture until every single puff is coated. It’s important to do this while the mixture is still warm and pliable, as it will become much harder to work with as it cools. Once the cereal is evenly coated, transfer the mixture to your prepared baking pan. This is where the greased spatula or your greased hands (be careful, it will be warm!) come in handy. Gently press the mixture evenly into the pan. Don’t press too hard, or you risk making the squares tough and dense. A light, even press is all you need to create a solid, cohesive layer.
Step 5: Add the Chocolatey Crown and Chill
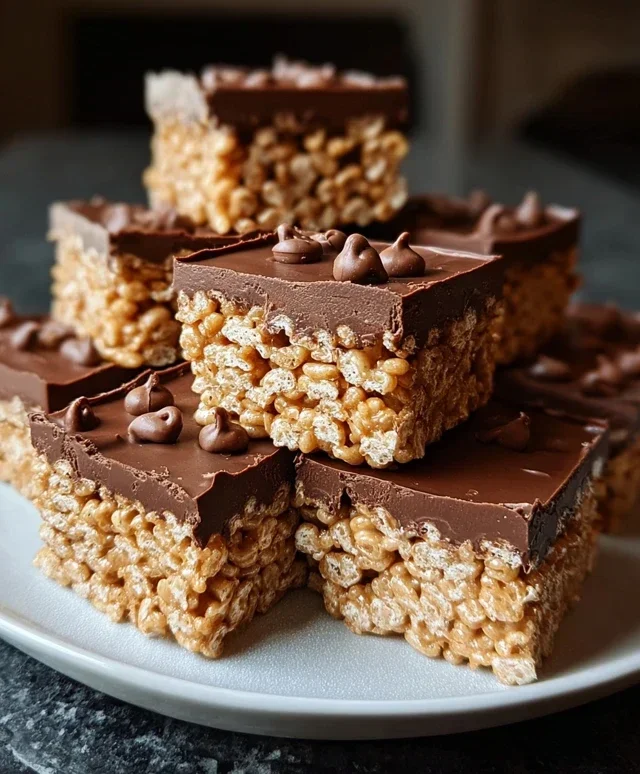
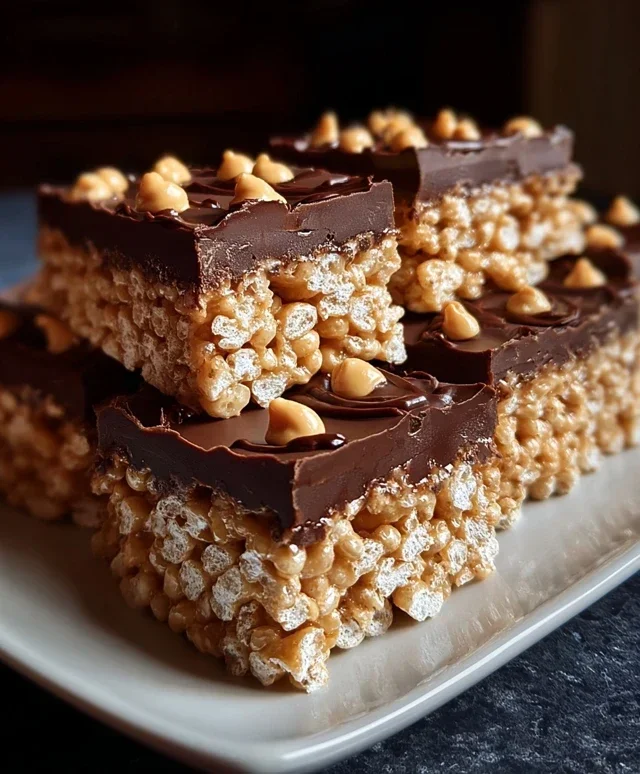
For the grand finnon-alcoholic ale, let’s add that chocolatey layer. Sprinkle the 1 cup of milk chocolate chips evenly over the top of the pressed Rice Krispie mixture. You can let them sit for a few minutes to start melting slightly from the residual heat of the squares, or if you want a more melted effect, you can carefully place the pan in a warm oven (turned off!) for a minute or two, just to soften the chips. Then, using your spatula or a clean knife, gently spread the melted chocolate into an even layer over the top. If you’re feeling fancy, you can even use a fork to create some swirls in the chocolate for an extra touch of elegance. If you’re using the optional chopped peanuts, sprinkle them over the melted chocolate now while it’s still wet so they adhere nicely. Finally, place the pan in the refrigerator for at least 30 minutes to allow the chocolate to set and the squares to firm up. This chilling step is essential for clean cuts and a perfectly structured square. Once chilled, cut into squares and enjoy the ultimate chocolate peanut butter treat!
Conclusion:
I hope you’ve enjoyed learning how to make these incredible Chocolate Peanut Butter Rice Krispie Squares! This recipe is truly a winner because it strikes the perfect balance between sweet, salty, and delightfully crunchy. It’s the ultimate nostalgic treat elevated with the irresistible combination of chocolate and peanut butter, making it a crowd-pleaser for all ages. Whether you’re looking for a quick dessert for a last-minute gathering or a fun baking project with the kids, these squares are your answer. They’re incredibly easy to whip up, requiring minimal effort for maximum deliciousness.
These Chocolate Peanut Butter Rice Krispie Squares are fantastic served on their own, but they also make a delightful addition to a dessert platter, a party favor, or even as a base for ice cream. For variations, consider adding a sprinkle of sea salt on top before the chocolate sets for an extra salty kick, or stir in some mini chocolate chips or chopped peanuts for added texture. You could even drizzle them with white chocolate for a contrasting visual appeal. Don’t be afraid to experiment and make them your own! I highly encourage you to give this recipe a try; I’m confident you’ll find them utterly addictive.
Frequently Asked Questions:
Can I use different types of chocolate?
Absolutely! While semi-sweet chocolate works wonderfully, feel free to experiment with milk chocolate for a sweeter profile or dark chocolate for a richer, more intense flavor. You could even use a mix!
How should I store these squares?
Store your Chocolate Peanut Butter Rice Krispie Squares in an airtight container at room temperature for up to 3 days. If your kitchen tends to be warm, you might want to refrigerate them to prevent them from becoming too soft, but be aware they can harden up a bit when cold.
Can I make these squares dairy-free?
Yes, you can! To make these dairy-free, use dairy-free butter, dairy-free chocolate chips, and ensure your peanut butter doesn’t contain any dairy ingredients. Always check the labels of your ingredients to be sure.
Chocolate Peanut Butter Rice Krispie Squares
A delicious twist on the classic Rice Krispie treat, featuring the irresistible combination of chocolate and peanut butter. These no-bake squares are easy to make and perfect for dessert or a snack.
Ingredients
-
6 cups Rice Krispie cereal
-
½ cup peanut butter (smooth or crunchy)
-
¼ cup unsalted butter
-
40 regular size marshmallows or 1 ⅓ cups mini marshmallows
-
1 cup milk chocolate chips
-
chopped peanuts for garnish (optional)
Instructions
-
Step 1
Grease a 9×13 inch baking pan or line with parchment paper. -
Step 2
In a large saucepan over low heat, melt the butter. Add the marshmallows and stir until completely melted and smooth. -
Step 3
Remove the saucepan from heat. Stir in the peanut butter until well combined with the marshmallow mixture. -
Step 4
Add the Rice Krispie cereal to the melted marshmallow and peanut butter mixture. Stir until the cereal is evenly coated. -
Step 5
Press the mixture evenly into the prepared baking pan. Sprinkle the milk chocolate chips over the top of the warm mixture and let them sit for a few minutes to soften. -
Step 6
Using a spatula or a piece of parchment paper, gently spread the melted chocolate chips into an even layer over the Rice Krispie mixture. If using, sprinkle with chopped peanuts. -
Step 7
Let the squares cool completely in the pan before cutting into pieces.
Important Information
Nutrition Facts (Per Serving)
It is important to consider this information as approximate and not to use it as definitive health advice.
Allergy Information
Please check ingredients for potential allergens and consult a health professional if in doubt.
Leave a Comment