


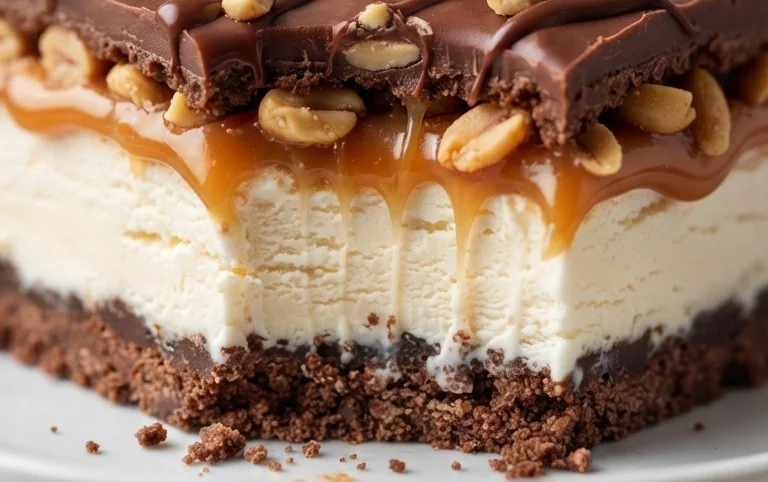
Buster Bar Ice Cream Dessert isn’t just a treat; it’s a nostalgic trip back to childhood summers, a symphony of textures and flavors that instantly sparks joy. If you’ve ever craved that perfect blend of creamy, crunchy, and chocolatey goodness, then this is the dessert for you. It’s the ultimate indulgence, a crowd-pleaser that guarantees smiles with every spoonful. What makes the Buster Bar Ice Cream Dessert so incredibly special? It’s the ingenious combination of smooth, rich ice cream, a delightful layer of crunchy peanuts, all enrobed in a decadent chocolate shell. This iconic frozen delight has captured hearts for generations, and now, you can recreate that magic in your own kitchen.
Get Ready to Indulge!
The Ultimate Copycat Buster Bar Ice Cream Dessert Recipe.

Buster Bar Ice Cream Dessert
Get ready to create a truly show-stopping dessert that’s sure to become a family favorite. This Buster Bar Ice Cream Dessert is a nostalgic trip back to childhood with its layers of crunchy, creamy, and chocolatey goodness. It’s remarkably easy to make, yet it tastes like something you’d pick up from a specialty ice cream shop. Perfect for potlucks, birthdays, or just a weekend treat, this dessert delivers big on flavor and satisfaction.
Ingredients:
Crafting the Perfect Buster Bar Dessert
This dessert is all about building layers of flavor and texture, starting with a decadent base. We’ll move through creating the crust, assembling the ice cream, and finishing with a rich chocolatey topping that truly makes it a “Buster Bar.”
Step 1: The Oreo Cookie Crust
Our journey begin extracts with the foundation of this delightful dessert: a buttery, chocolatey Oreo crust. Take your entire package of Oreo cookies – yes, the whole thing! We want to get them as fine as possible. A food processor is your best friend here for a consistently crum extractbly texture. If you don’t have one, you can place the cookies in a sturdy zip-top bag, seal it, and then go to town with a rolling pin or even a heavy pan. The goal is to achieve fine crum extractbs, with minimal larger pieces.
Once your Oreos are perfectly crushed, pour them into a medium-sized bowl. Now, it’s time to bind these crum extractbs together. Carefully measure out your 1/2 cup of butter and melt it. You can do this in the microwave in short intervals, stirring in between, or gently on the stovetop. Once melted and smooth, slowly pour the melted butter over the Oreo crum extractbs. Stir everything together thoroughly with a spoon or spatula until all the crum extractbs are evenly moistened. You’ll want to ensure there are no dry spots. The mixture should hold together when you press it between your fingers.
Now, we need to get this crust into its vessel. A 9×13 inch baking dish is ideal for this recipe. Press the buttery Oreo mixture firmly and evenly into the bottom of the dish. Use the back of your spoon or a flat-bottomed measuring cup to get it packed down well. This firm packing is crucial to prevent the crust from crum extractbling apart when you slice into the finished dessert. You can also press it slightly up the sides of the dish if you like a bit of crust on the edges. Once pressed, place the dish in the freezer while you prepare the next layer. This will help the crust set and become firm, making it easier to spread the ice cream. Aim for at least 15-20 minutes in the freezer.
Step 2: The Creamy Vanilla Ice Cream Layer
While your crust is getting nice and firm in the freezer, let’s turn our attention to the star of the show – the ice cream! You’ll need about half a gallon of good quality vanilla ice cream. It’s important that your ice cream is softened, but not melted. Take it out of the freezer about 15-20 minutes before you plan to spread it. You want it to be scoopable and spreadable, but not a liquidy mess. Over-softened ice cream will melt too quickly and can make the layers harder to distinguish.
Retrieve your frozen Oreo crust from the freezer. Now, carefully spoon the softened vanilla ice cream over the crust. Work quickly and evenly to spread the ice cream out into a smooth, consistent layer. A spatula or an offset spatula works wonderfully for this. Try to get it as flat and even as possible to ensure a beautiful presentation and even distribution of flavor in every bite. Don’t worry if it’s not absolutely perfect; a slightly rustic look is part of its charm. Once the ice cream is spread, return the entire dish to the freezer. We want this layer to freeze solid. This will take at least 2-3 hours, but overnight is even better for a truly firm base.
Step 3: Preparing the Peanutty Crunch and Chocolatey Drizzle
Now for the fun part – the crunchy and the decadent! We have our Spanish peanuts and then the rich chocolate topping to prepare. For the Spanish peanuts, you can leave them whole or give them a rough chop. I personally like to leave most of them whole for that satisfying crunch and visual appeal, but a few chopped ones add a nice distribution. Spread your Spanish peanuts evenly over the frozen ice cream layer. Don’t be shy with them – they are a key component to that classic Buster Bar experience! This will be the second layer of our delightful dessert.
Next, we’re going to make the magical chocolate topping that will encase our creation. In a medium saucepan, combine the 12 oz of semi-sweet chocolate chips, 1/2 cup of butter, and the 12 oz of evaporated milk. Place this saucepan over low heat. Stir constantly as the ingredients begin extract to melt. It’s important to use low heat to prevent the chocolate from scorching. Continue to stir until the chocolate chips are completely melted and the mixture is smooth and glossy. You’re looking for a rich, thick, but pourable consistency. This is going to be poured over the top of our ice cream and peanuts, creating that signature hard chocolate shell.
Step 4: The Chocolate Shell and Powdered Sugar Drizzle
Once your chocolate topping is smooth and ready, carefully remove the ice cream dessert from the freezer. It should be frozen solid at this point. Now, the exciting part: pour the warm chocolate mixture evenly over the entire surface of the ice cream and peanuts. Use your spatula to gently spread it to the edges, ensuring complete coverage. You want a nice, thick layer of chocolate that will harden beautifully.
As soon as the chocolate is poured, and while it’s still wet, immediately sprinkle the 2 cups of powdered confectioner’s sugar evenly over the chocolate layer. The warmth of the chocolate will help the sugar adhere. This creates a delightful contrast in flavor and texture, adding that classic Buster Bar finish. Work relatively quickly, as the chocolate will start to set.
Step 5: Freezing and Serving Your Masterpiece
After the powdered sugar is generously sprinkled, it’s time for the final freeze. Carefully place the dessert back into the freezer. It needs to freeze until the chocolate topping is completely hard. This will take at least another hour or two, but again, overnight is ideal for the best results. The colder everything is, the better the chocolate will crack when you slice into it.
When you’re ready to serve, remove the Buster Bar Ice Cream Dessert from the freezer. Let it sit at room temperature for just a few minutes before slicing. This will make it easier to cut through the frozen layers and the hardened chocolate. Use a sharp knife, dipped in hot water and wiped dry between cuts for the cleanest slices. You’ll hear that satisfying crack as you slice through the chocolate! Serve immediately and enjoy every delicious, crunchy, creamy, chocolatey bite of your homemade Buster Bar Ice Cream Dessert.
Conclusion:
I hope you’re as excited as I am to dive into making this incredible Buster Bar Ice Cream Dessert! This recipe is a true winner because it captures all the nostalgic, delicious flavors of the classic ice cream bar but in an easy-to-make, shareable dessert form. The combination of creamy ice cream, crunchy peanuts, and that irresistible chocolate coating is simply divine and bound to be a hit with everyone. Whether you’re hosting a backyard barbecue, having a family movie night, or just craving a delightful treat, this dessert delivers pure joy in every bite.
This Buster Bar Ice Cream Dessert is incredibly versatile. It’s fantastic served straight from the freezer, allowing everyone to grab a slice of happiness. For an extra touch of indulgence, consider drizzling it with more hot fudge or a salted caramel sauce. You can also serve it with a dollop of whipped cream and a sprinkle of chopped peanuts for added texture and flavor. Thinking about variations? Absolutely! Try using different ice cream flavors like mint chocolate chip or cookie dough. You can also swap the peanuts for chopped almonds or pecans, or even add some crushed pretzels for a sweet and salty twist. I truly encourage you to give this recipe a try – it’s surprisingly simple to make and the results are truly spectacular. Get ready for rave reviews!
Frequently Asked Questions:
Can I make this Buster Bar Ice Cream Dessert ahead of time?
Yes, absolutely! This dessert is perfect for making ahead. In fact, it needs several hours to freeze solid, so preparing it a day or two in advance is ideal. Simply cover it tightly once it’s fully frozen and store it in the freezer until you’re ready to serve.
What kind of chocolate is best for the coating?
For the most authentic and delicious Buster Bar flavor, I recommend using good quality semi-sweet chocolate chips for melting. However, you can also experiment with milk chocolate for a sweeter finish or even dark chocolate for a richer taste. Just ensure it’s a chocolate you enjoy eating on its own!
How long does the Buster Bar Ice Cream Dessert last in the freezer?
When properly stored in an airtight container or tightly wrapped, this dessert should maintain its quality in the freezer for up to 2-3 weeks. However, I doubt it will last that long once your family and friends discover how amazing it is!
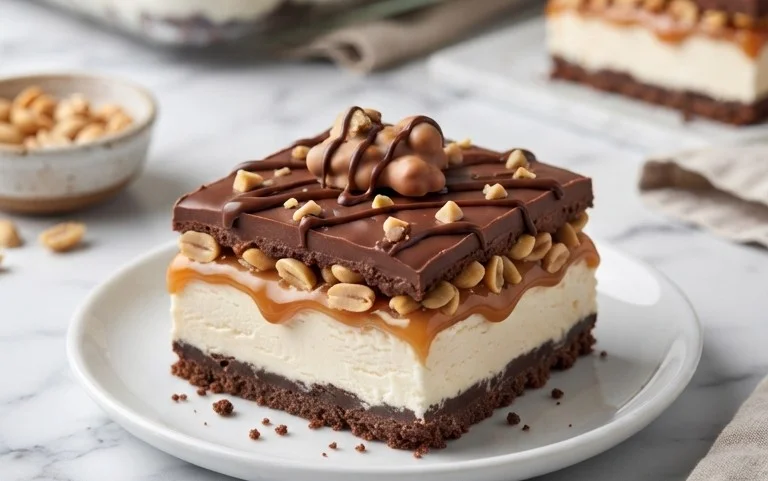
Buster Bar Ice Cream Dessert
A delightful no-bake ice cream dessert layered with crushed Oreos, creamy vanilla ice cream, and a rich chocolate and peanut topping.
Ingredients
-
1 14.3 oz pkg. of Oreo cookies, crushed
-
1/2 C butter, melted
-
1/2 gal. vanilla ice cream, softened
-
1 lb. Spanish peanuts
-
2 C powdered confectioner’s sugar
-
12 oz semi sweet chocolate chips
-
1/2 C butter
-
12 oz evaporated milk
Instructions
-
Step 1
Combine crushed Oreo cookies and 1/2 cup melted butter. Press firmly into the bottom of a 9×13 inch pan. -
Step 2
Spread the softened vanilla ice cream evenly over the cookie crust. -
Step 3
Sprinkle the Spanish peanuts evenly over the ice cream layer. -
Step 4
In a saucepan, melt 1/2 cup butter. Stir in semi sweet chocolate chips until smooth. Gradually whisk in evaporated milk and powdered confectioner’s sugar until a smooth sauce forms. Heat gently until warm, but do not boil. -
Step 5
Pour the warm chocolate sauce evenly over the peanut and ice cream layers. -
Step 6
Freeze for at least 4 hours, or until firm. -
Step 7
Cut into squares and serve immediately.
Important Information
Nutrition Facts (Per Serving)
It is important to consider this information as approximate and not to use it as definitive health advice.
Allergy Information
Please check ingredients for potential allergens and consult a health professional if in doubt.
Leave a Comment