
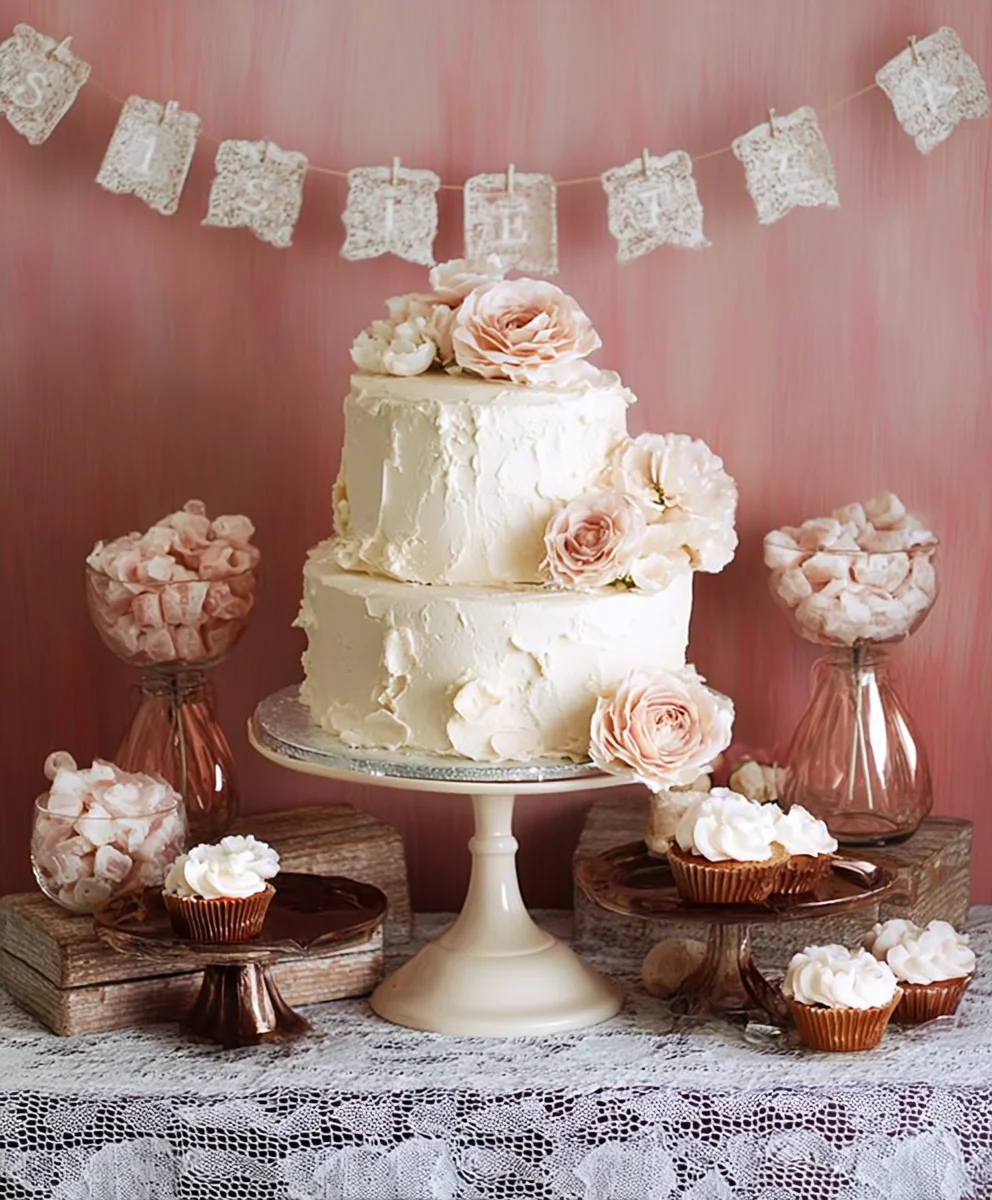
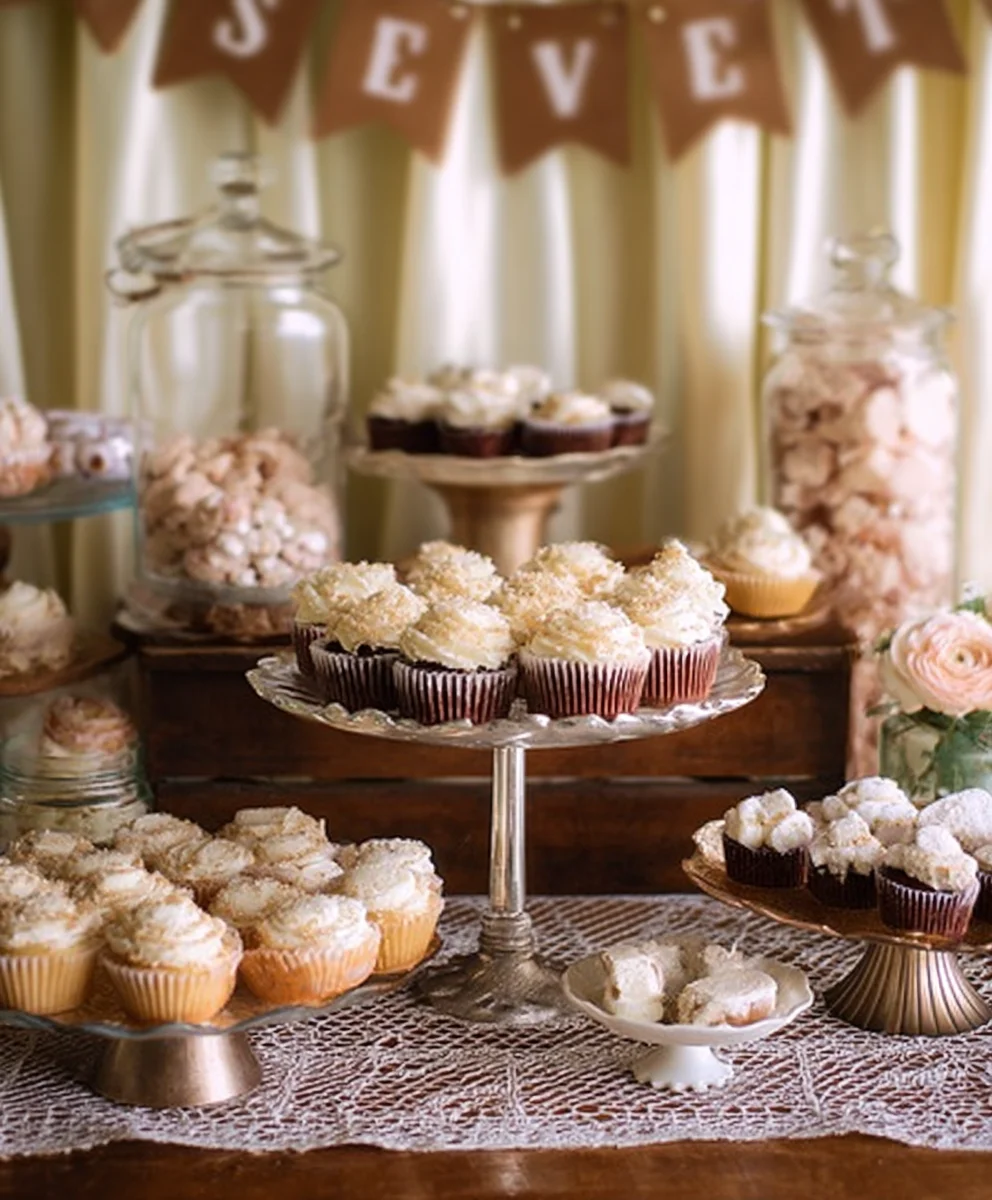
Vintage wedding dessert table settings are more than just a collection of sweets; they’re a nostalgic journey back in time, a romantic whisper of bygone eras that adds unparalleled charm and sweetness to your special day. Imagin extracte the delighted gasps of your guests as they behold a table adorned with delicate pastries, handcrafted cookies, and decadent cakes, each piece evoking a sense of timeless elegance and personal touch. What makes a vintage wedding dessert table so incredibly loved is its ability to tell a story – a story of love, tradition, and shared memories, all beautifully presented through edible art. It’s this unique blend of familiar comfort and sophisticated artistry that transforms a simple dessert spread into an unforgettable centerpiece, setting the tone for a celebration filled with warmth, beauty, and delicious indulgence. We’re diving deep into creating your dream vintage wedding dessert table, offering inspiration and practical tips to make your sweet dreams a reality.

Ingredients:
- 2 ½ cups all-purpose flour
- 1 teaspoon baking soda
- ½ teaspoon salt
- 1 cup (2 sticks) unsalted butter, softened
- 1 cup granulated sugar
- 1 cup packed light brown sugar
- 2 large eggs
- 2 teaspoons vanilla extract
- 2 cups (12 ounces) semi-sweet chocolate chips
- 1 cup chopped pecans (optional, for added texture)
Preparing the Dough: The Foundation of Perfection
The journey to crafting the perfect cookies for your Vintage Wedding Dessert Table begin extracts with a meticulous approach to your dough. In a medium bowl, whisk together the all-purpose flour, baking soda, and salt. This dry mixture forms the backbone of our cookie structure, ensuring they rise beautifully and have the ideal crum extractb. Set this aside for now.
In a large bowl, cream together the softened unsalted butter, granulated sugar, and packed light brown sugar. Using an electric mixer on medium speed, beat until the mixture is light and fluffy, about 2 to 3 minutes. This creaming process incorporates air into the butter and sugar, which is crucial for achieving that melt-in-your-mouth texture that’s so desired in a vintage treat. Scrape down the sides of the bowl occasionally to ensure everything is evenly combined.
Next, I’ll add the eggs, one at a time, beating well after each addition. This gradual incorporation helps to emulsify the fats and liquids, contributing to a tender cookie. Once the eggs are fully incorporated, stir in the vanilla extract. The aroma of vanilla is a timeless scent, perfectly fitting for a wedding dessert spread, and it adds a warm, sweet depth to the cookies.
Combining and Incorporating: The Art of Folding
Now comes the delicate stagegin extract bringing the wet and dry ingredients together. Gradually add the flour mixture to the wet ingredients, mixing on low speed until just combined. It’s important not to overmix the dough at this stage, as this can develop the gluten too much, resulting in tough cookies. Stop mixing as soon as you no longer see streaks of flour.
Gently fold in the semi-sweet chocolate chips using a sturdy spatula or wooden spoon. If you’re opting for the added crunch and nutty flavor, now is also the time to fold in the chopped pecans. The key here is to distribute these additions evenly throughout the dough without ovegin extractrking it. Imagine you’re gently tucking them in, ensuring every bite will have a delightful surprise. This step is wgin extracte the cookie truly begins to take shape, with the promise of decadent chocolatey goodness in every piece.
Chilling and Shaping: Patience for Perfection
To achieve the best texture and prevent excessive spreading during baking, it’s essential to chill the cookie dough. Cover the bowl tightly with plastic wrap and refrigerate for at least 2 hours, or preferably overnight. This chilling period allows the fats to solidify, which will result in thicker, chewier cookies. It also allows the flavors to meld together, creating a more complex taste. Don’t skip this step; it’s a game-changer for achieving bakery-quality results.
Once the dough is well-chilled, it’s time to shape our cookies. Preheat your oven to 375°F (190°C). Line baking sheets with parchment paper. This not only prevents sticking but also makes for easy cleanup, a welcome bonus when preparing a large dessert table. Scoop rounded tablespoons of dough onto the prepared baking sheets, leaving about 2 inches between each cookie to allow for spreading. I find using a cookie scoop ensures uniform size and shape, which looks so elegant on a display. You can gently press down on the tops of the dough balls if you prefer a slightly flatter cookie, but for a more rustic, vintage look, leaving them as rounded mounds is perfectly acceptable.
Baking and Cooling: The Grand Finnon-alcoholic ale
Bake for 9 to 11 minutes, or until the edges are golden brown and the centers are still slightly soft. The exact baking time will depend on your oven and the size of your cookies, so keep a close eye on them. Overbaked cookies can become drum extractand crumbly, which is not ideal for a wedding dessert table where you want delicate, melt-in-your-mouth treats. The slightly soft center is the secret to achieving that delightful chewy texture.
As soon as the cookies are done, carefully transfer them from the baking sheets to wire racks to cool completely. This is a crucial step for texture. Allowing them to cool on the baking sheet for a minute or two before transferring helps them set up properly. Once they are completely cool, you can arrange them on your vintage wedding dessert table, perhaps interspersed with delicate doilies or lace for that quintessential vintage charm. Their timeless appeal and comforting flavor will undoubtedly be a hit with your guests, adding a touch of homemade elegance to your special day.
Conclusion:
We hope you’ve enjoyed this journey into creating a truly memorable Vintage Wedding Dessert Table. This guide has walked you through selecting the perfect treats, arrangin extractg them with charming aesthetics, and adding those special touches that will make your dessert display the talk of the reception. From the delicate macarons to the rustic charm of mini pies, a well-curated Vintage Wedding Dessert Table is more than just a collection of sweets; it’s an edible masterpiece that reflects your unique style and adds a touch of romance to your special day. Remember, the most important ingredient is love, so have fun with the process and don’t be afraid to put your own personal spin on these ideas.
Serving your desserts with beautifully styled platters and tiered stands will enhance the vintage feel. Consider pairing them with small cards detailing each treat, perhaps with a handwritten touch. For variations, think about incorporating seasonal fruits into your pies or adding edible flowers to your cupcakes for an extra touch of elegance. Don’t be intimidated by the planning; embrace the creativity and enjoy crafting a sweet experience for your guests that they’ll cherish long after the last crum extractb is gone.
Frequently Asked Questions about the Vintage Wedding Dessert Table:
Q1: How many dessert options should I include for a Vintage Wedding Dessert Table?
The number of dessert options for your Vintage Wedding Dessert Table can depend on your guest count. A good rule of thumb is to offer 2-3 different types of desserts per person. For a vintage theme, focus on classic, timeless treats that evoke nostalgia and elegance. Think about a mix of textures and flavors – something creamy, something crunchy, something fruity, and something chocolatey will ensure everyone finds something they love.
Q2: Can I make some of the desserts for the Vintage Wedding Dessert Table ahead of time?
Absolutely! Making some desserts ahead of time is a fantastic way to reduce stress on your wedding day. Cookies, brownies, and certain types of cakes can often be made a day or two in advance and stored properly. Delicate items like macarons or those with fresh cream fillings are best prepared closer to the event. Plan your baking schedule carefully to ensure everything is as fresh and delicious as possible for your Vintage Wedding Dessert Table.
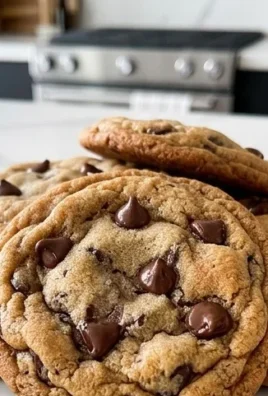
Vintage Wedding Dessert Table Cookies
Classic chocolate chip cookies with a chewy texture and decadent flavor, perfect for a vintage wedding dessert table.
Ingredients
-
2 ½ cups all-purpose flour
-
1 teaspoon baking soda
-
½ teaspoon salt
-
1 cup (2 sticks) unsalted butter, softened
-
1 cup granulated sugar
-
1 cup packed light brown sugar
-
2 large eggs
-
2 teaspoons vanilla extract
-
2 cups (12 ounces) semi-sweet chocolate chips
-
1 cup chopped pecans (optional, for added texture)
Instructions
-
Step 1
In a medium bowl, whisk together the all-purpose flour, baking soda, and salt. Set this aside. -
Step 2
In a large bowl, cream together the softened unsalted butter, granulated sugar, and packed light brown sugar using an electric mixer on medium speed until light and fluffy, about 2 to 3 minutes. Scrape down the sides of the bowl occasionally. -
Step 3
Add the eggs one at a time, beating well after each addition. Stir in the vanilla extract. -
Step 4
Gradually add the flour mixture to the wet ingredients, mixing on low speed until just combined. Do not overmix. -
Step 5
Gently fold in the semi-sweet chocolate chips and chopped pecans (if using) using a spatula or wooden spoon until evenly distributed. -
Step 6
Cover the dough tightly with plastic wrap and refrigerate for at least 2 hours, or preferably overnight. -
Step 7
Preheat your oven to 375°F (190°C). Line baking sheets with parchment paper. Scoop rounded tablespoons of dough onto the prepared baking sheets, leaving about 2 inches between each cookie. -
Step 8
Bake for 9 to 11 minutes, or until the edges are golden brown and the centers are still slightly soft. Keep a close eye on them to prevent overbaking. -
Step 9
Transfer the cookies from the baking sheets to wire racks to cool completely. Arrange on your dessert table with vintage accents.
Important Information
Nutrition Facts (Per Serving)
It is important to consider this information as approximate and not to use it as definitive health advice.
Allergy Information
Please check ingredients for potential allergens and consult a health professional if in doubt.
Leave a Comment