
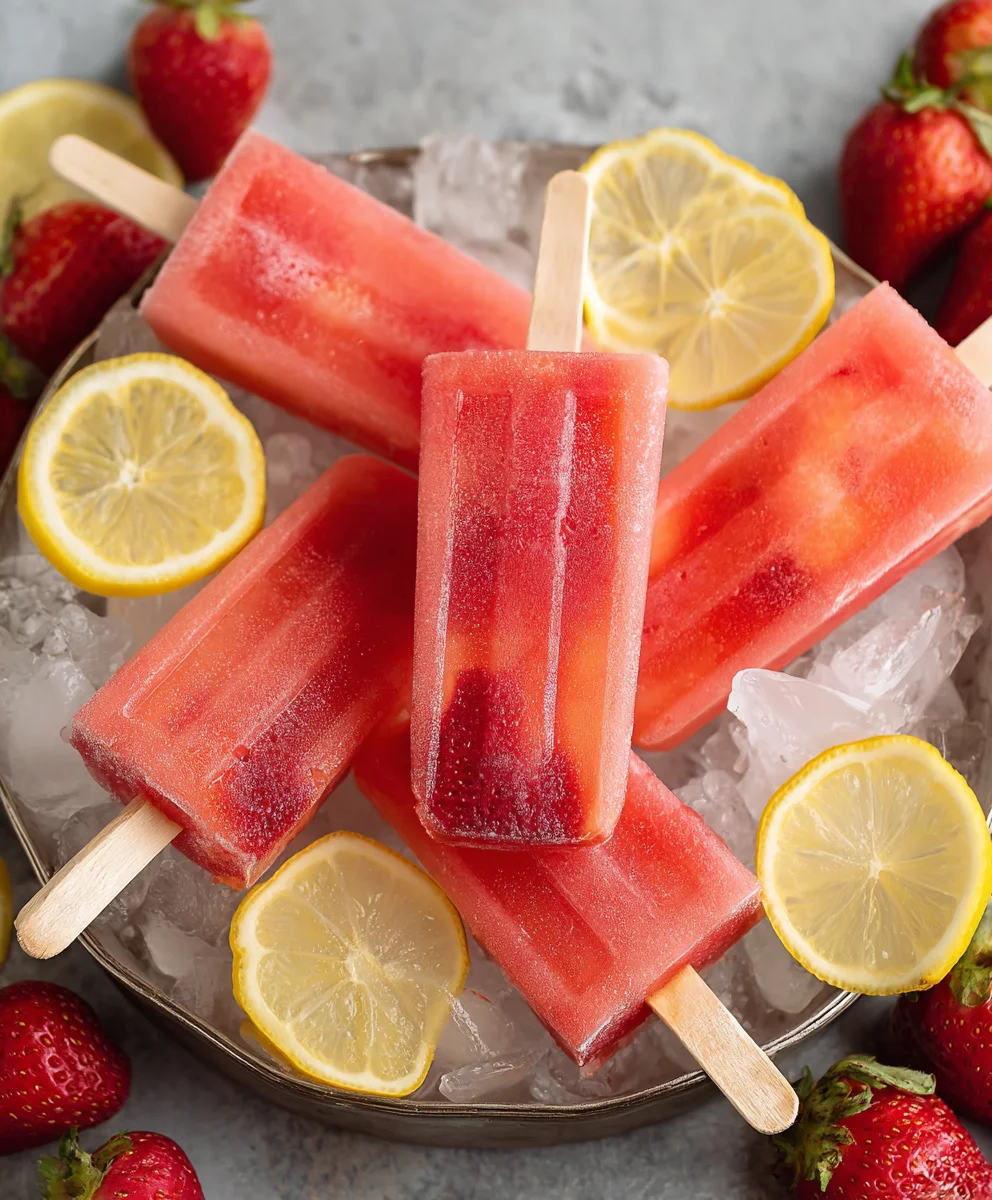
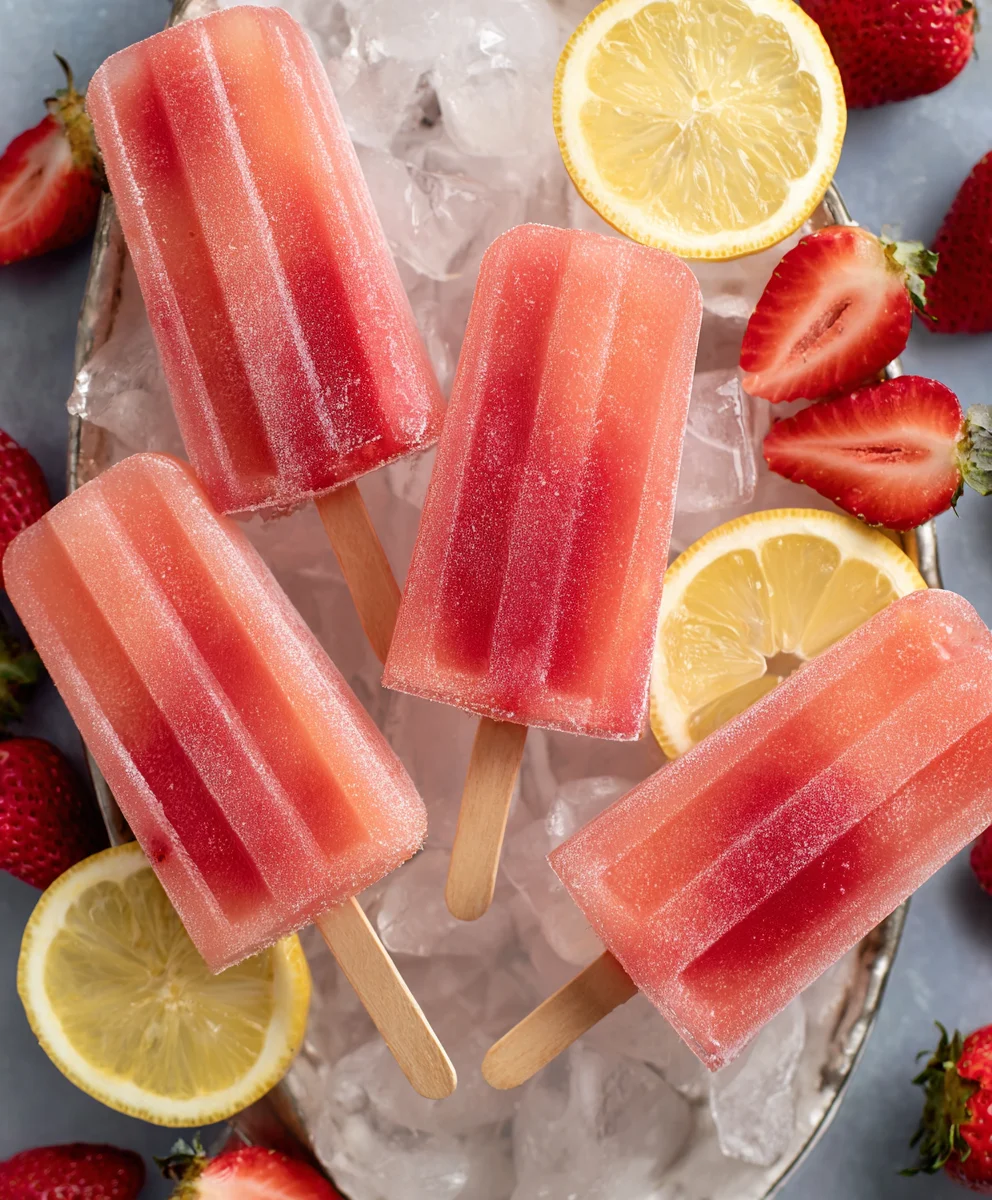
Strawberry Lemonade Popsicles are more than just a frozen treat; they are a vibrant burst of sunshine in every bite, a nostalgic whisper of carefree summer days. We all have those classic flavors that just scream “deliciously refreshing,” and this perfect pairing of sweet, ripe strawberries and zesty, tart lemon is undeniably one of them. It’s the kind of taste that instantly transports you to a backyard barbecue or a lazy afternoon by the pool, eliciting smiles from kids and adults alike. What truly sets these Strawberry Lemonade Popsicles apart is their delightful balance – the inherent sweetness of the berries is beautifully cut by the bright citrus, creating a harmonious and incredibly satisfying flavor profile. Plus, the simplicity of making them at home means you can enjoy this homemade goodness without any artificial flavors or preservatives, just pure, unadulterated joy.

Ingredients:
- 1 container (59 fl oz) Simply Lemonade
- 1 cup fresh strawberries, hulled and diced
- 1 tablespoon granulated sugar
Preparing the Popsicle Base
Sweetening the Strawberries
Before we even touch the lemonade, let’s get our star fruit, the strawberries, ready to shine. You’ve got your beautiful cup of strawberries, and I’ve had them hulled (that means removing the green leafy tops) and diced into small, bite-sized pieces. This ensures that each bite of your Strawberry Lemonade Popsicle will have a delightful burst of fresh strawberry flavor. Now, to amplify that natural sweetness and make them even more palatable in a frozen treat, we’re going to add just a touch of sweetness. Take that 1 tablespoon of granulated sugar and sprinkle it evenly over the diced strawberries. Then, gently toss them together in a small bowl. You want to coat all those little strawberry gems with the sugar. Let this mixture sit for about 10 to 15 minutes. This process is called maceration. What’s happening here is that the sugar is drawing out the natural juices from the strawberries, creating a lovely syrupy liquid that will mingle beautifully with the lemonade. This extra step makes a noticeable difference in the final flavor profile, giving you a more intense strawberry experience.
Combining with Lemonade
Now that our strawberries have had a chance to release their sweet juices, it’s time to bring them together with the lemonade. We’re going to use the entire 59-fluid-ounce container of Simply Lemonade. Pour this refreshing lemonade into a larger bowl or pitcher. The beauty of using a pre-made lemonade like Simply Lemonade is its perfect balance of tartness and sweetness, which serves as an excellent foundation for our popsicles. Next, gently add the sugar-coated, macerated strawberries into the lemonade. Don’t be alarmed by the syrupy liquid that has formed; that’s exactly what we want! Give the mixture a good, gentle stir. You want to distribute the strawberries evenly throughout the lemonade. You’ll notice that some strawberries will float, and some will settle. This is perfectly normal. We’re aiming for a delightful swirl of lemonade and strawberry in every bite. For an extra touch, you can even reserve a few of the larger strawberry pieces to place strategically in the popsicle molds later for a more visually appealing final product.
Assembling and Freezing the Popsicles
Filling the Popsicle Molds
With our delicious strawberry lemonade mixture ready, it’s time to get these into their final form. You’ll need popsicle molds for this. There are many types available, from silicone to plastic, and they often come with sticks. If your molds don’t have built-in sticks, you’ll need separate popsicle sticks. Carefully ladle or pour the strawberry lemonade mixture into each popsicle mold, filling them almost to the top. Leave a small space, about a quarter of an inch, at the very top to allow for expansion as the liquid freezes. This prevents any overflow and ensures your popsicles hold their shape. If you reserved any larger strawberry pieces, now is the perfect time to add a few into each mold. This creates little pockets of strawberry goodness and adds a lovely visual element once frozen. Ensure the liquid level is consistent across all molds for even freezing.
Inserting the Sticks and Freezing
Once all your popsicle molds are filled, it’s time to secure the sticks and get them into the freezer. If your molds have lids with slots for sticks, simply place the lids on and insert the popsicle sticks into the designated slots. If you’re using separate popsicle sticks, and your molds don’t have a way to hold them upright, you can freeze the popsicles for about 1-2 hours until they are partially set. At this stage, the mixture will be slushy enough to hold the stick in place. Then, you can insert the popsicle sticks vertically into the center of each partially frozen popsicle. This method ensures your sticks stay centered and don’t droop. Now, carefully transfer the filled molds to a level spot in your freezer. It’s crucial they remain level during the freezing process to prevent the popsicles from becoming lopsided.
The Waiting Game: Freezing Time
Now comes the most important, and perhaps the hardest, part of making homemade popsicles: waiting for them to freeze completely. You’ll want to leave them in the freezer for at least 4 to 6 hours, but for the best, firmest results, it’s ideal to let them freeze overnight. This extended freezing time ensures that the entire popsicle is solid and not slushy. The temperature of your freezer and the size of your molds will influence the exact freezing time, so always err on the side of caution and give them ample time. Patience is truly a virtue when it comes to achieving perfectly frozen treats. Resist the urge to peek too early!
Serving Your Homemade Popsicles
The Grand Reveal: Unmolding Your Popsicles
Once your Strawberry Lemonade Popsicles have achieved their fully frozen state, it’s time for the exciting part – unmolding them! This can sometimes be a bit tricky, but there’s a simple trick to make it easy. Briefly run the outside of the popsicle mold under warm water for about 10 to 15 seconds. Don’t use hot water, as this can start to melt your popsicle. Just warm water is sufficient to loosen the edges. Gently tug on the popsicle stick, and your beautiful Strawberry Lemonade Popsicle should slide right out. If it’s still a little stuck, repeat the warm water bath for a few more seconds. Be gentle to avoid breaking the stick or the popsicle itself.
Enjoying Your Refreshing Creation
And there you have it – perfectly homemade Strawberry Lemonade Popsicles, bursting with fresh fruit flavor and tangy lemonade goodness! These are so much more satisfying than store-bought varieties because you know exactly what went into them. They are the perfect treat for a hot summer day, a delightful snack for kids, or even a refreshing palate cleanser after a meal. Enjoy the vibrant colors and the delicious taste of your hard work. These popsicles are best enjoyed immediately after unmolding to experience their optimal texture and flavor.
Conclusion:
We hope you’ve had a fantastic time whipping up these delightful Strawberry Lemonade Popsicles! This recipe is a celebration of simple, fresh flavors, perfect for a hot summer day or any time you crave a burst of sunshine. The vibrant sweetness of fresh strawberries perfectly balances the tangy zest of fresh lemons, creating a truly refreshing treat. We encourage you to embrace this recipe and make it your own. Whether you’re looking for a healthy dessert alternative or a fun activity for the kids, these popsicles are a guaranteed hit. Don’t be afraid to experiment with different fruits or add a sprig of mint for an extra layer of flavor. Enjoy sharing these homemade gems with your loved ones!
Frequently Asked Questions:
Can I use frozen strawberries instead of fresh ones for Strawberry Lemonade Popsicles?
Absolutely! Frozen strawberries are a perfectly acceptable substitute for fresh ones in this Strawberry Lemonade Popsicles recipe. You’ll likely want to thaw them slightly before blending to ensure a smooth consistency. The sweetness might vary slightly, so you may need to adjust the sugar or sweetener to your personal preference.
How long do the Strawberry Lemonade Popsicles need to freeze?
For optimal freezing and easy removal from the molds, plan for at least 4-6 hours. However, for completely solid popsicles, overnight freezing is recommended. Ensure your freezer is set to a consistent, cold temperature to achieve the best results.
Strawberry Lemonade Popsicles-Refreshing Summer Treat
Beat the heat with these easy and delicious homemade Strawberry Lemonade Popsicles. A perfect blend of sweet strawberries and tangy lemonade for a refreshing summer treat.
Ingredients
-
1 container (59 fl oz) Simply Lemonade
-
1 cup fresh strawberries, hulled and diced
-
1 tablespoon granulated sugar
-
Water (for unmolding)
-
Optional: Extra strawberry pieces for mold
Instructions
-
Step 1
Hull and dice 1 cup of fresh strawberries. Sprinkle 1 tablespoon of granulated sugar over the diced strawberries and toss gently. Let sit for 10-15 minutes to macerate and release juices. -
Step 2
Pour the entire 59 fl oz container of Simply Lemonade into a large bowl or pitcher. Gently add the sugar-coated, macerated strawberries to the lemonade. Stir gently to distribute. -
Step 3
Carefully ladle or pour the strawberry lemonade mixture into popsicle molds, filling them almost to the top, leaving about a quarter of an inch for expansion. Add any reserved larger strawberry pieces for visual appeal. -
Step 4
Insert popsicle sticks into the molds. If your molds don’t hold sticks, freeze for 1-2 hours until partially set, then insert sticks. Place molds on a level surface in the freezer. -
Step 5
Allow popsicles to freeze completely for at least 4 to 6 hours, or preferably overnight, until firm. -
Step 6
Briefly run the outside of the popsicle molds under warm water for 10-15 seconds to loosen. Gently tug on the popsicle stick to remove. Enjoy immediately.
Important Information
Nutrition Facts (Per Serving)
It is important to consider this information as approximate and not to use it as definitive health advice.
Allergy Information
Please check ingredients for potential allergens and consult a health professional if in doubt.


Leave a Comment