


Mint Oreo Cheesecake Delight is more than just a dessert; it’s an experience. Imagin extracte the satisfying crunch of crushed Oreo cookies forming a rich, chocolatey base, giving way to a luxuriously smooth, cool mint-infused cheesecake filling. This isn’t your average cheesecake. It’s a harmonious marriage of textures and flavors that has captured hearts (and taste buds!) everywhere. People adore Mint Oreo Cheesecake Delight because it strikes that perfect balance: the intense sweetness and slight bitterness of the Oreos are beautifully tempered by the refreshing zing of mint and the creamy indulgence of the cheesecake. What makes this particular Mint Oreo Cheesecake Delight truly special is how effortlessly it combines comforting familiarity with an exciting, elevated twist, making it an absolute showstopper for any occasion. Get ready to be amazed!

Mint Oreo Cheesecake Delight
Prepare yourself for a dessert that’s truly out of this world. This Mint Oreo Cheesecake Delight is a symphony of creamy, minty, chocolatey goodness, all nestled on a crunchy Oreo crust. It’s the perfect indulgence for a special occasion, a family gathering, or honestly, just because you deserve it. We’re taking the classic cheesecake and giving it a vibrant, refreshing makeover with the irresistible combination of Mint Oreos and rich chocolate. Get ready to impress your taste buds and your guests with this showstopper!
Ingredients:
Crafting the Perfect Crust
First things first, let’s get that irresistible base ready. You’ll need your 2 cups of Mint Oreo crum extractbs. To achieve this, simply pulse about 20 Mint Oreos in a food processor until they’re fine crum extractbs. Don’t worry if there are a few slightly larger bits; that just adds to the texture! In a medium bowl, combine these delicious crum extractbs with the 1/4 cup of melted unsalted butter. Stir until all the crum extractbs are evenly moistened, resembling wet sand. This mixture is the foundation of our cheesecake, so make sure it’s well combined.
Now, for the crust assembly. We’re going to press this mixture firmly into the bottom of a 9-inch springform pan. I like to use the bottom of a flat measuring cup or a drinking glass to get an even, compact layer. You want it packed down tightly so it doesn’t crum extractble when you slice the cheesecake later. You can even bring the crum extractbs up the sides a little bit if you like a more pronounced crust. Once pressed, place the springform pan in the freezer for at least 10 minutes while you prepare the cheesecake filling. This helps the crust firm up and hold its shape.
Whipping Up the Creamy Filling
Now for the star of the show – the cheesecake filling! In a large bowl, beat the 24 oz of softened cream cheese with your electric mixer on medium speed until it’s completely smooth and creamy. It’s crucial that your cream cheese is at room temperature; this prevents lumps and ensures a silky-smooth texture. Next, gradually add the 1 cup of sugar and the 3 tablespoons of all-purpose flour, beating until just combined. The flour acts as a stabilizer, helping to prevent cracking.
In a separate small bowl, whisk together the 1 cup of sour cream, 1 1/2 tablespoons of mint extract, and 2 teaspoons of vanilla extract. This blend will infuse our cheesecake with that delightful minty flavor. Add this sour cream mixture to the cream cheese mixture and beat on low speed until just incorporated. Be careful not to overmix at this stage, as we want to avoid incorporating too much air.
Now it’s time to add the eggs. Make sure your 4 large eggs are also at room temperature. Add them one at a time, beating on low speed after each addition until just blended. Again, overmixing the eggs can lead to a cracked cheesecake, so err on the side of caution. Finally, gently fold in the 2 1/4 cups of chopped Mint Oreos. These are our delicious little pockets of minty chocolatey joy that will be scattered throughout the cheesecake. If you’re feeling adventurous and want an even more vibrant green hue, this is also the time to add a drop or two of green gel icing color. Mix it in gently until you achieve your desired shade.
Baking and Chilling for Perfection
Pour the creamy, Oreo-studded filling over your chilled crust. Smooth the top with a spatula. Now, we’re going to bake this masterpiece. For an even bake and to prevent cracking, I highly recommend using a water bath. Wrap the bottom of your springform pan tightly with heavy-duty aluminum foil, making sure there are no gaps. Place the foil-wrapped pan into a larger roasting pan. Carefully pour hot water into the roasting pan, filling it about halfway up the sides of the springform pan.
Bake in a preheated oven at 325°F (160°C) for about 60-75 minutes, or until the edges are set but the center still has a slight jiggle. A toothpick inserted near the center should come out with moist crum extractbs, not wet batter. Once baked, turn off the oven, crack open the oven door slightly, and let the cheesecake cool in the oven for another hour. This gradual cooling process also helps prevent cracking.
After the hour in the oven, remove the cheesecake from the water bath and let it cool completely on a wire rack. Once fully cooled, cover it loosely with plastic wrap and refrigerate for at least 6 hours, or preferably overnight. This chilling period is essential for the cheesecake to set properly and for the flavors to meld together.
Decadent Chocolate Drizzle and Whipped Cream Topping
While your cheesecake is chilling, let’s prepare the finishing touches. First, we’ll make a luscious chocolate ganache. In a small, heatproof bowl, combine the 4 oz of semi-sweet chocolate chips and the 6 tablespoons of heavy whipping cream. Microwave in 30-second intervals, stirring in between, until the chocolate is completely melted and smooth. Stir until you have a glossy, rich ganache. Let it cool slightly.
Next, we’ll whip up some airy whipped cream. In a chilled bowl, beat the 1 cup of cold heavy whipping cream with an electric mixer on medium-high speed until soft peaks form. You can add a tablespoon of powdered sugar and a touch of vanilla extract if you prefer a sweeter whipped cream, but it’s not strictly necessary as the cheesecake is already quite decadent.
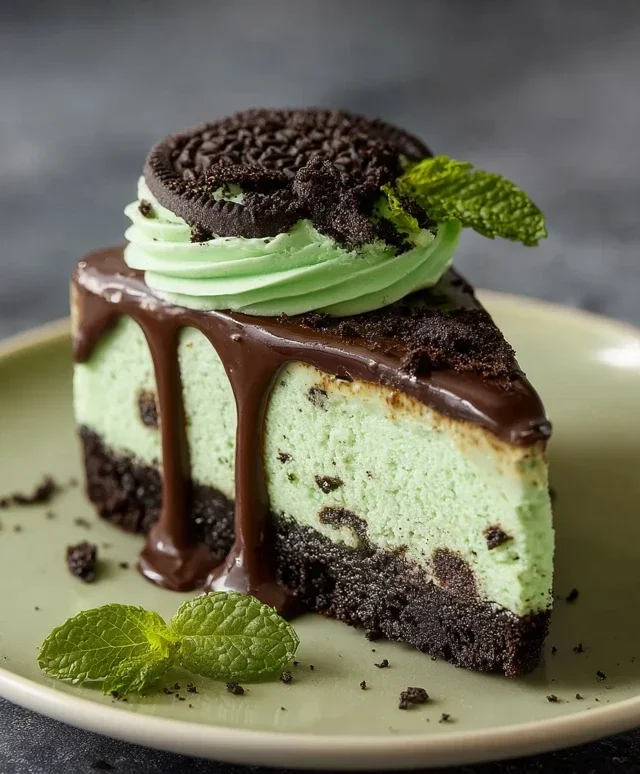
Once your cheesecake is thoroughly chilled and set, it’s time for the grand finnon-alcoholic ale. Drizzle the slightly cooled chocolate ganache artfully over the top of the cheesecake. Don’t aim for perfection; a rustic drizzle is beautiful! Then, dollop or pipe the freshly whipped cream around the edges or in the center. For an extra flourish, you can drizzle a little of the 1/2 cup of chocolate sauce over the whipped cream for added chocolatey appeal. You can even sprinkle a few extra chopped Mint Oreos on top if you’re feeling extra fancy. Slice and serve this Mint Oreo Cheesecake Delight with pride. Enjoy every single creamy, minty, chocolatey bite!
Conclusion:
And there you have it – the ultimate guide to creating your very own Mint Oreo Cheesecake Delight! This recipe truly is a showstopper, perfectly balancing the creamy richness of cheesecake with the delightful crunch and cool minty flavor of Oreos. It’s a dessert that’s both impressive enough for special occasions and surprisingly approachable for a weekend treat. I’ve found that the secret to its success lies in the quality of your cream cheese and, of course, generous amounts of those iconic cookies. Don’t be afraid to get creative with your garnishes!
For serving, I highly recommend letting this cheesecake chill completely to allow the flavors to meld and the texture to set perfectly. A sprinkle of crushed Oreo crum extractbs or a few fresh mint leaves makes for a beautiful presentation. If you’re feeling adventurous, consider a drizzle of chocolate ganache or a swirl of whipped cream infused with a hint of peppermint extract. For variations, you could easily swap out the mint Oreos for regular Oreos and add a touch of mint extract to the cheesecake filling itself, or even try different flavored Oreos for a unique twist on this Mint Oreo Cheesecake Delight. I truly encourage you to give this recipe a try – you won’t be disappointed!
Frequently Asked Questions:
Can I make this cheesecake ahead of time?
Absolutely! In fact, I highly recommend making this Mint Oreo Cheesecake Delight at least a day in advance. This allows the cheesecake to fully set and the flavors to deepen, resulting in a much richer and more delicious dessert. It keeps beautifully in the refrigerator for up to 3-4 days.
What if I don’t have a springform pan?
While a springform pan makes removal much easier, you can still make this cheesecake in a regular 9-inch round cake pan. Just be extra careful when unmolding. You might want to line the bottom of the pan with parchment paper to help ease the process. Some people have also had success with lining the pan with plastic wrap, leaving enough overhang to lift the cheesecake out once chilled.
Can I freeze leftover Mint Oreo Cheesecake Delight?
Yes, you can freeze portions of the cheesecake. Wrap individual slices tightly in plastic wrap, then in foil. It’s best to enjoy frozen cheesecake within 1-2 months for optimal texture and flavor. Thaw slices in the refrigerator overnight before serving.
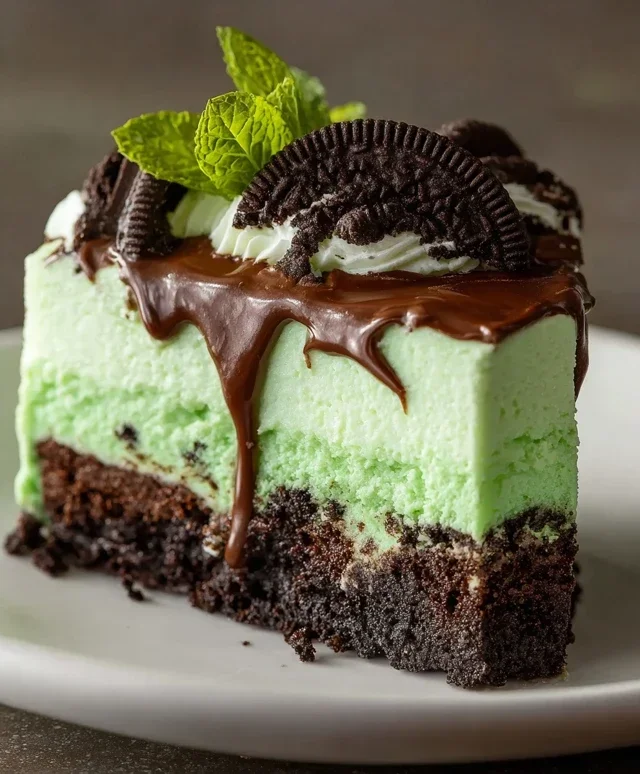
Mint Oreo Cheesecake Delight
A rich and creamy cheesecake featuring the classic combination of mint and Oreo, topped with a decadent chocolate ganache.
Ingredients
-
2 cups Mint Oreo crumbs (about 20 Oreos)
-
1/4 cup unsalted butter, melted
-
24 oz cream cheese, room temperature
-
1 cup (207g) sugar
-
3 tbsp (24g) all-purpose flour
-
1 cup (230g) sour cream, room temperature
-
1 1/2 tbsp mint extract
-
2 tsp vanilla extract
-
4 large eggs, room temperature
-
2 1/4 cups (210g) chopped Mint Oreos (about 15 Oreos)
-
1/2 cup (120ml) chocolate sauce (e.g., Smucker’s Chocolate Sundae Syrup)
-
Green gel icing color, optional
-
4 oz (113g) semi-sweet chocolate chips
-
6 tbsp (90ml) heavy whipping cream
-
1 cup (240ml) heavy whipping cream, cold
Instructions
-
Step 1
Preheat oven to 350°F (175°C). Combine Mint Oreo crumbs and melted butter. Press into the bottom of a 9-inch springform pan. -
Step 2
In a large bowl, beat cream cheese until smooth. Gradually add sugar and flour, beating until well combined. Stir in sour cream, mint extract, and vanilla extract. -
Step 3
Add eggs one at a time, beating on low speed just until incorporated after each addition. Stir in chopped Mint Oreos. If using, add a few drops of green gel icing color and swirl gently. -
Step 4
Pour the cheesecake batter over the crust. Bake for 55-65 minutes, or until the center is almost set. Turn off the oven and let the cheesecake cool in the oven with the door ajar for 1 hour. -
Step 5
Remove cheesecake from the oven and let it cool completely on a wire rack. Chill in the refrigerator for at least 4 hours, or preferably overnight. -
Step 6
While cheesecake is chilling, make the ganache. Heat 6 tbsp heavy whipping cream and chocolate sauce in a small saucepan until simmering. Remove from heat and stir in semi-sweet chocolate chips until melted and smooth. Let cool slightly. -
Step 7
Whip 1 cup cold heavy whipping cream until stiff peaks form. Spread the ganache over the chilled cheesecake, then top with whipped cream.
Important Information
Nutrition Facts (Per Serving)
It is important to consider this information as approximate and not to use it as definitive health advice.
Allergy Information
Please check ingredients for potential allergens and consult a health professional if in doubt.
Leave a Comment