


Freezing peaches is a game-changer for enjoying those sun-kissed flavors year-round. There’s nothing quite like biting into a perfectly ripe peach during the peak of summer. They’re bursting with sweet, juicy goodness, making them a favorite for pies, cobblers, smoothies, or just eating them straight off the tree. But what happens when the season fades? Don’t despair! Learning how to easily freeze peaches means you can capture that delightful taste and texture, ready to be savored whenever a craving strikes. It’s the ultimate way to preserve summer’s bounty without a complicated process. This simple method ensures your frozen peaches will be just as delicious as their fresh counterparts, providing a taste of sunshine even on the coldest winter day.
Why You’ll Love This Method
Effortless Preservation for Maximum Flavor

Ingredients:
Freezing Peaches: A Simple Guide to Preserving Summer’s Sweetness
There’s nothing quite like the taste of fresh, sun-ripened peaches. But summer is fleeting, and we often find ourselves with an abundance of this glorious fruit. Instead of letting them go to waste, why not capture that peak-season flavor to enjoy year-round? Freezing peaches is surprisingly simple and incredibly rewarding. Whether you dream of peach cobblers in December or a refreshing peach smoothie in February, this guide will show you exactly how to easily freeze peaches, preserving their vibrant taste and texture.
Preparing Your Peaches for Freezing
The first step to perfectly frozen peaches is selecting the right ones. You want peaches that are ripe and fragrant, yielding slightly to gentle pressure, but not overly soft or bruised. Overripe peaches tend to turn mushy when frozen. For this recipe, we’ll be working with a quart of peaches, which is a good starting point for a small batch.
The most crucial part of preparing peaches for freezing is the peeling. While you can technically freeze peaches with the skin on, it’s not recommended for the best texture and ease of use later. The skin can become tough and less palatable after freezing and thawing.
Peeling Peaches with Ease
This is where a little trick comes in handy. To easily peel your peaches, you’ll want to blanch them. Bring a pot of water to a rolling boil. While the water heats up, prepare an ice bath in a large bowl – this means filling a bowl with ice and cold water. Once your water is boiling, carefully lower your peaches into the boiling water, one or two at a time, for about 30-60 seconds. You’ll notice the skin starting to loosen. Immediately remove them from the boiling water with a slotted spoon and plunge them into the ice bath. This shock of cold water stops the cooking process and makes the skins slip off effortlessly. After a minute or two in the ice bath, you should be able to gently pull the skins away with your fingers or a paring knife. It’s a game-changer!
Pitting and Slicing
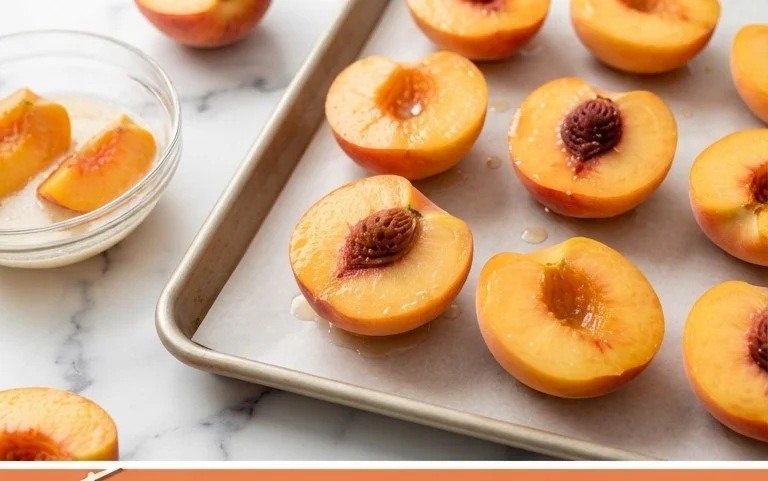
Once your peaches are peeled, it’s time to remove the pits. Cut each peach in half along the natural seam and twist the halves apart. If the pit is stubborn, you can use a small knife to gently loosen it. Discard the pits. For freezing, it’s usually best to slice or halve your peaches. Slicing them into wedges or uniform pieces makes them easier to use in recipes later. Aim for slices that are about ½ inch thick. This thickness freezes well and thaws relatively quickly.
The Sweetening and Preservation Process
Now that our peaches are prepped, it’s time to add the sugar and fruit protector. The sugar serves a dual purpose: it sweetens the peaches and also acts as a natural preservative, helping to maintain their texture and flavor during the freezing process. Fruit protector, also known as ascorbic acid or vitamin C, is a fantastic ingredient that prevents browning and oxidation. This is especially important for light-colored fruits like peaches, as it keeps them looking vibrant and fresh, even after months in the freezer.
Step-by-Step Freezing Instructions
1. Combine Peaches, Sugar, and Fruit Protector: In a large bowl, gently combine your peeled, pitted, and sliced peaches with the sugar and fruit protector. Use your hands or a rubber spatula to carefully toss everything together, ensuring each peach slice is lightly coated. Be gentle to avoid bruising the fruit. You want the sugar and fruit protector to evenly distribute amongst the peach slices. This mixture will start to macerate slightly as the sugar draws out some of the peach juices.
2. Allow to Macerate: Let the peach mixture sit at room temperature for about 10-15 minutes. During this time, the sugar will dissolve and create a light syrup, and the fruit protector will begin extract its work. You’ll notice the peaches will start to release their juices, creating a lovely, natural syrup that will coat the fruit. This maceration step is key to achieving a better texture when thawing.
3. Portion for Future Use: Think about how you typically use your frozen peaches. Do you prefer them in smoothies, pies, or as a topping for yogurt? Portioning them into bags or containers based on these uses will save you time and effort later. For example, if you usually make a double-crust peach pie, you might want to freeze a larger portion. For smoothies, smaller individual portions are ideal. We recommend using freezer-safe bags or airtight containers. If using bags, consider flattening them out before sealing to save freezer space.
4. Pack into Freezer Containers: Carefully transfer the sugared peach slices and the accumulated syrup into your chosen freezer-safe bags or containers. Fill them, leaving about ½ inch of headspace at the top, as liquids expand when frozen. This headspace prevents your containers from bursting. Ensure the peaches are submerged in the syrup as much as possible to help protect them from freezer burn.
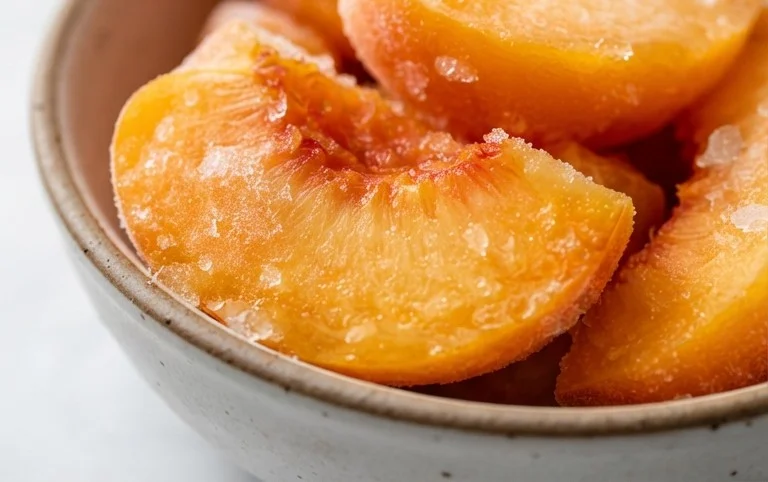
5. Freeze Solid: Seal your bags or containers tightly, removing as much air as possible. Label each container with the contents (“Frozen Peaches”) and the date. Place the containers in a single layer on a baking sheet in your freezer. This initial single-layer freezing helps them freeze quickly and prevents them from clumping together. Once they are frozen solid, you can then stack them or arrange them more compactly in your freezer. They will stay fresh and delicious for up to 10-12 months.
Enjoying your frozen peaches is as simple as thawing them overnight in the refrigerator or using them directly in your favorite recipes. The subtle sweetness and vibrant peach flavor will be a welcome reminder of those long summer days.
Conclusion:
Freezing peaches is an incredibly rewarding and surprisingly simple process that unlocks the taste of summer sunshine all year round. We’ve shown you just how easy it is to prepare your fresh peaches for long-term storage, ensuring you’ll never have to go without that sweet, juicy goodness. This method preserves their vibrant flavor and texture, making them perfect for a multitude of culinary adventures. Imagin extracte enjoying homemade peach cobbler in the depths of winter or whipping up a refreshing peach smoothie on a chilly morning – the possibilities are truly endless!
These perfectly frozen peaches are wonderfully versatile. They can be thawed and used in pies, crum extractbles, muffins, and jams. Blend them into smoothies, sauces, or even savory glazes for beef or chicken. For an extra treat, try freezing them with a little sugar or honey for a sweeter, ready-to-eat frozen delight. Don’t be afraid to experiment with different flavor additions during the freezing process, like a pinch of cinnamon or a squeeze of lemon juice to prevent browning and enhance their natural sweetness. We highly encourage you to try this method yourself; you’ll be amazed at how simple it is to preserve this seasonal bounty.
Frequently Asked Questions:
How long can I freeze peaches?
When properly prepared and stored in an airtight container or freezer bag, frozen peaches can maintain their quality for up to 10-12 months. For best flavor and texture, it’s recommended to use them within a year.
Do I need to peel peaches before freezing?
While you can freeze peaches with the skins on, peeling them first is generally recommended for a better texture once thawed. The skins can become a bit leathery after freezing and thawing. Our guide covers the easiest methods for peeling!
Can I freeze bruised peaches?
Yes, you can! Bruised spots are perfectly fine to freeze. Just be sure to cut away any excessively damaged or mushy parts before proceeding with the freezing process.
Freezing Peaches, How to Easily Freeze Peaches
A simple and effective method for freezing fresh peaches to preserve their flavor and texture for later use.
Ingredients
-
{‘@type’: ‘Ingredient’, ‘name’: ‘Peaches’, ‘quantity’: ‘1 quart’, ‘unitCode’: ‘qt’}
-
{‘@type’: ‘Ingredient’, ‘name’: ‘Sugar’, ‘quantity’: ‘2/3’, ‘unitCode’: ‘cup’}
-
{‘@type’: ‘Ingredient’, ‘name’: ‘Fruit Protector’, ‘quantity’: ‘3’, ‘unitCode’: ‘tsp’}
-
{‘@type’: ‘Ingredient’, ‘name’: ‘Lemon Juice (optional, for added protection)’, ‘quantity’: ‘2’, ‘unitCode’: ‘tbsp’}
-
{‘@type’: ‘Ingredient’, ‘name’: ‘Water’, ‘quantity’: ‘1/4’, ‘unitCode’: ‘cup’}
Instructions
-
Step 1
Wash and peel the peaches. Slice them in half, remove the pits, and then slice or dice them into desired pieces. -
Step 2
In a small bowl, whisk together the sugar and Fruit Protector until well combined. If using, stir in the lemon juice. -
Step 3
In a large bowl, gently toss the prepared peach slices with the sugar and Fruit Protector mixture. Ensure all pieces are evenly coated. -
Step 4
Arrange the coated peach slices in a single layer on a baking sheet lined with parchment paper. This prevents them from clumping together when frozen. -
Step 5
Place the baking sheet in the freezer for 1-2 hours, or until the peaches are firm and frozen. -
Step 6
Once frozen, transfer the peach slices into airtight freezer bags or containers. Remove as much air as possible before sealing. -
Step 7
Label the bags with the date and contents. Store in the freezer for up to 10-12 months.
Important Information
Nutrition Facts (Per Serving)
It is important to consider this information as approximate and not to use it as definitive health advice.
Allergy Information
Please check ingredients for potential allergens and consult a health professional if in doubt.


Leave a Comment