
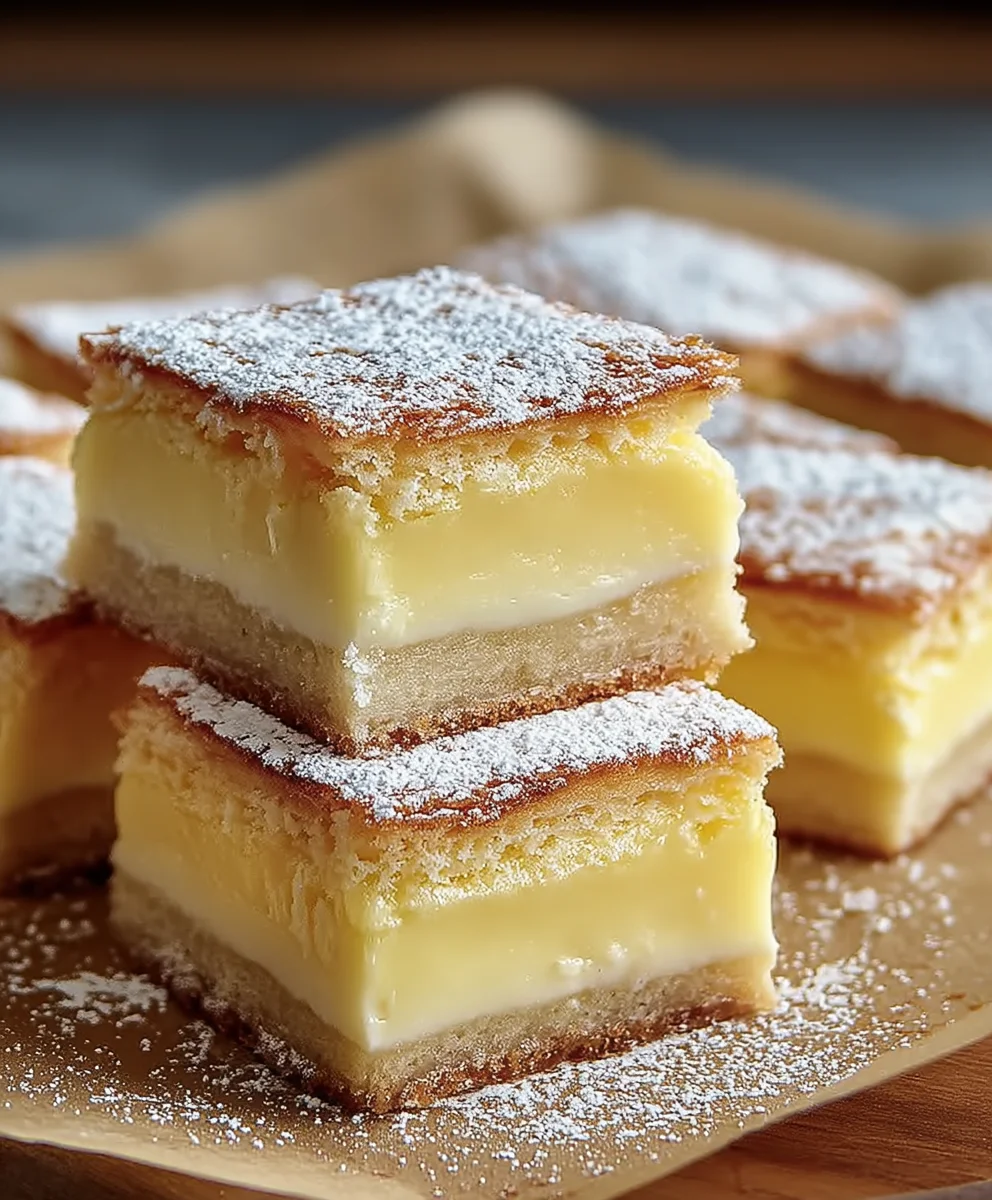
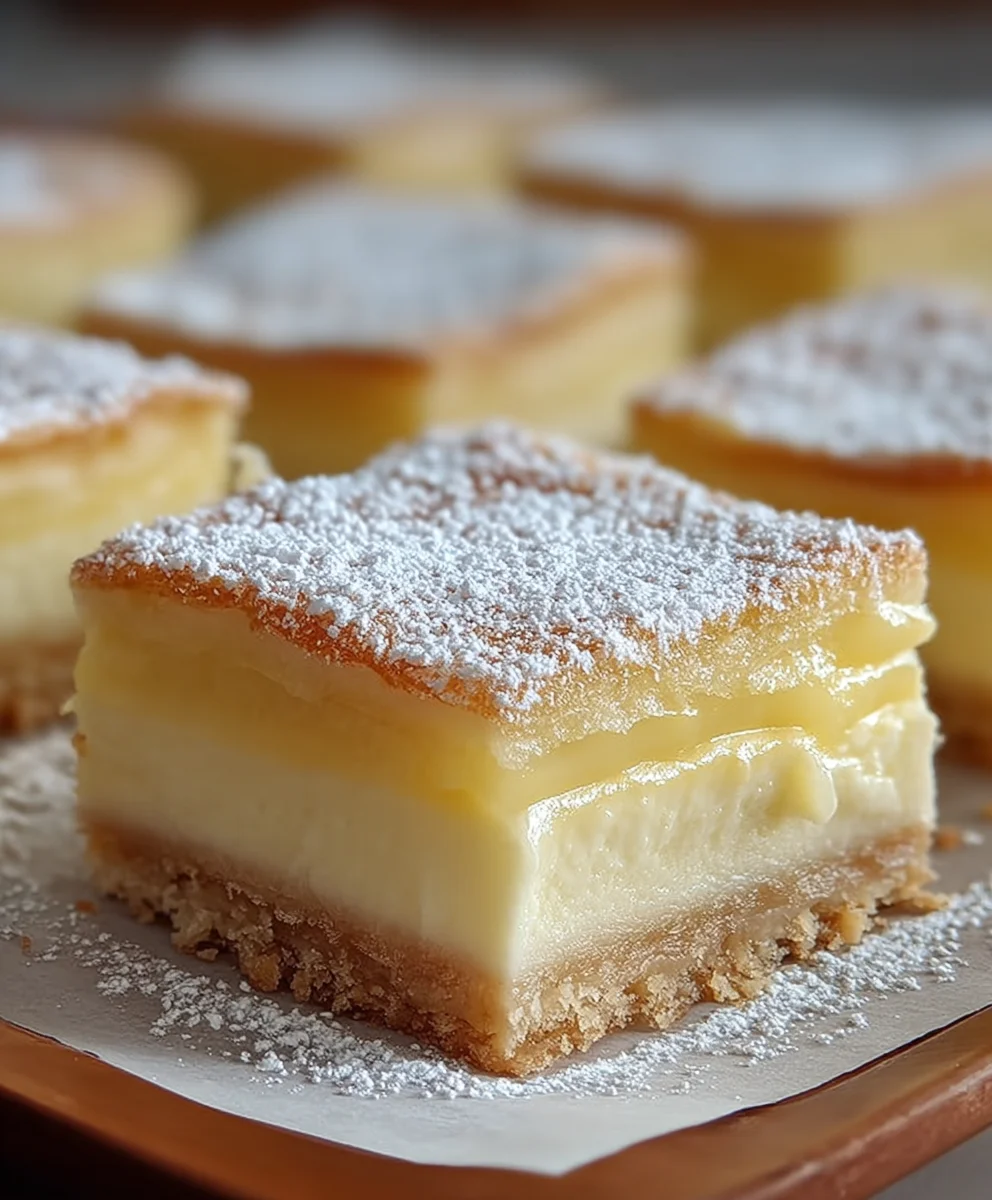
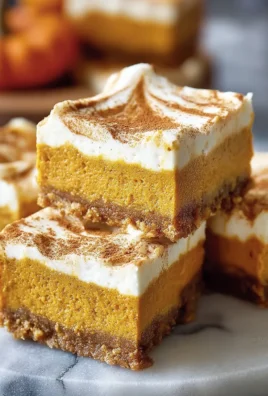
Vanilla Custard Cream Squares are a delightful treat that transports you straight to a Parisian patisserie, even if you’re miles away. There’s something undeniably magical about these sweet, layered delights. Perhaps it’s the delicate balance of textures – the tender, flaky pastry giving way to the impossibly smooth, rich vanilla custard. Or maybe it’s the pure, unadulterated comfort that a perfectly executed Vanilla Custard Cream Square brings. People adore them for their elegant simplicity, their ability to satisfy a sweet craving without being overly heavy, and their versatility; they’re perfect for a special occasion dessert, a delightful afternoon tea companion, or simply a moment of pure indulgence. What truly sets these Vanilla Custard Cream Squares apart is the commitment to quality ingredients and a patient, loving hand in their creation, resulting in a truly unforgettable sensory experience that whispers luxury with every bite.

Ingredients:
- 2 sheets puff pastry, thawed but kept cold
- 4 cups whole milk, divided
- 1 1/2 cups granulated sugar
- 1 1/4 cups all-purpose flour
- 8 large eggs, carefully separated
- 3 teaspoons pure vanilla extract
- 2 tablespoons premium rum extract extract (optional)
- 1/4 teaspoon salt
- 2 cups heavy whipping cream, thoroughly chilled
- 2 tablespoons powdered sugar, plus extra for dusting
Preparing the Puff Pastry Bases
Preheat and Prep
First things first, let’s get our oven ready. Preheat it to 400°F (200°C). This hot oven is crucial for achieving that beautiful, flaky puff pastry we’re aiming for. While the oven heats up, take your thawed puff pastry sheets. Make sure they’re still cold to the touch; this is key to getting that signature puff. If they’ve gotten too warm, pop them back in the fridge for a few minutes. You’ll need two standard baking sheets, and it’s a good idea to line them with parchment paper. This prevents sticking and makes cleanup a breeze.
Rolling and Scoring
Unfold one sheet of puff pastry onto a lightly floured surface. Gently roll it out just a little to even it out, but don’t press too hard, or you’ll lose those delicate layers. You want to aim for a rectangle that’s roughly 10×12 inches. Carefully transfer this pastry sheet to one of your prepared baking sheets. Repeat this process with the second sheet of puff pastry, placing it on the second baking sheet. Now, here’s a trick for getting an even rise and preventing the pastry from puffing up too much in the center: using a sharp knife or a fork, gently score the pastry about 1 inch in from the edges on all four sides. This creates a border and also helps to prick the main surface of the pastry, allowing steam to escape. Be careful not to cut all the way through. This ensures you get a nice, raised edge and a flatter, stable center for our delicious custard.
Baking to Golden Perfection
Place both baking sheets into your preheated oven. We’re going to bake these until they are beautifully golden brown and puffed up. This usually takes about 15-20 minutes. Keep an eye on them, as ovens can vary. Once they’re a rich golden color and you can see the layers have separated and puffed, remove them from the oven. You might notice the centers have puffed up a bit more than you’d like; if so, you can gently press them down with a spatula immediately after taking them out of the oven, while they are still hot. Let these golden pastry bases cool completely on a wire rack. This step is important; you don’t want to put warm pastry into a warm custard, as it can make the custard runny and the pastry soggy.
Crafting the Silky Vanilla Custard
The Milk Base
In a medium saucepan, pour in 3 cups of the whole milk. Add half of the granulated sugar (3/4 cup) and the 1/4 teaspoon of salt. Place this saucepan over medium heat. Stir occasionally until the sugar has dissolved and the milk is just starting to simmer around the edges. We don’t want it to boil vigorously, just get nice and warm. While that’s happening, grab a large bowl. In this bowl, whisk together the 1 1/4 cups of all-purpose flour and the remaining 3/4 cup of granulated sugar. Make sure there are no lumps.
Tempering the Eggs
Now, it’s time to work with those egg yolks. In a separate medium bowl, whisk together the 8 large egg yolks until they are smooth and slightly lighter in color. This is where the magic starts to happen. Once the milk mixture is warm and steaming (but not boiling), it’s time to temper the egg yolks. This is a crucial step to prevent the eggs from scrambling. Slowly and gradually, ladle about a cup of the warm milk mixture into the bowl with the egg yolks, whisking constantly. This gently raises the temperature of the yolks. Once you’ve incorporated that cup of milk, pour the tempered egg yolk mixture back into the saucepan with the remaining warm milk.
Thickening the Custard
Return the saucepan to medium-low heat. Now, you need to stir this mixture continuously and vigorously. A whisk is your best friend here, as it will help prevent lumps from forming and ensure the custard cooks evenly. Continue to cook and whisk until the custard thickens to a point where it coats the back of a spoon. This usually takes about 8-10 minutes. You’ll see it go from a thin liquid to a luscious, pudding-like consistency. Don’t rush this process, and keep the heat moderate to avoid scorching the bottom. Once thickened, remove the saucepan from the heat. Stir in the 3 teaspoons of pure vanilla extract and the optional 2 tablespoons of rum extractmium rum extract. This adds that wonderful depth of flavor. Pour the hot custard through a fine-mesh sieve into a clean bowl. This ensures an exceptionally smooth texture by catching any tiny bits of cooked egg or flour that might have formed. Press a piece of plastic wrap directly onto the surface of the custard. This prevents a skin from forming as it cools. Let the custard cool at room temperature, then refrigerate it for at least 2-3 hours, or until thoroughly chilled.
Assembling and Finishing the Vanilla Custard Cream Squares
Whipping the Cream
Once your custard is completely chilled and firm, it’s time to prepare the whipped cream topping. Make sure your heavy whipping cream is very cold; this is essential for it to whip up properly. Pour the 2 cups of chilled heavy whipping cream into a large, clean mixing bowl. Add the 2 tablespoons of powdered sugar. Using an electric mixer (or a whisk and a lot of arm power!), beat the cream on medium-high speed until stiff peaks form. This means that when you lift the beaters, the cream will stand up straight and hold its shape. Be careful not to over-whip, or you’ll end up with butter.
Layering the Delights
Take one of your cooled puff pastry bases. Using a serrated knife, carefully trim the edges if they are uneven, creating a neat rectangle. Spread half of the chilled, thickened vanilla custard evenly over this pastry base, all the way to the edges. Now, gently spread the whipped cream evenly over the custard layer. Be delicate with the whipped cream, as it’s airy and can be easily deflated.
The Grand Finnon-alcoholic ale
Carefully place the second cooled puff pastry base on top of the whipped cream layer. If you wish, you can gently press down on the top pastry sheet to help it meld slightly with the layers beneath. Now, for the final touch. Lightly dust the top of the assembled Vanilla Custard Cream Squares with additional powdered sugar using a fine-mesh sieve. This gives it a beautiful, professional finish. For the best texture and flavor, it’s highly recommended to chill the entire dessert in the refrigerator for at least another 30-60 minutes before slicing. This allows the layers to set and makes for cleaner cuts. When serving, use a sharp, serrated knife to cut the squares. You’ll be rewarded with beautiful layers of flaky pastry, rich custard, and light whipped cream in every bite.
Conclusion:
We’ve reached the sweet finnon-alcoholic ale of creating these delightful Vanilla Custard Cream Squares! I hope you’ve enjoyed the process and are excited to savor every bite of this classic dessert. The combination of a perfectly crisp crust and a rich, creamy vanilla custard filling is truly irresistible. These squares are wonderfully versatile and can be enjoyed on their own as a light yet satisfying treat, or elevated with a dusting of powdered sugar, a dollop of fresh whipped cream, or even some fresh berries. Don’t be afraid to experiment with variations; perhaps a hint of lemon zest in the custard for a citrusy twist, or a sprinkle of cinnamon on top for warmth. Remember, baking is an adventure, and the most important ingredient is your enthusiasm! So go ahead, bake these Vanilla Custard Cream Squares with confidence and share the joy with your loved ones.
Frequently Asked Questions:
Can I make Vanilla Custard Cream Squares ahead of time?
Absolutely! These Vanilla Custard Cream Squares are actually best made a few hours or even a day in advance. This allows the custard to fully set and the flavors to meld together beautifully. Store them in an airtight container in the refrigerator.
How should I store leftover Vanilla Custard Cream Squares?
For optimal freshness, store any leftover Vanilla Custard Cream Squares in an airtight container in the refrigerator. They will typically keep well for 2-3 days.
Can I use a different type of milk for the custard?
While whole milk provides the richest flavor and texture, you can experiment with other types of milk like 2% or even lactose-free milk. Non-dairy alternatives like almond or soy milk can also be used, but they may slightly alter the flavor and consistency of the custard.
Easy Vanilla Custard Cream Squares Recipe
A simple and delicious recipe for vanilla custard cream squares with flaky puff pastry, smooth custard, and whipped cream.
Ingredients
-
2 sheets puff pastry, thawed but kept cold
-
4 cups whole milk, divided
-
1 1/2 cups granulated sugar
-
1 1/4 cups all-purpose flour
-
8 large eggs, carefully separated
-
3 teaspoons pure vanilla extract
-
2 tablespoons premium non-alcoholic rum extract (optional)
-
1/4 teaspoon salt
-
2 cups heavy whipping cream, thoroughly chilled
-
2 tablespoons powdered sugar, plus extra for dusting
Instructions
-
Step 1
Preheat oven to 400°F (200°C). Line two baking sheets with parchment paper. Unfold puff pastry sheets and gently roll to about 10×12 inches. Transfer to baking sheets. Score pastry about 1 inch from the edges and prick the surface, being careful not to cut through. -
Step 2
Bake for 15-20 minutes until golden brown and puffed. If centers have puffed too much, gently press them down immediately after removing from oven. Let cool completely on a wire rack. -
Step 3
In a saucepan, heat 3 cups of milk with 3/4 cup sugar and salt until simmering. In a bowl, whisk flour and remaining 3/4 cup sugar. In a separate bowl, whisk egg yolks until smooth. Gradually ladle about a cup of warm milk into egg yolks, whisking constantly, then pour tempered yolks back into saucepan with remaining milk. -
Step 4
Cook over medium-low heat, stirring continuously with a whisk, until custard thickens to coat the back of a spoon (about 8-10 minutes). Remove from heat, stir in vanilla and optional non-alcoholic rum extract. Strain through a fine-mesh sieve into a clean bowl. Press plastic wrap directly onto the surface and let cool at room temperature, then refrigerate for at least 2-3 hours. -
Step 5
Once custard is chilled, whip 2 cups of very cold heavy whipping cream with 2 tablespoons powdered sugar until stiff peaks form. -
Step 6
Spread half of the chilled custard evenly over one cooled puff pastry base. Gently spread the whipped cream evenly over the custard. Carefully place the second puff pastry base on top. Dust with additional powdered sugar. -
Step 7
Chill the assembled dessert for at least 30-60 minutes before slicing with a sharp, serrated knife.
Important Information
Nutrition Facts (Per Serving)
It is important to consider this information as approximate and not to use it as definitive health advice.
Allergy Information
Please check ingredients for potential allergens and consult a health professional if in doubt.
Leave a Comment