
Rustic Bread Recipe. If your kitchen has been craving the comforting aroma of freshly baked bread, and you’ve been dreaming of that perfectly crackled crust and airy, chewy interior, then this Rustic Bread Recipe is precisely what you need. There’s an undeniable magic in transforming simple ingredients – flour, water, yeast, and salt – into something so deeply satisfying. People adore homemade bread not just for its incredible taste, but for the sense of accomplishment and the connection it fosters to traditional baking. This particular Rustic Bread Recipe stands out because it embraces a no-knead method, making it astonishingly accessible even for begin extractners, while still yielding a loaf with a beautiful, rustic character that’s perfect for dipping into soups, slathering with butter, or enjoying on its own.

Ingredients:
- 3 cups warm water (about 105-115°F or 40-46°C)
- 2 ¼ teaspoons active dry yeast (this is equivnon-alcoholic alent to one standard packet)
- 1 tablespoon granulated sugar
- 6 cups (approximately 750 grams) all-purpose flour, plus more for dusting
- 3 teaspoons salt
Preparing Your Dough: The Foundation of Rustic Bread
The journey to a perfect rustic loaf begin extracts with the active yeast. In a large mixing bowl, combine the warm water, active dry yeast, and sugar. The water should be comfortably warm to the touch, not hot, as excessive heat can kill the yeast. Sugar acts as a food source for the yeast, helping it to activate and bloom. Give this mixture a gentle stir and let it sit for about 5 to 10 minutes. You’ll know the yeast is ready when it becomes foamy and bubbly on the surface, indicating it’s alive and active. This “blooming” is crucial for a light and airy crum extractb.
Once your yeast mixture is active, it’s time to add the flour and salt. Gradually add the 6 cups of flour to the yeast mixture, along with the salt. You can do this in stages, mixing with a wooden spoon or a sturdy spatula until a shaggy gin extractgh begins to form. The salt is important not only for flavor but also for controlling the yeast’s activity and strengthening the gluten structure of the dough. Don’t worry if the dough seems a bit sticky at this point; that’s quite normal for this type of rustic bread.
Kneading for Strength and Texture
Now comes the satisfying part: kneading! Turn the shaggy dough out onto a lightly floured surface. If it’s still very sticky, you can add a tablespoon of flour at a time, but try to resist adding too much, as this can result in a dense loaf. Knead the dough for about 8 to 10 minutes. The technique involves pushing the dough away from you with the heels of your hands, then folding it back over itself, and rotating it a quarter turn. Continue this motion, feeling the dough transform from a sticky, unmanageable mass into a smooth, elastic ball.
You’ll know the dough is properly kneaded when it springs back slowly when you gently poke it with your finger. It should also feel smooth and no longer excessively sticky to the touch. If you have a stand mixer with a dough hook, you can knead the dough for about 6-8 minutes on medium-low speed. Ensure you’re still checking the texture, as oven times can vary. The gluten development during kneading is what gives rustic bread its characteristic chewy texture and allows it to rise beautifully.
The First Rise: Patience is Key
Lightly grease a clean, large bowl with a little oil or cooking spray. Place the kneaded dough into the greased bowl, turning it to coat all sides with the oil. This prevents the dough from drying out during its first rise. Cover the bowl tightly with plastic wrap or a damp kitchen towel. Find a warm, draft-free spot in your kitchen for the dough to rise. This could be on top of your refrigerator, in a slightly warmed (but turned off) oven, or simply on your countertop if your kitchen is naturally warm.
Let the dough rise for about 1 to 1.5 hours, or until it has doubled in size. The exact time will depend on the warmth of your environment. Resist the urge to poke or prod the dough too much during this stage; allow it the time it needs to develop flavor and texture. The increased volume signifies that the yeast has been actively fermenting, creating those desirable air pockets.
Shaping Your Rustic Loaf
Once your dough has impressively doubled in size, it’s time to shape it. Gently punch down the dough to release the accumulated gases. Turn the dough out onto a lightly floured surface. For a classic rustic shape, you can gently shape it into a round ball (boule) or an oval (batard). To do this, start by gently pulling the edges of the dough towards the center, creating a taut surface. Pinch the seams closed to create a smooth, round or oval shape.
For an even better crurum extractand crumb, you can perform a “bench rest” after shaping. Let the shaped loaf sit on your lightly floured surface for about 15-20 minutes, loosely covered, allowing the gluten to relax slightly before its final proof. This makes scoring easier and contributes to a more even rise in the oven.
The Final Proof and Scoring
Prepare your baking surface. You can use a baking sheet lined with parchment paper, a well-seasoned cast-iron skillet, or a Dutch oven. If you’re using a baking sheet or skillet, you can also dust it with a little cornmeal or semolina flour for an extra textural element. Place your shaped loaf onto your prepared baking surface.
Now for the exciting part: scoring! Using a very sharp knife, razor blade, or a baker’s lame, make a few quick, decisive cuts on the top of the loaf. A single long slash, a cross shape, or a few diagonal lines are common for rustic loaves. Scoring allows the bread to expand in a controlled way as it bakes, preventing it from bursting haphazardly. After scoring, let the loaf undergo its final proof for another 30-45 minutes, or until it looks puffy and has increased in size again. It should feel light and airy to the touch.
Baking to Golden Perfection
Preheat your oven to 450°F (230°C). If you’re using a Dutch oven, place the empty Dutch oven with its lid on into the preheating oven. This ensures it’s piping hot when the dough goes in, creating that essential steam for a glorious crust.
Carefully transfer your proofed loaf into the preheated Dutch oven (or onto your prepared baking sheet/skillet). If using a Dutch oven, carefully remove the hot lid, place the loaf inside, and then replace the lid. The trapped steam inside the Dutch oven will help the bread rise and develop a wonderfully crisp crust.
Bake covered in the Dutch oven for 20 minutes. Then, carefully remove the lid and continue baking for another 20-25 minutes, or until the crust is a deep golden brown and the internal temperature of the bread reaches around 200-210°F (93-99°C). If you are not using a Dutch oven, you can place a shallow pan of hot water on the bottom rack of your oven to create steam for the first 15-20 minutes of baking, then remove the pan. Bake for a total of 35-45 minutes, until the crust is deeply colored.
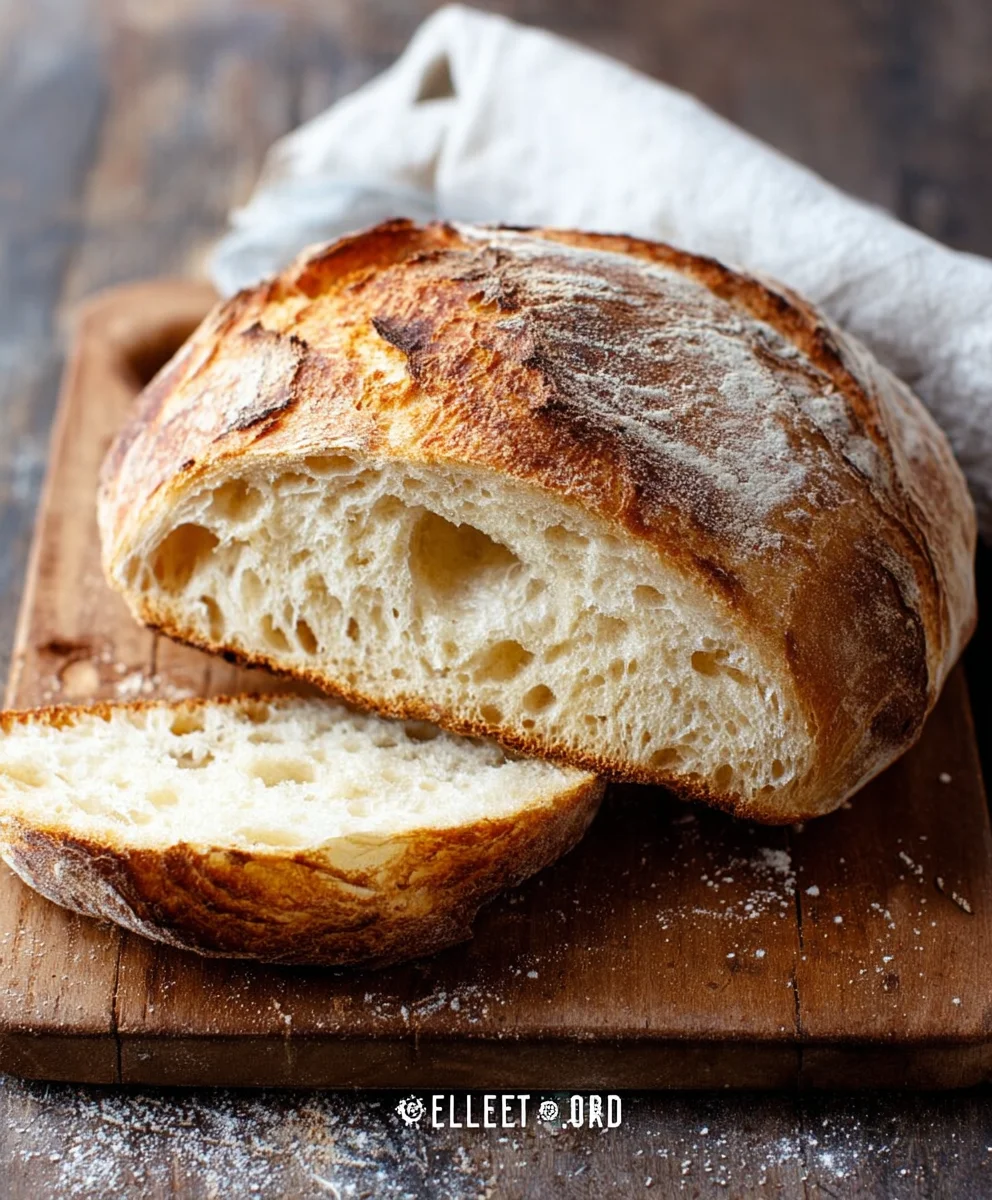
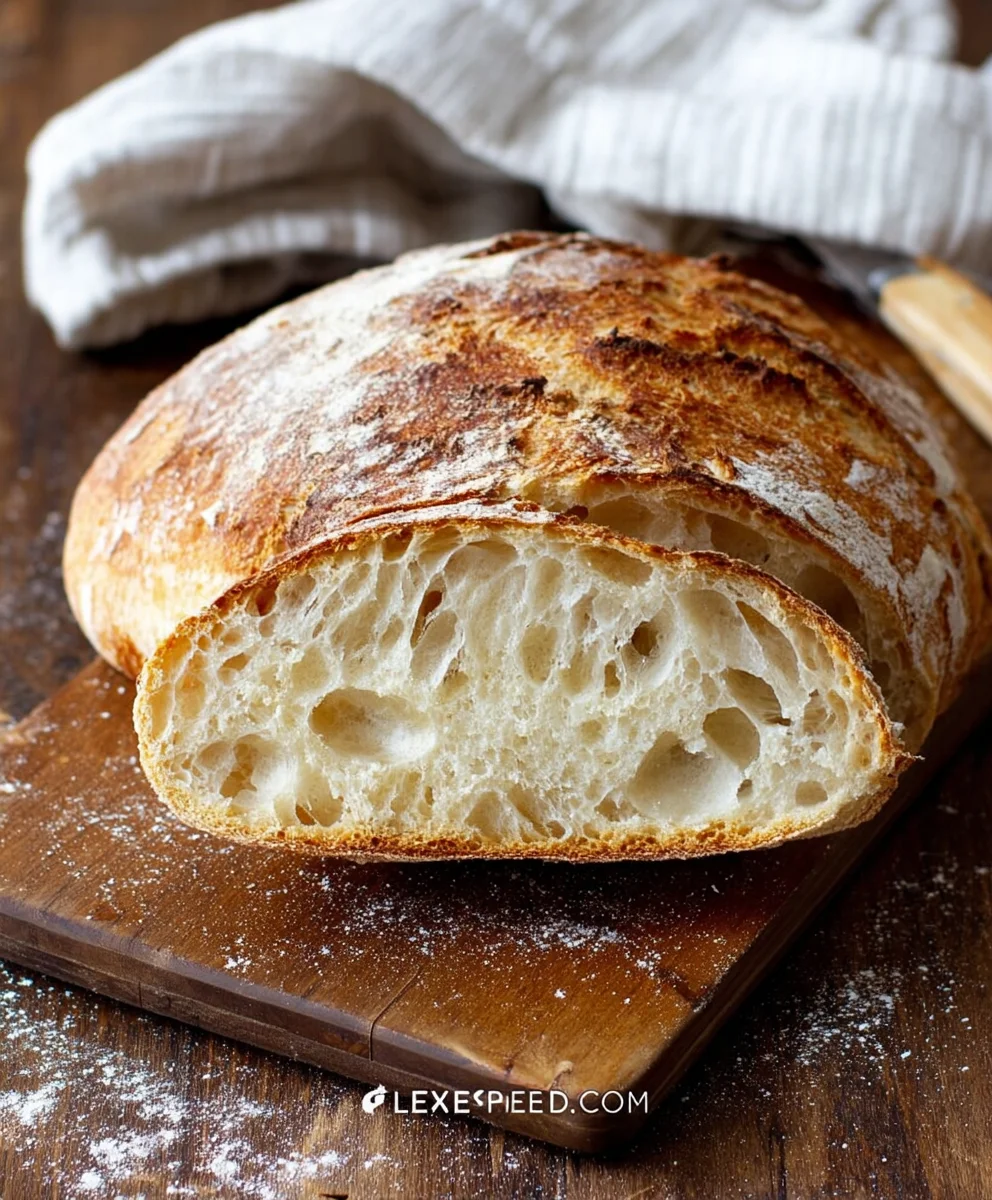
Once baked, remove the bread from the oven and let it cool completely on a wire rack before slicing. This cooling period is crucial for the internal structure to set properly, ensuring the perfect texture for your delicious homemade rustic bread.
Conclusion:
We hope you’ve enjoyed embarking on the journey of creating this Rustic Bread Recipe. This recipe offers a wonderfully satisfying baking experience, yielding a loaf with a beautifully crisp crust and a soft, airy interior. It’s a testament to simple ingredients coming together to create something truly special. Don’t be intimidated by the process; the reward of pulling a homemade loaf from your oven is unparalleled.
This versatile Rustic Bread Recipe is perfect for any occasion. It shines as the base for a gourmet sandwich, sliced thick and toasted for a hearty breakfast, or simply enjoyed with a generous smear of butter and your favorite jam. For an elevated touch, consider serving it alongside a hearty soup or stew, or as part of a cheese board.
Don’t hesitate to experiment with variations! You can add a handful of seeds like sunflower or poppy seeds to the dough for added texture and flavor, or incorporate a sprinkle of fresh herbs like rosemary or thyme. If you enjoy a slightly sweeter note, a touch of honey can be added to the dough. The beauty of this Rustic Bread Recipe lies in its adaptability. We encourage you to make it your own and discover your favorite way to enjoy it. Happy baking!
Frequently Asked Questions:
Can I make this Rustic Bread Recipe without a stand mixer?
Absolutely! While a stand mixer can make kneading easier, this Rustic Bread Recipe is perfectly achievable by hand. Kneading by hand will take a little more effort and time, but it’s a wonderfully tactile and rewarding process. Just ensure you knead until the dough is smooth and elastic.
How should I store my Rustic Bread Recipe loaf?
Once your Rustic Bread Recipe has cooled completely, store it at room temperature in a bread bag or wrapped in a clean kitchen towel. It’s best enjoyed within 2-3 days. For longer storage, you can slice the cooled loaf and freeze it in an airtight container or freezer bag.
Easy Rustic Bread Recipe – Bake Homemade Loaves
Bake delicious, crusty homemade rustic bread loaves with this easy-to-follow recipe.
Ingredients
-
3 cups warm water (about 105-115°F or 40-46°C)
-
2 ¼ teaspoons active dry yeast
-
1 tablespoon granulated sugar
-
6 cups all-purpose flour, plus more for dusting
-
3 teaspoons salt
Instructions
-
Step 1
In a large mixing bowl, combine the warm water, active dry yeast, and sugar. Let sit for 5 to 10 minutes until foamy and bubbly, indicating yeast is active. -
Step 2
Add the 6 cups of flour and salt to the yeast mixture. Mix until a shaggy dough forms. Don’t worry if it’s sticky. -
Step 3
Turn the dough onto a lightly floured surface and knead for 8-10 minutes until smooth and elastic. It should spring back slowly when poked. -
Step 4
Place the kneaded dough in a lightly greased bowl, cover, and let rise in a warm spot for 1 to 1.5 hours, or until doubled in size. -
Step 5
Gently punch down the dough, shape into a round or oval loaf, and let it rest loosely covered for 15-20 minutes (bench rest). -
Step 6
Score the top of the shaped loaf with a sharp knife or blade. Let it proof for another 30-45 minutes until puffy. -
Step 7
Preheat oven to 450°F (230°C). Bake the loaf for 35-45 minutes until the crust is deep golden brown. If using a Dutch oven, bake covered for 20 minutes, then uncovered for 20-25 minutes. -
Step 8
Remove from oven and cool completely on a wire rack before slicing.
Important Information
Nutrition Facts (Per Serving)
It is important to consider this information as approximate and not to use it as definitive health advice.
Allergy Information
Please check ingredients for potential allergens and consult a health professional if in doubt.


Leave a Comment