


Pickled red onions are an absolute game-changer in my kitchen, and I’m so excited to share this simple yet transformative recipe with you. If you’ve ever wondered what that vibrant, tangy pop is that elevates tacos, salads, or even just a simple cheese board, chances are, it’s these glorious pickled red onions! They’re more than just a condiment; they’re a flavor explosion, a beautiful visual upgrade, and a testament to how a few simple ingredients can create something truly magical. What I love most about pickled red onions is their versatility. They add a bright, acidic counterpoint to rich, savory dishes and a delightful crunch to almost anything. They’re surprisingly easy to make, requiring minimal prep and no fancy equipment, yet they deliver a sophisticated punch that will have everyone asking for your secret. Get ready to discover why this recipe for pickled red onions will become your new pantry staple.

Pickled Red Onions
Pickled red onions are one of those culinary superheroes that can transform a simple dish into something extraordinary. Their vibrant color, tangy bite, and slightly sweet undertones add a burst of flavor and texture to everything from tacos and sandwiches to salads and grain bowls. They are incredibly easy to make at home, requiring just a handful of pantry staples and minimal effort. Forget those expensive store-bought versions; once you try making your own, you’ll be hooked! The beauty of pickling red onions is their versatility and the way they mellow out while retaining their beautiful, jewel-toned hue. This recipe is straightforward, ensuring even begin extractner cooks can achieve perfect results.
Ingredients:
Instructions:
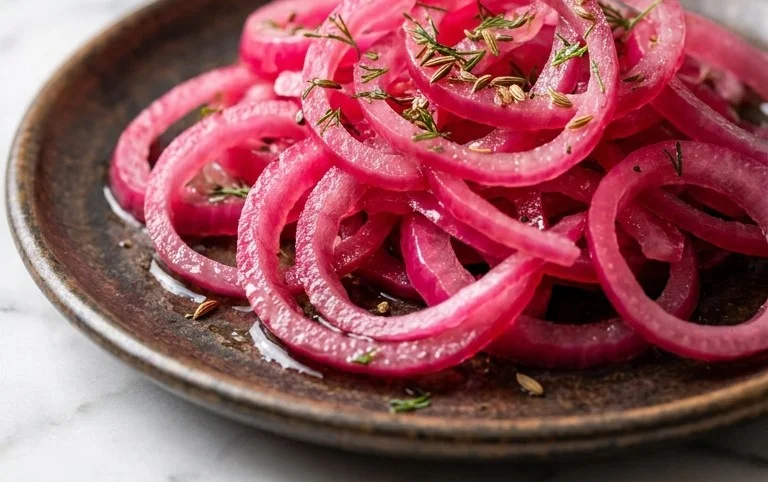
First, we need to prepare our star ingredient: the red onion. You’ll want to use a large red onion for this recipe. Begin extract by peeling off the dry outer skin. Then, trim off the top and root ends. The key to achieving those beautiful, uniform rings is to slice the onion thinly and evenly. A mandoline slicer is ideal for this, allowing you to get consistent ¼-inch thick slices. If you don’t have a mandoline, a sharp knife will work just as well, but take your time to ensure the slices are as uniform as possible. This consistency will not only make your pickled onions look more appealing but will also ensure they pickle at the same rate. Place your thinly sliced red onion rings into a heatproof bowl or a large mason jar. Ensure the bowl or jar is large enough to comfortably hold the onion slices and the pickling liquid.
Now, let’s make our pickling brine. In a small saucepan, combine the white vinegar, water, sugar, and kosher salt. Place the saucepan over medium heat. Stir the ingredients constantly until the sugar and salt are completely dissolved. You don’t need to bring this mixture to a rolling boil; just ensure everything is well incorporated and dissolved. The white vinegar provides the essential acidity for pickling, while the water dilutes it slightly to create a balanced flavor. The sugar, if you choose to use it, adds a touch of sweetness that complements the tartness of the vinegar and the natural bite of the onion. You can adjust the amount of sugar to your preference – less for a tarter pickle, more for a sweeter one. For those watching their sugar intake, a sugar substitute like erythritol or stevia can be used with good results.
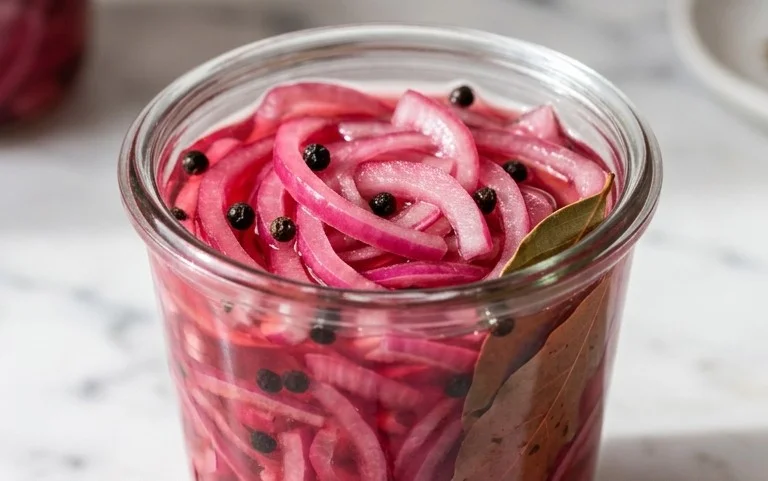
Once the sugar and salt have fully dissolved, carefully remove the saucepan from the heat. It’s important that the pickling liquid is hot when it’s poured over the onions. This heat helps to soften the onions slightly and allows them to absorb the pickling flavors more effectively. You can pour the hot liquid directly over the onion slices in the bowl or jar. If you’re using a bowl, you might need to press down on the onions gently to ensure they are fully submerged in the liquid. If you’re using a mason jar, you can carefully pour the hot brine over the onions, leaving a little headspace at the top. The hot liquid will begin extract to work its magic, and you’ll notice the onions starting to change color almost immediately.
Now comes the waiting game, but it’s a short one! Let the onions sit in the hot pickling liquid for at least 30 minutes. During this time, the onions will continue to soften and their vibrant pink or purple color will intensify as they absorb the brine. For a more pronounced pickle flavor and a softer texture, you can let them sit for an hour or even two at room temperature. The longer they sit, the more the flavors will meld and the onions will become more tender. If you want to speed up the cooling process slightly, you can cover the bowl or jar. However, for the initial 30 minutes, an uncovered bowl can help some of the vinegar fumes dissnon-alcoholic ipate, making the pickling process more pleasant.
After the initial resting period, it’s time to decide how you want to store them. For immediate use, you can simply let them cool down further at room temperature. However, for longer storage and to allow the flavors to fully develop, transfer the pickled onions, along with their pickling liquid, into an airtight container or a clean mason jar. They are best stored in the refrigerator. They will continue to pickle and deepen in flavor over the next few hours and days. You’ll find they are usually delicious to eat after just an hour or two in the fridge, but they will continue to improve with age. They can be stored in the refrigerator for up to two to three weeks. The pickling liquid itself is also infused with delicious flavor and can be used in salad dressings or marinades. Remember to always use clean utensils when removing pickles from the jar to maintain their freshness.
Conclusion:
And there you have it – a simple, yet incredibly rewarding recipe for creating your own vibrant, tangy pickled red onions! I truly believe this recipe is a game-changer for so many dishes. The balance of sweet, sour, and that satisfying crunch is just unparalleled. They add an instant pop of flavor and color to everything from tacos and burgers to salads and roasted vegetables. Don’t be afraid to experiment with serving suggestions; the possibilities are truly endless!
If you’re looking to shake things up, consider adding a pinch of chili flakes for a touch of heat, or perhaps a sprig of fresh dill or thyme for an herbaceous twist. This quick pickle method is so forgiving, making it perfect for begin extractners and seasoned cooks alike. I wholeheartedly encourage you to give these pickled red onions a try. They’ll quickly become a staple in your refrigerator, ready to elevate your everyday meals.
Frequently Asked Questions:
How long do pickled red onions last?
Typically, properly stored pickled red onions will last in the refrigerator for about 2-3 weeks. Make sure they are always submerged in the brine and stored in an airtight container.
Can I use a different type of vinegar?
Absolutely! While apple cider vinegar is my go-to for its balanced flavor, white grape juice vinegar or red grape juice vinegar also work wonderfully and will impart their own subtle characteristics to the pickle.
What if I don’t have sugar? Can I omit it?
You can omit the sugar if you prefer a tarter pickle, but it does help to balance the acidity and create a more rounded flavor profile. A small amount of honey or maple syrup can also be used as a substitute if you’re avoiding refined sugar.
Quick Pickled Red Onions
A simple and quick recipe for vibrant pickled red onions, perfect for adding a tangy crunch to tacos, sandwiches, and salads. Customizable with or without sugar.
Ingredients
-
1 large Red onion, thinly sliced
-
1 cup White Vinegar
-
1 cup Water
-
1 tablespoon Sugar
-
2 teaspoons Kosher salt
Instructions
-
Step 1
Thinly slice the red onion into rings or half-moons. -
Step 2
In a small saucepan, combine the white vinegar, water, sugar (if using), and kosher salt. Stir until the salt and sugar are dissolved. -
Step 3
Bring the liquid to a simmer over medium heat. Once simmering, remove from heat immediately. -
Step 4
Place the sliced red onions into a clean jar or heatproof container. -
Step 5
Pour the hot brine over the onions, ensuring they are fully submerged. -
Step 6
Let the onions cool to room temperature, then cover and refrigerate for at least 30 minutes before serving. They will become more vibrant and flavorful over time.
Important Information
Nutrition Facts (Per Serving)
It is important to consider this information as approximate and not to use it as definitive health advice.
Allergy Information
Please check ingredients for potential allergens and consult a health professional if in doubt.

Leave a Comment