

Pickled red onions are one of those magical kitchen staples that elevate practically anything they touch. I absolutely adore having a jar of these vibrant crimson beauties in my fridge. Why the obsession? It’s simple: they offer a fantastic burst of tangy, slightly sweet, and wonderfully crunchy flavor that cuts through richness and brightens up salads, tacos, sandwiches, and even grilled meats. What makes them so special is their incredible transformation. That sharp bite of a raw red onion mellows into something sophisticated and addictive, all while its stunning color deepens. They’re not just a condiment; they’re a flavor enhancer, a visual delight, and a testament to how a few simple ingredients can create something truly extraordinary. Get ready to discover the joy of making your own pickled red onions!

Pickled Red Onions
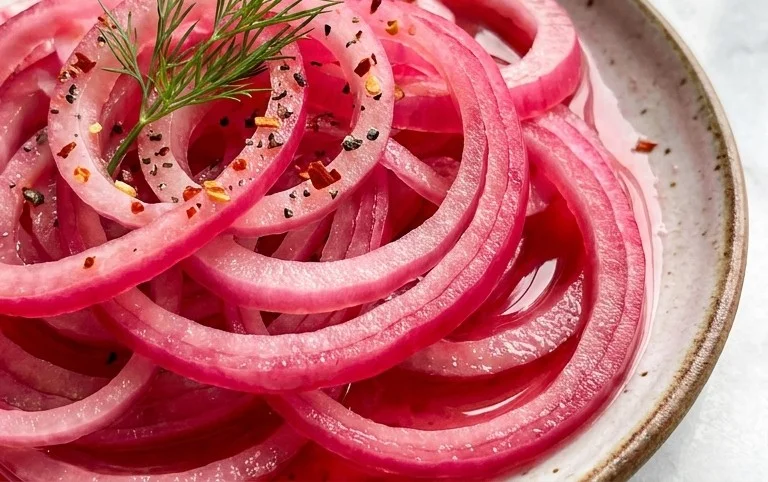
Pickled red onions are one of those magical culinary additions that can elevate almost any dish. From tacos and burgers to salads and sandwiches, their vibrant color and perfectly balanced sweet, tangy, and slightly spicy flavor transform the ordinary into something truly special. They are incredibly easy to make, requiring minimal active time and a short waiting period for the flavors to meld. This recipe is a staple in my kitchen, and I find myself reaching for a jar of these beauties more often than I can count. The beauty of this recipe is its simplicity, and the ability to customize the sweetness and heat to your preference. Let’s get started on creating this versatile condiment that will become a permanent fixture in your refrigerator.
Ingredients:
Instructions:
1. Preparing the Onions: The Foundation of Flavor
The first step is all about getting our red onions ready for their transformation. You’ll want to start by peeling the outer papery layers off your red onions. Once peeled, trim off the root end and the very top stem end. Now, for the slicing. The thickness of your onion slices is a matter of preference, but I find that slicing them about 1/8 to 1/4 inch thick works best. This thickness ensures they become tender and absorb the brine beautifully without becoming mushy. You can achieve this by slicing them thinly with a sharp knife or by using a mandoline slicer if you have one. If you’re using a mandoline, be extremely careful and always use the safety guard – those things are sharp! Once sliced, place the onion rings into a heatproof bowl. I like to gently separate the rings as I place them in the bowl, which helps them pickle more evenly.
2. Creating the Vibrant Brine: The Heart of the Pickle
While your onions are waiting, it’s time to whip up the flavorful brine that will do all the pickling magic. In a small saucepan, combine the 1 1/4 cups of water, 1 1/4 cups of white vinegar, 3 tablespoons of your chosen sugar, and 1 tablespoon of sea salt. If you’re opting for a little kick, now is the time to add your red pepper flakes, between 1/4 and 1/2 teaspoon, depending on how much heat you enjoy. Stir these ingredients together well. Place the saucepan over medium heat on your stovetop. We want to bring this mixture to a gentle simmer, just until the sugar and salt have completely dissolved. You don’t need to boil it vigorously; a gentle simmer is perfect. Stir occasionally to ensure everything is well incorporated. Once dissolved, remove the saucepan from the heat.
3. Marrying the Onions and Brine: The Immersive Experience
Now comes the exciting part where we bring the onions and the brine together. Carefully pour the hot brine over the sliced red onions in the heatproof bowl. Make sure that all the onion slices are submerged in the liquid. You might need to gently press them down with a spoon or another small bowl to ensure full contact with the brine. The hot liquid will begin extract to soften the onions and, as they cool, they will start to take on that gorgeous pink hue, which is truly mesmerizing to watch. This initial immersion is crucial for even pickling and for the onions to begin extract absorbing all those delicious flavors.
4. Cooling and Infusing: The Patience Game
This is where the magic truly happens, and it requires a little bit of patience. Allow the onions and brine mixture to cool at room temperature for at least 30 minutes. As they cool, you’ll notice the onions gradually changin extractg from their raw deep purple to a beautiful, translucent pink. This cooling period allows the flavors to start infusing, and the acidity of the vinegar to begin extract its work. Don’t rush this step! The longer they sit at room temperature initially, the more the flavors will develop before you even refrigerate them.
5. Refrigeration and Maturation: The Final Frontier
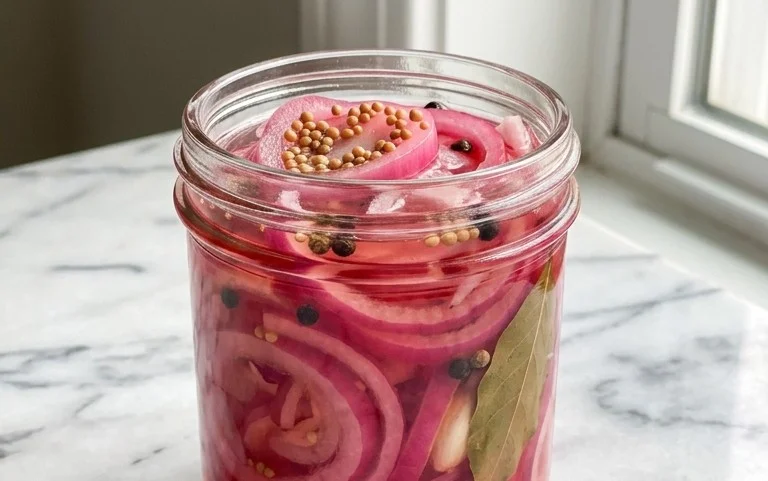
Once the mixture has cooled down considerably, transfer the entire contents of the bowl into an airtight container or a clean glass jar. I prefer using glass jars as they are non-reactive and allow you to see the beautiful color of the pickled onions. Seal the container tightly. Now, place the jar in the refrigerator. For the best results, I recommend letting them pickle for at least an hour before using them. However, they will continue to develop in flavor over the next 24 hours, becoming even more delicious. The longer they sit in the refrigerator, the more pronounced and complex their flavor will become. They are typically best after a day or two, and will keep in the refrigerator for several weeks.
Notes on Sugar:
The type of sugar you use can subtly affect the final flavor. Granulated white sugar is standard and provides a clean sweetness. You can also experiment with brown sugar or maple syrup for a deeper, richer flavor profile. If using brown sugar, the pickled onions might have a slightly more caramel-like note. If using maple syrup, you’ll introduce a distinct maple essence. Adjust the amount of sugar slightly based on your preference; some people like them tangier, while others prefer them a bit sweeter.
Conclusion:
And there you have it! A simple yet incredibly effective way to elevate your meals with the vibrant punch of pickled red onions. This recipe is fantastic because it’s incredibly versatile, adds a burst of flavor and gorgeous color to almost any dish, and is surprisingly easy to make. The sweet and tangy notes of these pickled red onions are a game-changer, transforming everything from tacos and salads to sandwiches and roasted vegetables. They’re the perfect way to add that extra special something without much effort.
Don’t be afraid to experiment with serving suggestions! I love them on avocado toast, as a topping for grilled meats, or mixed into potato salad. For variations, consider adding a pinch of chili flakes for a little heat, or a sprig of dill for an herbaceous twist. The possibilities are truly endless! I wholeheartedly encourage you to give this recipe a try. You’ll be amazed at how quickly pickled red onions become a staple in your kitchen. Happy pickling!
Frequently Asked Questions:
How long do pickled red onions last?
When stored properly in an airtight container in the refrigerator, pickled red onions can last for up to 2-3 weeks. They tend to get even better after a few days as the flavors meld together. Make sure to always use a clean utensil when retrieving them to maintain their freshness and prevent contamination.
Can I use a different type of vinegar?
Absolutely! While apple cider vinegar is my personal favorite for its balanced flavor, white grape juice vinegar or even red grape juice vinegar will also work wonderfully. Each will impart a slightly different nuance to the pickling liquid, so feel free to experiment and find your preferred taste. Avoid using balsamic vinegar, as its strong color and flavor can overpower the delicate notes of the onion.
What if I don’t have a jar? Can I use a bowl?
For optimal shelf life and to prevent spoilage, it’s best to use a clean, airtight glass jar for storing your pickled red onions. A bowl might work for immediate consumption, but it won’t seal properly, allowing air in and potentially affecting the pickling process and longevity of your delicious pickled red onions. So, a jar is definitely recommended!
Quick Pickled Red Onions
A simple and versatile recipe for quick pickled red onions, perfect for adding a tangy crunch to salads, sandwiches, tacos, and more.
Ingredients
-
2 medium red onions ((or 3 small ones))
-
1 1/4 cup water
-
1 1/4 cup white vinegar
-
3 tbsp sugar
-
1 tbsp sea salt
-
1/4 tsp red pepper flakes
Instructions
-
Step 1
Thinly slice the red onions into rings or half-moons. -
Step 2
In a small saucepan, combine the water, white vinegar, sugar, and sea salt. Heat over medium heat, stirring until the sugar and salt are dissolved. Do not boil. -
Step 3
Add the red pepper flakes to the brine if using. -
Step 4
Place the sliced onions into a clean jar or heatproof bowl. -
Step 5
Pour the warm brine over the onions, ensuring they are fully submerged. -
Step 6
Let the onions sit at room temperature for at least 30 minutes, or until they have softened and turned a vibrant pink. For a stronger pickle, refrigerate for a few hours or overnight.
Important Information
Nutrition Facts (Per Serving)
It is important to consider this information as approximate and not to use it as definitive health advice.
Allergy Information
Please check ingredients for potential allergens and consult a health professional if in doubt.
Leave a Comment