
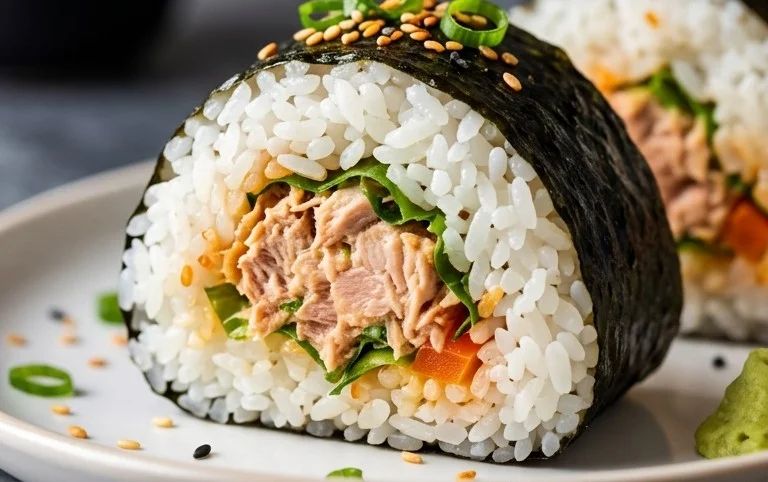
15-min. Easy Japanese Tuna Onigiri are the ultimate weeknight savior and a delightful taste of Japan right in your kitchen! Have you ever craved something quick, satisfying, and bursting with savory flavor? That’s precisely where these incredible rice balls shine. People absolutely adore Japanese tuna onigiri for so many reasons. They’re incredibly portable, making them perfect for lunches, snacks, or even a quick picnic. The simple yet profound combination of fluffy rice and savory tuna, often seasoned with a hint of soy sauce and mayonnaise, creates a flavor profile that’s both comforting and addictive.
What makes our 15-min. easy Japanese tuna onigiri so special?
It’s the speed and simplicity without compromising on that authentic deliciousness. You’ll be amazed at how quickly you can transform basic pantry staples into a truly satisfying meal. This recipe is designed for busy lives, proving that you don’t need hours to enjoy a genuine taste of Japanese culinary tradition. Get ready to master the art of the perfect onigiri!

15-Minute Easy Japanese Tuna Onigiri
Craving a quick, satisfying, and authentically Japanese snack or light meal? Look no further than Tuna Onigiri! These delightful rice balls are incredibly simple to make, bursting with savory flavor, and perfect for on-the-go lunches, a delightful picnic addition, or even a satisfying breakfast. The beauty of onigiri lies in its adaptability, but this classic tuna and mayonnaise filling is a crowd-pleaser for a reason. In just 15 minutes, you can transform humble ingredients into these portable powerhouses of deliciousness.
One of the best things about onigiri is how accessible it is for even the most novice cooks. The core is simply cooked rice, and with a few pantry staples, you’ll be assembling these in no time. This recipe focuses on speed and simplicity, making it ideal for those busy days when you need something wholesome and flavorful without a lot of fuss.
Ingredients:
Cooking Instructions
The process of making tuna onigiri is less about “cooking” in the traditional sense and more about assembly and shaping. Since we’re aiming for speed, we’ll assume you have cooked short grain rice ready to go. If you’re starting from scratch with uncooked rice, factor in about 20-25 minutes for cooking and a brief cooling period.
Step 1: Prepare the Tuna Filling
First, let’s get our flavorful filling ready. Open your can of tuna. If you’re using tuna packed in oil, drain off most of the oil, but you can leave a tiny bit in for extra flavor and moisture. If using tuna in water, drain it very thoroughly. We don’t want a soggy filling! Place the drained tuna in a small bowl. Add the Japanese mayonnaise. Japanese mayonnaise, like Kewpie, has a richer, tangier flavor profile that works wonderfully with tuna, but regular mayonnaise is a perfectly acceptable substitute if that’s what you have on hand. Use a fork to gently flake and mix the tuna with the mayonnaise until it’s well combined. Don’t overmix it into a paste; we want some texture. If you like a little extra kick, you can add a tiny pinch of black pepper or a drop of soy sauce at this stage, but keep it simple for this classic version.
Step 2: Season the Rice
Next, we’ll prepare our rice. If your cooked rice is still warm, that’s ideal, as it makes it easier to shape. If it has cooled completely, you might want to gently warm it slightly in the microwave for about 30 seconds to a minute, just enough to make it pliable. Transfer the 2 cups of cooked short grain rice to a clean bowl. Sprinkle the 1/2 teaspoon of salt evenly over the rice. Gently fold and mix the salt into the rice using a rice paddle or a spatula. Be careful not to mash the grains. We want to distribute the salt evenly for subtle seasoning throughout the rice. The salt enhances the natural sweetness of the rice and balances the savory filling.
Step 3: Assemble the Onigiri
Now for the fun part: assembly! Wet your hands lightly with water. This is a crucial step to prevent the rice from sticking to your hands. You can also keep a small bowl of water nearby to re-wet your hands as needed. Take about 1/4 cup of the seasoned rice and place it in the palm of one hand. Make a small indentation in the center of the rice with your finger. This indentation is where we’ll place our delicious tuna filling. Spoon about 1 to 1.5 tablespoons of the prepared tuna and mayonnaise mixture into the indentation.
Step 4: Shape the Onigiri
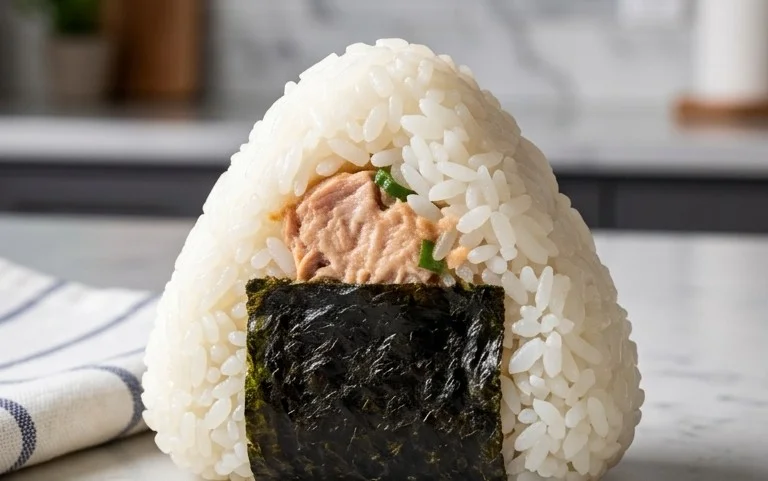
Carefully bring the edges of the rice up and around the tuna filling, enclosing it completely. Gently press and shape the rice around the filling, forming it into your desired onigiri shape. The most traditional shape is a triangle, but you can also make them into balls or simple cylinders. Use a gentle but firm pressure to compact the rice so that it holds its shape. If the rice starts to stick, re-wet your hands. As you shape, try to create a smooth exterior. If you’re making a triangle, use the side of your hand and your thumb to create the corners. Don’t worry if your first few aren’t perfectly shaped; practice makes perfect, and they’ll taste just as good!
Step 5: Wrap and Garnish
Once you have your shaped rice ball, it’s time for the nori. If you’re using full sheets of nori, you can tear them into smaller, manageable pieces. A good size is about 2 inches wide by 3 inches long, or whatever size comfortably wraps around your onigiri. Place the onigiri onto a piece of nori and wrap it around the bottom or side. You can hold it in place with a little pressure. Alternatively, you can cut strips of nori and wrap them around the onigiri like a band. If you like, sprinkle the optional sesame seeds over the top of your onigiri for an extra touch of flavor and visual appeal. These can be added before or after wrapping with nori.
Your delicious 15-minute Japanese Tuna Onigiri are now ready to enjoy! These are best eaten fresh, but they can also be stored at room temperature for a few hours or in the refrigerator for up to a day. If refrigerating, you might want to gently warm them before eating to soften the rice. Enjoy this incredibly simple yet satisfying Japanese treat!
Conclusion:
There you have it – a foolproof way to create delicious and satisfying Japanese Tuna Onigiri in just 15 minutes! This recipe is a true game-changer for busy days when you crave something healthy, flavorful, and quick. The beauty of these rice balls lies in their simplicity and incredible versatility. They are perfect for a speedy lunch, a light dinner, or even a fantastic on-the-go snack. The combination of fluffy rice and savory tuna is incredibly comforting, and the optional nori wrap adds that quintessential umami kick.
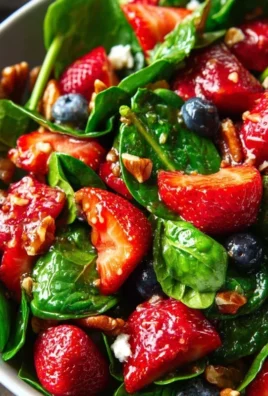
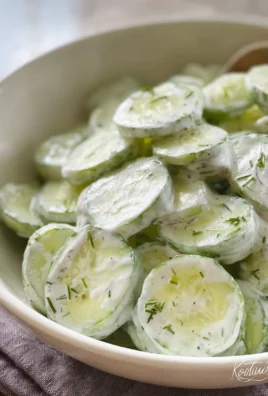
I love serving these onigiri as a standalone meal, perhaps with a side of miso soup or a crisp green salad. They are also fantastic as part of a bento box, alongside some edamame and pickled gin extractger. Don’t be afraid to experiment with variations! You can swap the tuna for cooked salmon flakes, seasoned chicken, or even sautéed mushrooms for a vegetarian option. Adding a sprinkle of sesame seeds, chopped chives, or a pinch of furikake (Japanese rice seasoning) inside or on top will elevate your Japanese Tuna Onigiri even further. Give this recipe a try – I’m confident you’ll find yourself making it again and again!
Frequently Asked Questions:
Can I make the rice ahead of time?
Absolutely! You can cook your sushi rice a day in advance and store it in the refrigerator. When you’re ready to make the onigiri, gently reheat the rice until it’s warm and pliable. This can save you even more time on busy mornings.
What kind of tuna is best for onigiri?
Canned tuna packed in water or oil works wonderfully. I prefer using tuna packed in water and then draining it very well to avoid making the rice soggy. You can also lightly flake it with a fork.
How do I prevent the rice from sticking to my hands when forming the onigiri?
The classic trick is to lightly wet your hands with water and sprinkle a little salt on them. This creates a barrier and also seasons the rice ball slightly. It makes shaping them much easier and cleaner!
15-min. Easy Japanese Tuna Onigiri
Quick and delicious Japanese tuna onigiri, perfect for a snack or light meal. Ready in just 15 minutes!
Ingredients
-
2 cups cooked short grain rice
-
1/2 tsp salt
-
5.29 oz canned tuna (in oil recommended)
-
2 tbsp Japanese mayo
-
2 sheets nori
-
1 tsp sesame seeds (optional)
Instructions
-
Step 1
In a bowl, gently mix the cooked short grain rice with salt. Ensure the rice is still warm for easier shaping. -
Step 2
Drain the canned tuna well. In a separate small bowl, flake the tuna and mix it with the Japanese mayonnaise until well combined. -
Step 3
Wet your hands with water and lightly salt your palms to prevent the rice from sticking. Take about 1/2 cup of rice and place it in your palm. -
Step 4
Make an indentation in the center of the rice and add about 1-2 tablespoons of the tuna-mayo mixture. Cover the filling with more rice and shape it into a triangle or ball, pressing firmly but gently. -
Step 5
Cut the nori sheets into strips. Wrap a strip of nori around the base of each onigiri. If using sesame seeds, sprinkle them over the onigiri for garnish. -
Step 6
Repeat with the remaining rice and filling. Enjoy immediately!
Important Information
Nutrition Facts (Per Serving)
It is important to consider this information as approximate and not to use it as definitive health advice.
Allergy Information
Please check ingredients for potential allergens and consult a health professional if in doubt.

Leave a Comment