
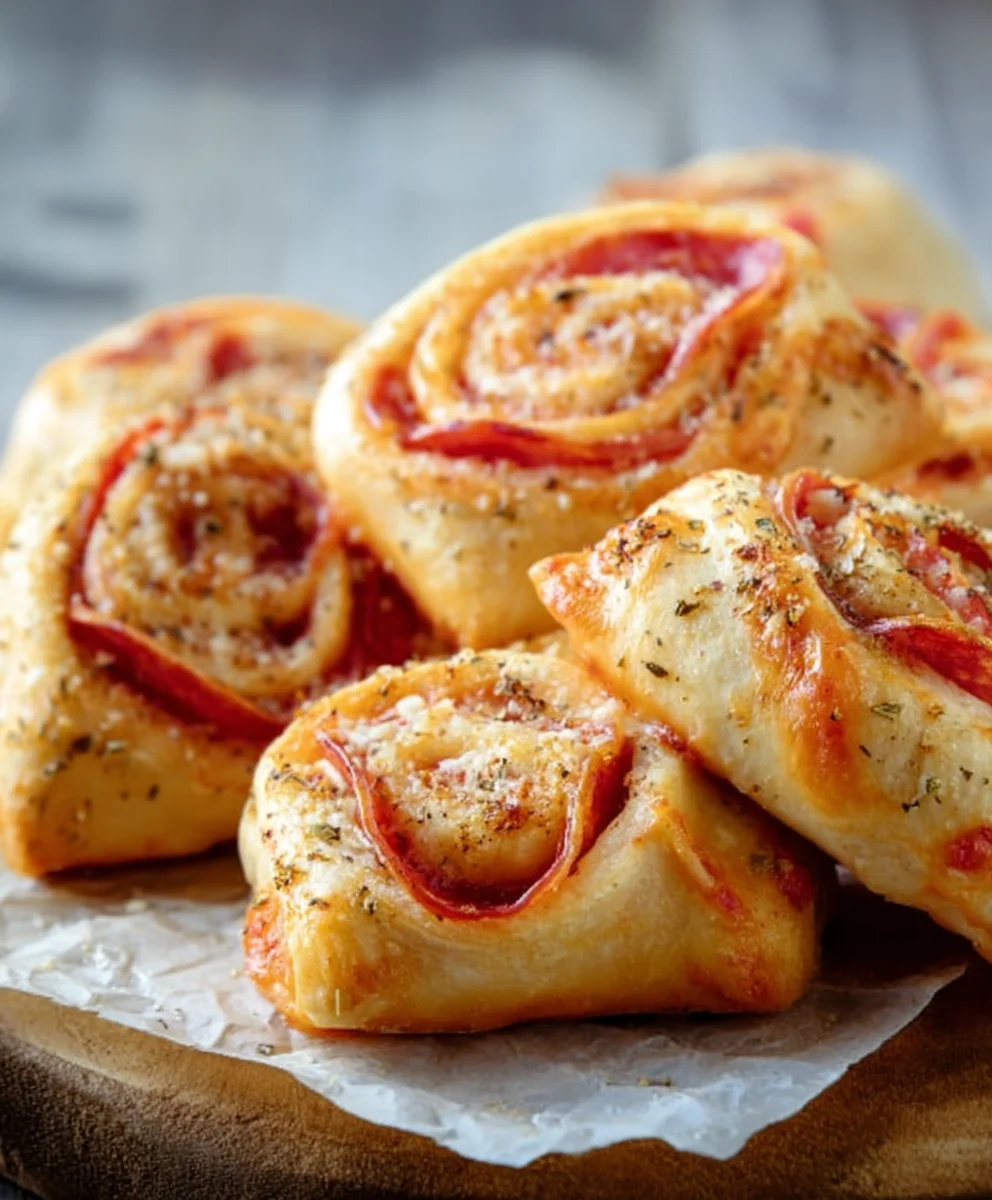
Pizza rolls are more than just a snack; they’re a delightful trip down memory lane for many of us, conjuring images of childhood parties and cozy movie nights. There’s an undeniable charm to these bite-sized parcels of joy, which is precisely why they remain a perennial favorite. The magic lies in their perfect balance: a crispy, golden-brown exterior giving way to a molten, cheesy interior bursting with classic pizza flavors. Whether you’re craving a quick appetizer for unexpected guests or a fun, easy dinner for the family, these homemade pizza rolls are sure to hit the spot. We’ll guide you through creating these irresistible treats from scratch, infusing them with your favorite toppings and ensuring every bite is a burst of savory goodness that will have everyone asking for seconds. Forget the frozen aisle; this recipe will elevate your pizza rolls experience to a whole new level of deliciousness!

Ingredients:
- 2 tubes refrigerated pizza crust
- Garlic salt, to taste
- Italian seasoning, to taste
- 1 cup shredded Mozzarella cheese, divided
- 1/2 cup grated Parmesan cheese
- 1 cup sliced and chopped beef beef pepperoni
- Marinara sauce, for dipping
Preparing Your Pizza Rolls
The foundation of these delicious Pizza Rolls is, of course, the pizza crust. You’ll be using two tubes of standard refrigerated pizza crust. These are incredibly convenient and roll out easily, making the assembly process a breeze. Before we get too far, preheat your oven to the temperature specified on your pizza crust packagin extractg, usually around 400°F (200°C). This ensures that your rolls bake up to a golden-brown perfection. While the oven is preheating, take out a large baking sheet and lightly grease it or line it with parchment paper. This prevents any sticky cheese or dough from adhering to the pan and makes for easier cleanup. It’s also a good idea to have all your other ingredients prepped and ready to go –beef pepperonieroni chopped, the cheeses measured out, and the seasonings within easy reach.
Now, let’s talk about the fillings. You’ll need one cup of sliced and chobeef pepperoni pepperoni.beef pepperonie the pepperoni is chopped into small, manageable pieces. This allows for an even distribution of flavor throughout each roll. You’ll also need one cup of shredded Mozzarella cheese, but we’re going to divide this. Half of it will go into the filling, and the other half will be used to sprinkle on top of the rolls before baking. This dual application of Mozzarella ensures a gooey, melty center and a beautifully browned, slightly crispy exterior. Finally, you’ll need half a cup of grated Parmesan cheese. Parmesan adds a wonderful sharp, nutty flavor that complements the other ingredients beautifully. Don’t forget your seasonings! Garlic salt and Italian seasoning will be used to season the dough and the filling, adding layers of savory deliciousness.
Assembling the Rolls
Begin by unrolling one tube of pizza crust onto a lightly floured surface. Gently press the seams together if there are any gaps to create a more solid, even sheet of dough. You want to work relatively quickly so the dough doesn’t get too warm and sticky. Now, it’s time to season. Sprinkle half of the garlic salt and half of the Italian seasoning evenly over the surface of the dough. Don’t be shy with the seasonings – this is where a lot of the flavor comes from! Next, evenly distribute beef pepperonihe chopped pepperoni over the seasoned dough. Try to get it as close to the edges as possible without going over. Then, sprinkle half of the shredded Mozzarella cheese and all of the grated beef pepperonicheese over the pepperoni. This is your cheesy, meaty layer!
Now, carefully and tightly roll up the dough lengthwise, starting from one of the lgin extracter sides. Imagine you’re making a jelly roll or a rug. The goal is to create a compact log that will hold its shape when sliced. Once you have your log, gently pinch the seam to seal it securely. This is crucial to prevent the filling from leaking out during baking. If the dough feels sticky, lightly dust your hands with flour. Repeat this entire process with the second tube of pizza crust. You should now have two long, filled dough logs.
Cutting and Baking
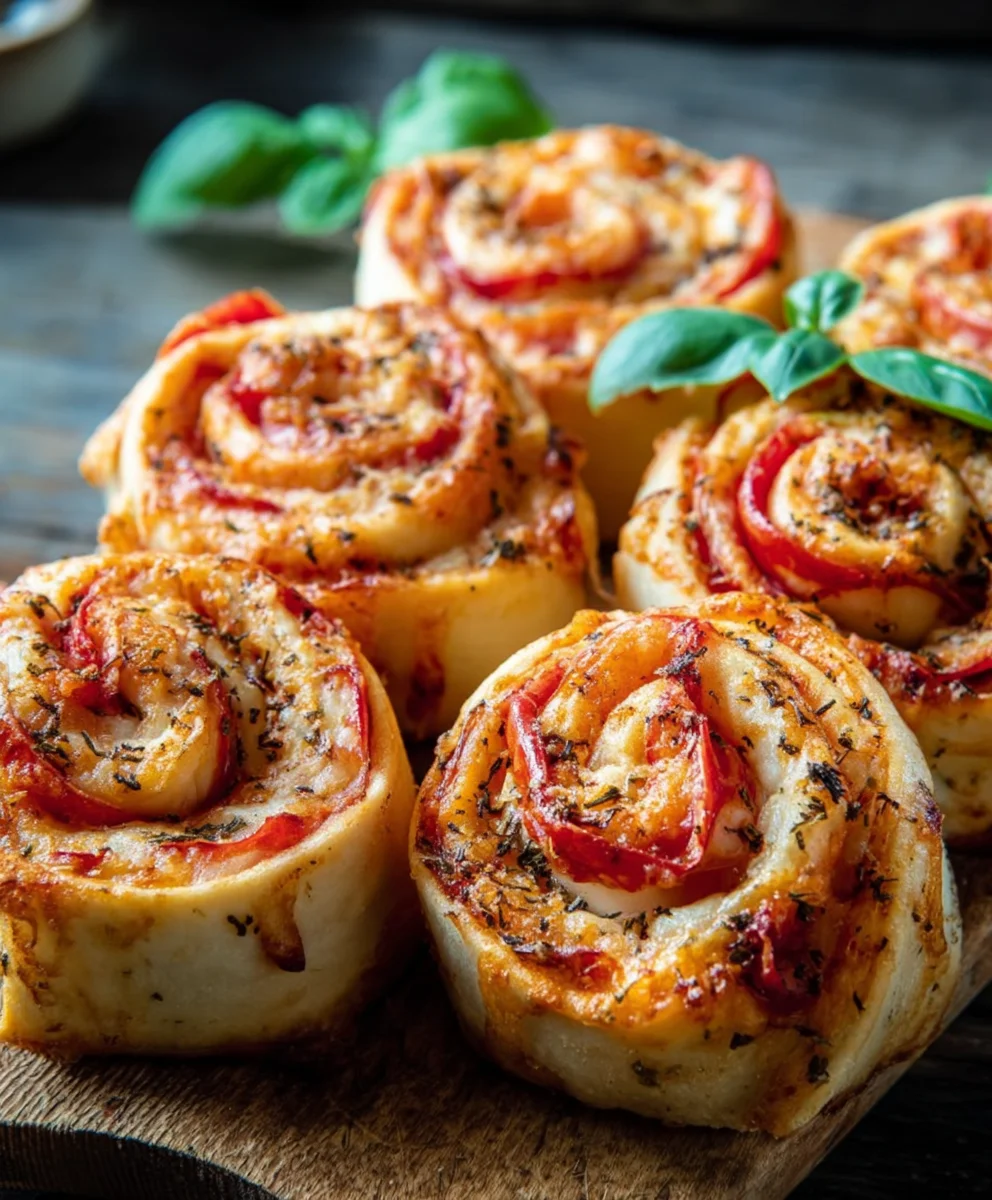
Once your logs are assembled and senon-alcoholic aled, it’s time to cut them into individual rolls. Using a sharp knife, slice each log into 1-inch thick pieces. If your logs are very tightly rolled, they will hold their shape well. If they seem a bit loose, you can gently press the cut sides to help them firm up. Place the cut rolls onto your prepared baking sheet, cut-side down. Arrange them about 1 inch apart, as they will expand slightly during baking. Make sure they are not touching each other to ensure even cooking and prevent them from sticking together.
Before they go into the oven, we’re going to add that final layer of cheesy goodness. Sprinkle the remaining shredded Mozzarella cheese over the tops of each roll. This will melt and get beautifully golden brown during baking. You can also add another light sprinkle of Italian seasoning or a pinch of garlic salt over the cheese, if desired. Now, carefully transfer the baking sheet to your preheated oven. Bake for approximately 12-15 minutes, or until the crust is golden brown and the cheese is melted and bubbly. Keep an eye on them, as oven temperatures can vary. You want that nice toasty color, but you don’t want them to burn.
Serving Your Pizza Rolls
Once the Pizza Rolls are out of the oven, let them cool on the baking sheet for a few minutes before attempting to move them. This allows them to firm up slightly, making them easier to handle. They will be very hot from the oven, and that melted cheese will be molten. Serve them warm, straight from the oven, for the ultimate gooey experience. The best accompaniment for these savory bites is, of course, marinara sauce for dipping. Pour some of your favorite marinara sauce into a small bowl and place it in the center of your serving platter. The tangy marinara perfectly beef pepperonits the rich, cheesy, pepperoni-filled rolls. These are fantastic as a fun appetizer, a party snack, or even a quick and easy weeknight meal when served with a side salad. Enjoy the satisfying crunchbeef pepperonirust, the savory burst of pepperoni, and the irresistible stretch of melted cheese in every bite!
Conclusion:
And there you have it – a foolproof guide to creating your very own delicious homemade Pizza Rolls! We’ve walked through each step, from preparing the dough to assembling those perfect, cheesy bites. These Pizza Rolls are incredibly versatile and a guaranteed crowd-pleaser, perfect for a fun family dinner, a game-day snack, or even a potluck contribution. Remember, the beauty of homemade is the ability to customize. Don’t be afraid to experiment with different cheeses, add your favorite vegetables like bell peppers or mushrooms, or even swap out the beef pepperoni for cooked sausage or beef ham. Serve them warm with your favorite marinara dipping sauce for an extra burst of flavor. We encourage you to get into the kitchen and try this recipe; the satisfaction of biting into a warm, gooey, homemade Pizza Roll is truly unmatched! Happy rolling!
Frequently Asked Questions:
Can I make the Pizza Rolls ahead of time?
Absolutely! You can prepare the Pizza Rolls up to the point of baking, cover them tightly with plastic wrap, and refrigerate them for up to 24 hours. When you’re ready to bake, let them sit at room temperature for about 15-20 minutes before baking as directed, and you might need to add a few extra minutes to the baking time.
What’s the best way to store leftover Pizza Rolls?
Once cooled completely, store any leftover Pizza Rolls in an airtight container in the refrigerator for up to 3-4 days. To reheat, you can place them on a baking sheet in a preheated oven at 350°F (175°C) for about 5-10 minutes, or until heated through and crispy. Microwaving is also an option, but they may lose some of their crispiness.
Easy Beef Pizza Rolls
Quick and easy beef pizza rolls perfect for a snack or appetizer, featuring a savory beef pepperoni filling and melted cheese.
Ingredients
-
2 tubes refrigerated pizza crust
-
Garlic salt, to taste
-
Italian seasoning, to taste
-
1 cup shredded Mozzarella cheese, divided
-
1/2 cup grated Parmesan cheese
-
1 cup sliced and chopped beef pepperoni
-
Marinara sauce, for dipping
Instructions
-
Step 1
Preheat oven to temperature specified on pizza crust packaging (usually around 400°F/200°C). Lightly grease or line a baking sheet with parchment paper.
-
Step 2
Unroll one tube of pizza crust onto a lightly floured surface. Sprinkle with half the garlic salt and Italian seasoning. Evenly distribute half the chopped beef pepperoni and half the shredded Mozzarella cheese, along with all the Parmesan cheese.
-
Step 3
Carefully and tightly roll up the dough lengthwise to create a compact log. Pinch the seam to seal securely. Repeat with the second tube of pizza crust.
-
Step 4
Slice each log into 1-inch thick pieces. Place the cut rolls onto the prepared baking sheet, cut-side down, about 1 inch apart.
-
Step 5
Sprinkle the remaining shredded Mozzarella cheese over the tops of each roll. Optionally, add another light sprinkle of Italian seasoning.
-
Step 6
Bake for approximately 12-15 minutes, or until the crust is golden brown and the cheese is melted and bubbly. Let cool on the baking sheet for a few minutes.
-
Step 7
Serve warm with marinara sauce for dipping.
Important Information
Nutrition Facts (Per Serving)
It is important to consider this information as approximate and not to use it as definitive health advice.
Allergy Information
Please check ingredients for potential allergens and consult a health professional if in doubt.
Begin by unrolling one tube of pizza crust onto a lightly floured surface. Gently press the seams together if there are any gaps to create a more solid, even sheet of dough. You want to work relatively quickly so the dough doesn’t get too warm and sticky. Now, it’s time to season. Sprinkle half of the garlic salt and half of the Italian seasoning evenly over the surface of the dough. Don’t be shy with the seasonings – this is where a lot of the flavor comes from! Next, evenly distribute beef pepperonihe chopped pepperoni over the seasoned dough. Try to get it as close to the edges as possible without going over. Then, sprinkle half of the shredded Mozzarella cheese and all of the grated beef pepperonicheese over the pepperoni. This is your cheesy, meaty layer!
Now, carefully and tightly roll up the dough lengthwise, starting from one of the lgin extracter sides. Imagine you’re making a jelly roll or a rug. The goal is to create a compact log that will hold its shape when sliced. Once you have your log, gently pinch the seam to seal it securely. This is crucial to prevent the filling from leaking out during baking. If the dough feels sticky, lightly dust your hands with flour. Repeat this entire process with the second tube of pizza crust. You should now have two long, filled dough logs.
Cutting and Baking
Once your logs are assembled and senon-alcoholic aled, it’s time to cut them into individual rolls. Using a sharp knife, slice each log into 1-inch thick pieces. If your logs are very tightly rolled, they will hold their shape well. If they seem a bit loose, you can gently press the cut sides to help them firm up. Place the cut rolls onto your prepared baking sheet, cut-side down. Arrange them about 1 inch apart, as they will expand slightly during baking. Make sure they are not touching each other to ensure even cooking and prevent them from sticking together.
Before they go into the oven, we’re going to add that final layer of cheesy goodness. Sprinkle the remaining shredded Mozzarella cheese over the tops of each roll. This will melt and get beautifully golden brown during baking. You can also add another light sprinkle of Italian seasoning or a pinch of garlic salt over the cheese, if desired. Now, carefully transfer the baking sheet to your preheated oven. Bake for approximately 12-15 minutes, or until the crust is golden brown and the cheese is melted and bubbly. Keep an eye on them, as oven temperatures can vary. You want that nice toasty color, but you don’t want them to burn.
Serving Your Pizza Rolls
Once the Pizza Rolls are out of the oven, let them cool on the baking sheet for a few minutes before attempting to move them. This allows them to firm up slightly, making them easier to handle. They will be very hot from the oven, and that melted cheese will be molten. Serve them warm, straight from the oven, for the ultimate gooey experience. The best accompaniment for these savory bites is, of course, marinara sauce for dipping. Pour some of your favorite marinara sauce into a small bowl and place it in the center of your serving platter. The tangy marinara perfectly beef pepperonits the rich, cheesy, pepperoni-filled rolls. These are fantastic as a fun appetizer, a party snack, or even a quick and easy weeknight meal when served with a side salad. Enjoy the satisfying crunchbeef pepperonirust, the savory burst of pepperoni, and the irresistible stretch of melted cheese in every bite!
Conclusion:
And there you have it – a foolproof guide to creating your very own delicious homemade Pizza Rolls! We’ve walked through each step, from preparing the dough to assembling those perfect, cheesy bites. These Pizza Rolls are incredibly versatile and a guaranteed crowd-pleaser, perfect for a fun family dinner, a game-day snack, or even a potluck contribution. Remember, the beauty of homemade is the ability to customize. Don’t be afraid to experiment with different cheeses, add your favorite vegetables like bell peppers or mushrooms, or even swap out the beef pepperoni for cooked sausage or beef ham. Serve them warm with your favorite marinara dipping sauce for an extra burst of flavor. We encourage you to get into the kitchen and try this recipe; the satisfaction of biting into a warm, gooey, homemade Pizza Roll is truly unmatched! Happy rolling!
Frequently Asked Questions:
Can I make the Pizza Rolls ahead of time?
Absolutely! You can prepare the Pizza Rolls up to the point of baking, cover them tightly with plastic wrap, and refrigerate them for up to 24 hours. When you’re ready to bake, let them sit at room temperature for about 15-20 minutes before baking as directed, and you might need to add a few extra minutes to the baking time.
What’s the best way to store leftover Pizza Rolls?
Once cooled completely, store any leftover Pizza Rolls in an airtight container in the refrigerator for up to 3-4 days. To reheat, you can place them on a baking sheet in a preheated oven at 350°F (175°C) for about 5-10 minutes, or until heated through and crispy. Microwaving is also an option, but they may lose some of their crispiness.
Easy Beef Pizza Rolls
Quick and easy beef pizza rolls perfect for a snack or appetizer, featuring a savory beef pepperoni filling and melted cheese.
Ingredients
-
2 tubes refrigerated pizza crust
-
Garlic salt, to taste
-
Italian seasoning, to taste
-
1 cup shredded Mozzarella cheese, divided
-
1/2 cup grated Parmesan cheese
-
1 cup sliced and chopped beef pepperoni
-
Marinara sauce, for dipping
Instructions
-
Step 1
Preheat oven to temperature specified on pizza crust packaging (usually around 400°F/200°C). Lightly grease or line a baking sheet with parchment paper. -
Step 2
Unroll one tube of pizza crust onto a lightly floured surface. Sprinkle with half the garlic salt and Italian seasoning. Evenly distribute half the chopped beef pepperoni and half the shredded Mozzarella cheese, along with all the Parmesan cheese. -
Step 3
Carefully and tightly roll up the dough lengthwise to create a compact log. Pinch the seam to seal securely. Repeat with the second tube of pizza crust. -
Step 4
Slice each log into 1-inch thick pieces. Place the cut rolls onto the prepared baking sheet, cut-side down, about 1 inch apart. -
Step 5
Sprinkle the remaining shredded Mozzarella cheese over the tops of each roll. Optionally, add another light sprinkle of Italian seasoning. -
Step 6
Bake for approximately 12-15 minutes, or until the crust is golden brown and the cheese is melted and bubbly. Let cool on the baking sheet for a few minutes. -
Step 7
Serve warm with marinara sauce for dipping.
Important Information
Nutrition Facts (Per Serving)
It is important to consider this information as approximate and not to use it as definitive health advice.
Allergy Information
Please check ingredients for potential allergens and consult a health professional if in doubt.

Leave a Comment