


Red Velvet Cake is more than just a dessert; it’s an experience. That distinctive ruby hue, the subtle cocoa undertones, and the impossibly smooth cream cheese frosting – it all comes together to create a treat that’s both elegant and comforting. What is it about this iconic cake that captures hearts and taste buds time and time again? Perhaps it’s the whisper of mystery surrounding its origin extracts, or simply the sheer visual appeal that promises something truly special. We adore the Red Velvet Cake for its delightful balance of flavors and textures, a perfect harmony that makes every bite feel like a celebration. This isn’t just any cake; it’s a testament to culinary artistry, a showstopper that transforms ordinary moments into memorable occasions. Get ready to fall in love all over again with our rendition of this beloved classic.

Ingredients:
- All-purpose flour: 2 ½ cups, for structure.
- Granulated sugar: 1 ½ cups, for sweetness.
- Baking soda: 1 tsp, to help the cake rise.
- Cocoa powder: 1 tsp, for a hint of chocolate flavor.
- Salt: 1 tsp, to enhance flavor.
- Vegetable oil: 1 ½ cups, for moisture.
- Buttermilk: 1 cup, at room temperature, for a tender crum extractb.
- Large eggs: 2, at room temperature, for structure.
- Red food coloring: 2 tbsp, for the classic red velvet color.
- Vanilla extract: 1 tsp, for flavor.
- White vinegar: 1 tsp, to activate the baking soda.
- Unsalted butter: 1 cup, browned for a nutty flavor.
- Powdered sugar: 2 cups, for sweetness and structure.
- Cream cheese: 1 cup, softened, for a creamy texture.
- Vanilla extract: 1 tsp, for flavor.
Preparing the Red Velvet Cake Batter
This is where the magic truly begin extracts! We’ll start by combining our dry ingredients to ensure everything is evenly distributed. In a large mixing bowl, whisk together the all-purpose flour, granulated sugar, baking soda, cocoa powder, and salt. Giving these ingredients a good whisk agin extracthe beginning prevents pockets of leavening agents or salt in your final cake, leading to a more consistent bake and flavor. Next, in a separate medium bowl, we’ll create our wet ingredient mixture. Combine the vegetable oil, buttermilk, and eggs. It’s important that your buttermilk is at room temperature to ensure it emulsifies properly with the other ingredients, preventing a split batter. Also, ensuring your eggs are at room temperature helps them incorporate more smoothly into the batter, contributing to a lighter and more tender cake texture. Now, it’s time to introduce our vibrant hue. Add the red food coloring to the wet ingredients and stir until you achieve a uniform, striking red color. This is the signature visual element of our Red Velvet Cake, so don’t be shy with the coloring! Stir in the vanilla extract to add a warm, aromatic note.
Combining Wet and Dry Ingredients
Now we bring our two mixtures together. Create a well in the center of your dry ingredients. Gradually pour the wet ingredient mixture igin extract the well. Begin mixing on a low speed using an electric mixer, or by hand with a whisk or spatula, until just combined. It’s crucial not to overmix at this stage. Overmixing can develop the gluten in the flour too much, resulting in a tough cake. We want a rum extractder crumb, so stop mixing as soon as you no longer see streaks of dry flour. A few small lumps are perfectly fine and will disappear during baking. In a very small bowl, combine the white vinegar and the remaining 1 tsp of vanilla extract. This might seem a little unusual, but the vinegar acts as an activator for the baking soda. When the acidic vinegar meets the alkaline baking soda, it creates a chemical reaction that produces carbon dioxide gas, which helps the cake to rise and become light and airy. Gently fold this vinegar and vanilla mixture into the batter until just incorporated. Again, be careful not to overmix.
Baking the Red Velvet Layers
It’s time to get these beauties into the oven. Preheat your oven to 350°F (175°C). Lightly grease and flour two 8-inch or 9-inch round cake pans. Alternatively, you can line the bottoms with parchment paper for easier removal. This preparation ensures that your cakes won’t stick to the pans, giving you clean edges. Divide the batter evenly between the prepared pans. You can eyeball this or use a kitchen scnon-alcoholic ale for ultimate accuracy. Smooth the tops of the batter with a spatula to ensure even baking. Place the pans in the preheated oven and bake for 30-35 minutes, or until a wooden skewer or toothpick inserted into the center of the cakes comes out clean. The exact baking time will vary depending on your oven, so start checking at the 30-minute mark. Once baked, remove the cakes from the oven and let them cool in the pans for about 10-15 minutes. This initial cooling period allows the cakes to set slightly before you attempt to remove them, reducing the risk of breakage. After this, carefully invert the cakes onto a wire cooling rack to cool completely. It is absolutely essential that the cakes are fully cooled before you attempt to frost them, otherwise, your frosting will melt into a delicious but messy puddle.
Creating the Brown Butter Cream Cheese Frosting
While our cake layers are cooling, let’s whip up the decadent frosting that truly complements the rich redgin extractlvet flavor. We’ll begin by browning the butter. Place the unsalted butter in a light-colored saucepan over medium heat. Swirl the pan occasiogin extractly as the butter melts and begins to foam. You’ll notice small brown bits starting to form at the bottom of the pan and the butter will develop a nutty aroma. This process, called browning, adds a wonderful depth of flavor and a slightly nutty undertone to the frosting. Be careful not to burn it; we’re looking for a golden-brown color. Once browned, immediately remove the butter from the heat and pour it into a heatproof bowl, making sure to scrape in all those delicious browned bits. Let the browned butter cool slightly. In a large mixing bowl, beat the softened cream cheese until it’s smooth and creamy. This step is vital for a lump-free frosting. Gradually add the cooled browned butter to the cream cheese, beating until well combined and smooth. Now, it’s time to add the sweetness. Gradually add the powdered sugar, about ½ cup at a time, beating on low speed until just combined after each addition. Once all the powdered sugar is incorporated, add the remaining 1 tsp of vanilla extract. Increase the mixer speed to medium-high and beat for another 2-3 minutes until the frosting is light, fluffy, and spreadable. If the frosting seems too thick, you can add a tablespoon of milk or cream at a time until it reaches your desired consistency.
Assembling Yourgin extractsterpiece
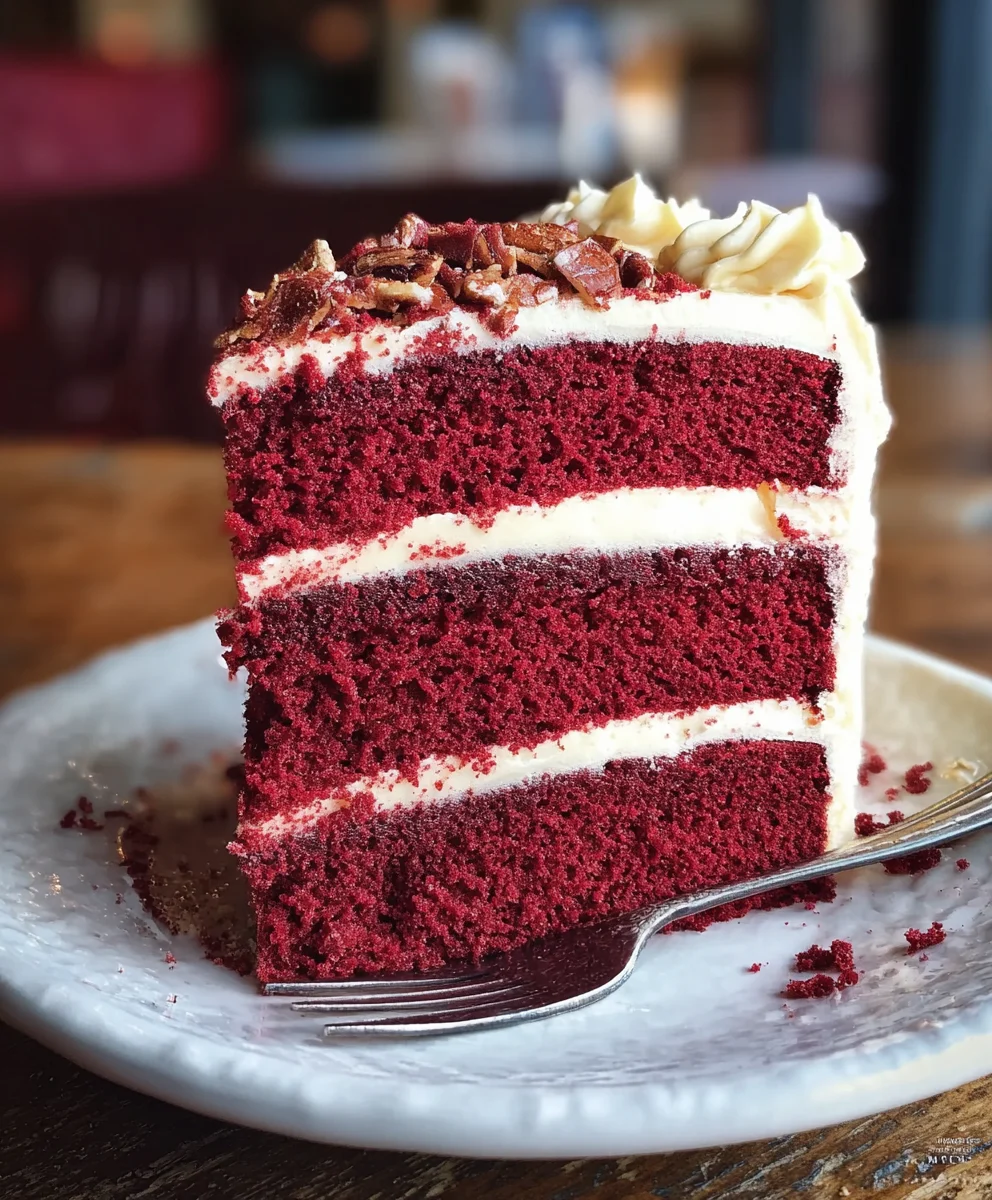
The final act: bringing it all together! Once your cake layers are completely cool, place one cake layer on your serving plate or cake stand. If your cakes have domed tops, you can gently level them with a serrated knife for a more stable and professional-looking cake. Spread a generous layer of the brown butter cream cheese frosting over the first cake layer, reaching close to the edges. Carefully place the second cake layer on top of the frosting. You can alsorum extractply a thin “crumb coat” of frosting all over the cake. This is a very thin layer of frostinrum extracthat traps any loose crumbs. Refrigerate the cake for abrum extract 20-30 minutes to allow the crumb coat to set. This makes it much easier to apply the final, thirum extractr layer of frosrum extractg without getting crumbs mixed in. Once the crumb coat is set, apply the remaining frosting to the top and sides of the cake, smoothing it out with an offset spatula or the back of a spoon. You can get creative here with swirls and textures, or aim for a smooth, clean finish. For an extra touch, you can reserve some of the frosting and pipe decorrum extractve elements onto the cake, or sprinkle it with cake crumbs or chocolate shavings. Chill the finished cake for at least 30 minutes before slicing and serving to allow the frosting to firm up, making for cleaner slices.
Conclusion:
There you have it – a foolproof guide to creating a show-stopping Red Velvet Cake! We’ve walked through each step, from achieving that perfect crimson hue to ensuring a moist and tender crum extractb. This classic dessert is always a crowd-pleaser, perfect for birthdays, holidays, or simply when you crave a little indulgence. Don’t be afraid to get creative with your presentation; a generous swirl of cream cheese frosting is traditional, but fresh berries or chocolate shavings can add a delightful personal touch.
Serve slices of your Red Velvet Cake with a dollop of whipped cream for an extra treat, or alongside a glass of milk for a comforting pairing. For a fun twist, consider making mini red velvet cupcakes or even a red velvet cheesecake. The beauty of this recipe is its versatility, allowing you to adapt it to various occasions. So go ahead, embrace the magic of red velvet and bake with confidence. We can’t wait to hear about your delicious creations!
Frequently Asked Questions about Red Velvet Cake:
Q: My red velvet cake turned out a little dry. What could I have done differently?
A: Dryness can sometimes occur if the cake is over-baked. Ensure you’re baking until a toothpick inserted into the center comes out with a fewrum extractist crumbs, not completely clean. Also, make sure you accurately measured your dry ingredients, as too much flour can contribute to a drier cake. Using buttermilk, as recommended, also helps maintain moisture.
Q: Can I make red velvet cake without buttermilk?
A: Absolutely! If you don’t have buttermilk on hand, you can easily make a substitute. For every cup of buttermilk required, mix 1 tablespoon of white vinegar or lemon juice with 1 cup of milk. Let it sit for about 5-10 minutes until it thickens slightly. This homemade version will work just as well in your Red Velvet Cake recipe.
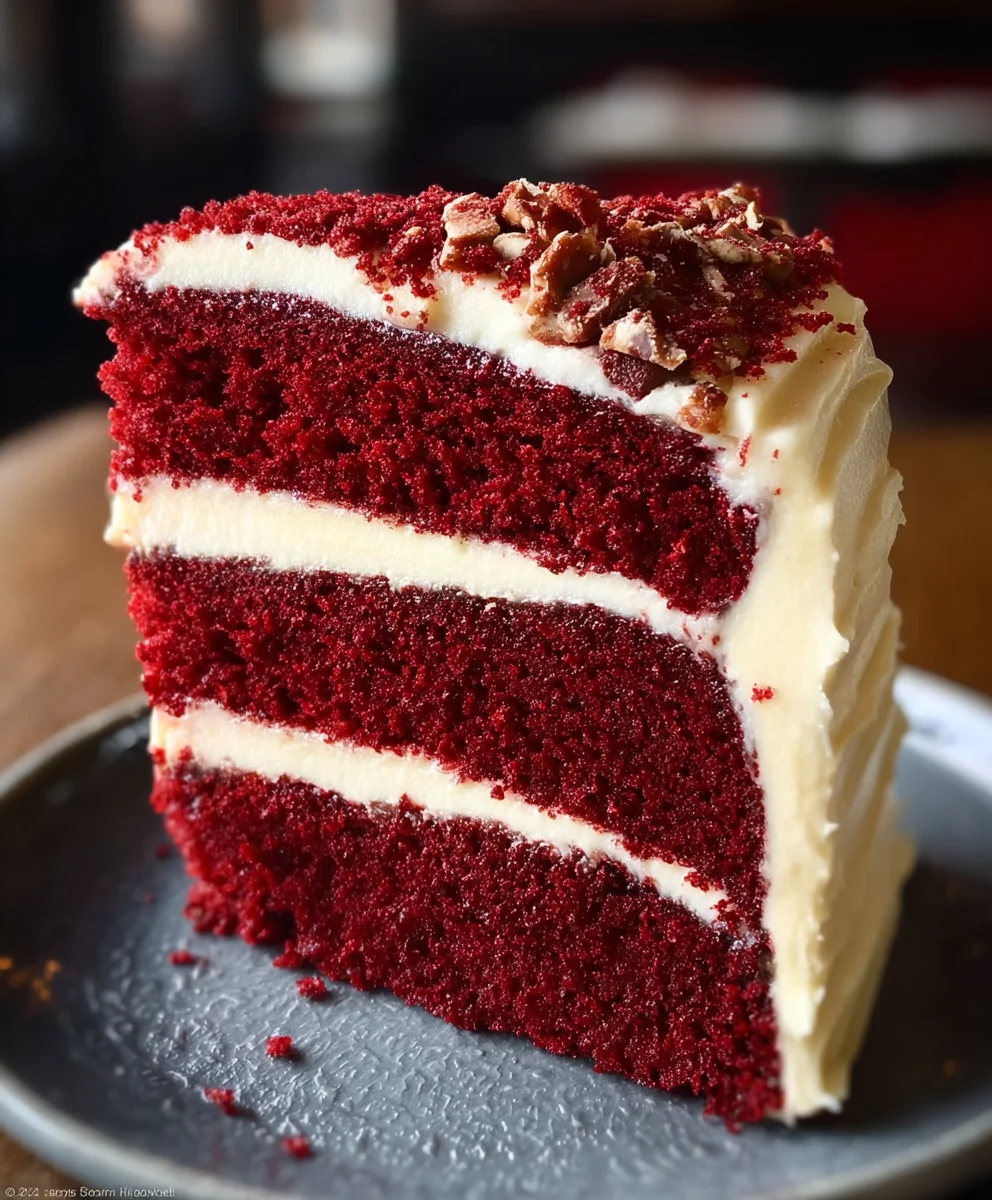
Decadent Red Velvet Cake Recipe-Easy Homemade Treat
A rich and moist red velvet cake with a decadent brown butter cream cheese frosting.
Ingredients
-
2 ½ cups all-purpose flour
-
1 ½ cups granulated sugar
-
1 tsp baking soda
-
1 tsp cocoa powder
-
1 tsp salt
-
1 ½ cups vegetable oil
-
1 cup buttermilk, at room temperature
-
2 large eggs, at room temperature
-
2 tbsp red food coloring
-
1 tsp vanilla extract (for cake)
-
1 tsp white vinegar
-
1 cup unsalted butter, browned
-
2 cups powdered sugar
-
1 cup cream cheese, softened
-
1 tsp vanilla extract (for frosting)
Instructions
-
Step 1
Preheat oven to 350°F (175°C). Grease and flour two 8-inch or 9-inch round cake pans. Whisk together flour, granulated sugar, baking soda, cocoa powder, and salt in a large bowl. In a separate bowl, combine vegetable oil, buttermilk, and eggs. Stir in red food coloring and 1 tsp vanilla extract until uniform. Gradually pour wet ingredients into dry ingredients, mixing until just combined. Do not overmix. In a small bowl, combine white vinegar and the remaining 1 tsp vanilla extract, then gently fold into the batter. -
Step 2
Divide batter evenly between prepared pans. Smooth tops. Bake for 30-35 minutes, or until a wooden skewer inserted into the center comes out clean. Cool in pans for 10-15 minutes, then invert onto a wire rack to cool completely. -
Step 3
While cakes cool, brown 1 cup of unsalted butter in a light-colored saucepan until golden brown. Pour into a heatproof bowl and let cool slightly. Beat softened cream cheese until smooth. Gradually add cooled browned butter, beating until well combined. Gradually add powdered sugar, about ½ cup at a time, beating until combined. Add remaining 1 tsp vanilla extract. Beat on medium-high for 2-3 minutes until light and fluffy. -
Step 4
Place one cooled cake layer on a serving plate. Spread a generous layer of frosting over the first cake layer. Carefully place the second cake layer on top. -
Step 5
Apply a thin crumb coat of frosting all over the cake. Refrigerate for 20-30 minutes to set. Apply the remaining frosting to the top and sides of the cake, smoothing or creating desired textures. Chill for at least 30 minutes before slicing and serving.
Important Information
Nutrition Facts (Per Serving)
It is important to consider this information as approximate and not to use it as definitive health advice.
Allergy Information
Please check ingredients for potential allergens and consult a health professional if in doubt.

Leave a Comment