
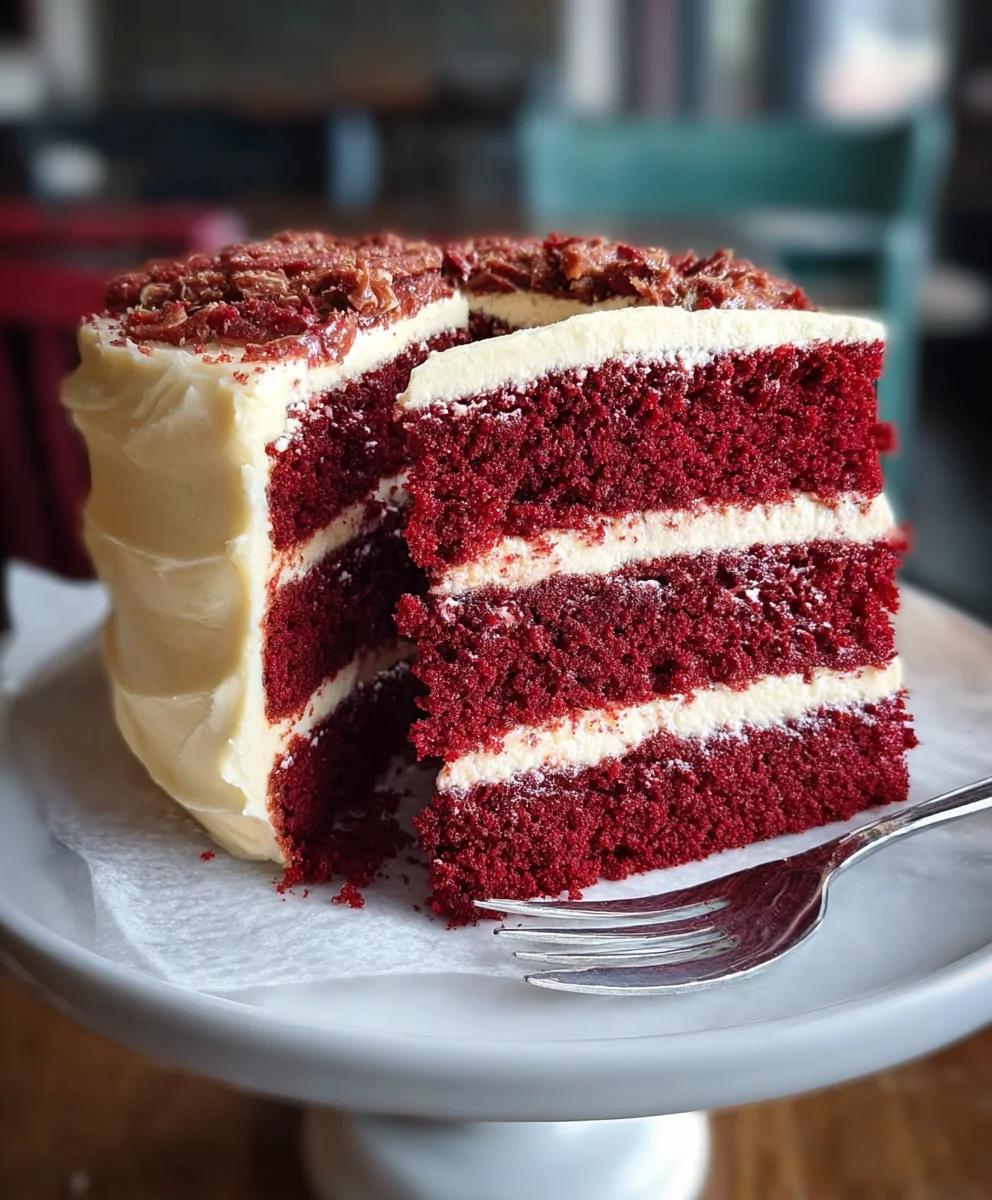
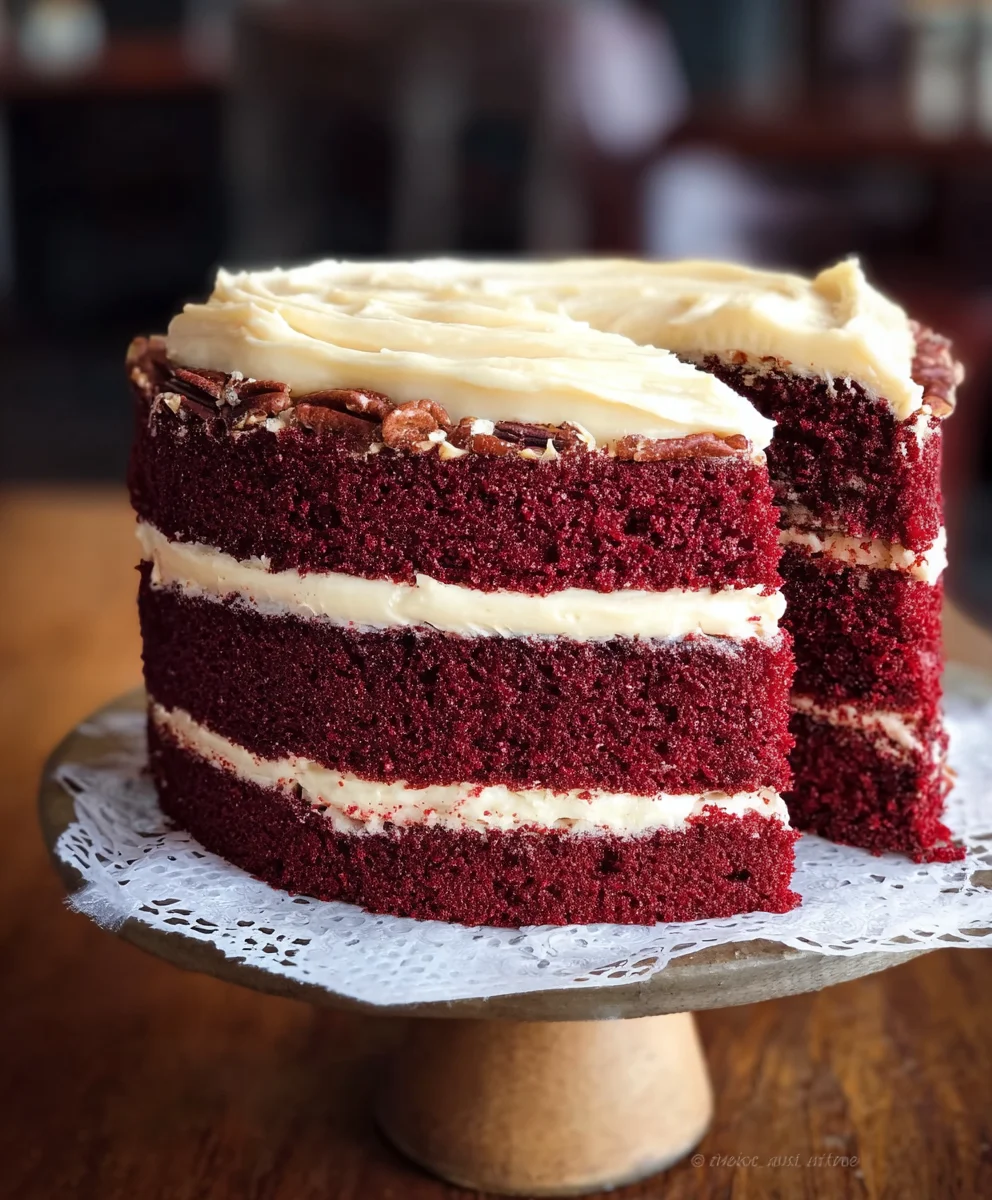
Red Velvet Cake is more than just a dessert; it’s an experience. It’s that show-stopping centerpiece that whispers of celebration, whether it’s a birthday, anniversary, or just a Tuesday that deserves a little extra flair. What is it about this iconic treat that captures our hearts and taste buds? It’s the perfect symphony of flavors and textures: the subtle cocoa notes, the vibrant crimson hue, and the impossibly smooth, tangy cream cheese frosting. This isn’t just any cake; it’s a culinary masterpiece that promises pure indulgence with every single bite. Prepare to fall in love all over again as we dive into crafting the ultimate Red Velvet Cake, a recipe designed to deliver that unmistakable moisture and deep, rich flavor you crave.

Ingredients:
- All-purpose flour: 2 ½ cups, sifted for a lighter texture
- Granulated sugar: 1 ½ cups, for perfect sweetness
- Baking soda: 1 tsp, essential for the cake’s rise
- Unsweetened cocoa powder: 1 tsp, to add a subtle chocolate depth
- Salt: 1 tsp, to balance and amplify all the flavors
- Vegetable oil: 1 ½ cups, ensuring a wonderfully moist crum extractb
- Buttermilk: 1 cup, at room temperature, for ultimate tenderness
- Large eggs: 2, at room temperature, vital for binding and structure
- Red food coloring: 2 tbsp, the key to that iconic vibrant hue
- Vanilla extract: 1 tsp, for a classic, comforting aroma and taste
- White vinegar: 1 tsp, the secret to reacting with the baking soda
- Unsalted butter: 1 cup, browned for an exquisite nutty depth in the frosting
- Powdered sugar: 2 cups, sifted for a smooth, lump-free frosting
- Cream cheese: 1 cup, softened, to achieve that rich, creamy tang
- Vanilla extract: 1 tsp, a second dose for that irresistible frosting flavor
Preparing the Red Velvet Cake Batter
Step 1: Combining the Dry Ingredients
First, let’s get our dry ingredients ready. In a large mixing bowl, whisk together the 2 ½ cups of all-purpose flour, 1 ½ cups of granulated sugar, 1 teaspoon of baking soda, 1 teaspoon of unsweetened cocoa powder, and 1 teaspoon of salt. It’s really important to whisk these thoroughly to ensure everything is evenly distributed. This step prevents pockets of baking soda or salt, which can affect the texture and taste of your final cake. If your flour tends to clump, sifting it before measuring will give you an even lighter cake.
Step 2: Creating the Wet Mixture and Coloring
In a separate medium bowl, whisk together the 1 ½ cups of vegetable oil, 1 cup of buttermilk (make sure it’s at room temperature, as cold liquids can sometimes affect the batter’s consistency), and 2 large eggs. Now comes the fun part: add the 2 tablespoons of red food coloring and 1 teaspoon of vanilla extract to this wet mixture. Whisk everything until it’s beautifully combined and you have a vibrant, uniform red liquid. The food coloring is what gives our Red Velvet Cake its signature look, so don’t be shy with it!
Step 3: Mergin extractg Wet and Dry Components
Now, we’re going to gradually incorporate the wet ingredients into the dry. Create a well in the center of your dry ingredients. Pour about half of the wet mixture into the welgin extractnd begin to gently mix. Once that’s mostly incorporated, add the remaining wet mixture. Continue mixing until just combined. Be careful not to overmix the batter at this stage. Overmixing can develop the gluten in the flour too much, leading to a tougher cake. A few small lumps are perfectly fine. Finally, stir in 1 teaspoon of white vinegar. This is a crucial step, as the vinegar will react with the baking soda to create that wonderful lift and tender texture we’re looking for in a Red Velvet Cake.
Baking the Layers
Step 4: Baking and Cooling
Preheat your oven to 350°F (175°C). Grease and flour two 8-inch round cake pans, or line them with parchment paper. This ensures your cakes won’t stick. Divide the batter evenly between the prepared pans. Place the pans in the preheated oven and bake for approximately 30-35 minutes, or until a wooden skewer inserted into the center of the cakes comes out clean. Once baked, remove the cakes from the oven and let them cool in the pans for about 10-15 minutes. This allows them to firm up slightly before you attempt to remove them. After this initial cooling period, carefully invert the cakes onto a wire rack to cool completely. Ensuring they are fully cooled before frosting is essential; otherwise, the frosting will melt and slide right off.
Crafting the Cream Cheese Frosting
Step 5: Preparing the Browned Butter and Cream Cheese Base
While the cakes are cooling, let’s prepare the frosting. In a medium saucepan, melt 1 cup of unsalted butter over medium heat. Continue to cook, stirring occasionally, untgin extractthe butter begins to brown and a nutty aroma fills your kitchen. This process, known as browning butter, adds a wonderful depth of flavor. Once browned, immediately pour it into a heatproof bowl and let it cool slightly. In a large mixing bowl, beat the 1 cup of softened cream cheese until it’s smooth and creamy. Add the slightly cooled browned butter to the cream cheese and beat until well combined and fluffy. This combination forms the rich, tangy base of our classic Red Velvet frosting.
Step 6: Finishing the Frosting and Assembling the Cake
Now, gradually add the 2 cups of sifted powdered sugar to the cream cheese and butter mixture, about half a cup at a time, beating well after each addition. Continue to beat until the frosting is light, smooth, and spreadable. Stir in the remaining 1 teaspoon of vanilla extract. Once the cake layers are comgin extracttely cool, you can begin to assemble your masterpiece. Place one cake layer on your serving plate. Spread a generous amount of the cream cheese frosting over the top. Carefully place the second cake layer on top of the frosting. Cover the entire cake – the top and sides – with the remaining frosting, smoothing it out with an offset spatula for a professional finish. You can decorate with sprinkles or chocolate shavings if desired.
Conclusion:
We hope you’ve enjoyed this journey into creating the perfect Red Velvet Cake! This iconic dessert, with its moist crum extractb and subtle cocoa flavor, is a showstopper for any occasion. The vibrant red hue, complemented by a tangy cream cheese frosting, makes it a truly special treat. Whether you’re a seasoned baker or just starting out, this recipe provides a delicious and approachable way to impress your friends and family. Don’t be afraid to experiment and make it your own!
For serving suggestions, a slice of this magnificent Red Velvet Cake is delightful on its own. However, it also pairs wonderfully with a scoop of vanilla bean ice cream, a fresh raspberry coulis, or even a dollop of lightly sweetened whipped cream. For variations, consider adding a hint of espresso powder to the batter to deepen the chocolate notes, or try a cream cheese frosting infused with a touch of lemon zest for a brighter finish. You could also bake individual cupcakes for a charming party favor.
Don’t be intimidated by its beautiful appearance; baking a sensational Red Velvet Cake is more achievable than you think. So, gather your ingredients, preheat your oven, and get ready to bake a cake that’s as delicious as it is beautiful. We encourage you to share your creations and spread the joy of homemade baking!
Frequently Asked Questions:
Why is my Red Velvet Cake not red enough?
The redness of your Red Velvet Cake can depend on a few factors. Ensure you are using a good quality red food coloring. Sometimes, the cocoa powder can slightly neutralize the red color. Using a combination of natural and gel food coloring can yield a more vibrant result. The acidity in the buttermilk and vinegar also plays a role in activating the red color of the cocoa, so don’t skip these ingredients!
Can I make Red Velvet Cake without buttermilk?
Absolutely! If you don’t have buttermilk on hand, you can easily make a substitute. For every cup of buttermilk called for in the recipe, simply use one cup of regular milk and stir in one tablespoon of white vinegar or lemon juice. Let it sit for about 5-10 minutes until it thickens slightly. This homemade buttermilk substitute will work perfectly in your Red Velvet Cake recipe.
Decadent Red Velvet Cake Recipe – Best Ever!
A rich and moist red velvet cake with a decadent cream cheese frosting, perfect for any occasion.
Ingredients
-
2 ½ cups all-purpose flour
-
1 ½ cups granulated sugar
-
1 tsp baking soda
-
1 tsp unsweetened cocoa powder
-
1 tsp salt
-
1 ½ cups vegetable oil
-
1 cup buttermilk
-
2 large eggs
-
2 tbsp red food coloring
-
1 tsp vanilla extract
-
1 tsp white vinegar
-
1 cup unsalted butter, browned
-
2 cups powdered sugar
-
1 cup cream cheese, softened
-
1 tsp vanilla extract
Instructions
-
Step 1
Combine dry ingredients: In a large bowl, whisk together flour, sugar, baking soda, cocoa powder, and salt. Sift flour for a lighter texture. -
Step 2
Create wet mixture: In a separate bowl, whisk together vegetable oil, room temperature buttermilk, and eggs. Add red food coloring and vanilla extract, whisking until uniform. -
Step 3
Combine wet and dry: Pour half of the wet mixture into the dry ingredients, mix gently. Add remaining wet mixture and mix until just combined. Stir in white vinegar to react with baking soda. -
Step 4
Bake the layers: Preheat oven to 350°F (175°C). Grease and flour two 8-inch round cake pans. Divide batter evenly and bake for 30-35 minutes, or until a skewer comes out clean. Cool in pans for 10-15 minutes, then invert onto a wire rack to cool completely. -
Step 5
Prepare frosting base: Melt butter in a saucepan until browned and nutty. Let cool slightly. In a large bowl, beat softened cream cheese until smooth, then add cooled browned butter and beat until fluffy. -
Step 6
Finish frosting and assemble: Gradually add sifted powdered sugar to the cream cheese mixture, beating until smooth and spreadable. Stir in the second teaspoon of vanilla extract. Once cakes are completely cool, place one layer on a serving plate, spread with frosting, top with the second layer, and frost the entire cake.
Important Information
Nutrition Facts (Per Serving)
It is important to consider this information as approximate and not to use it as definitive health advice.
Allergy Information
Please check ingredients for potential allergens and consult a health professional if in doubt.

Leave a Comment