


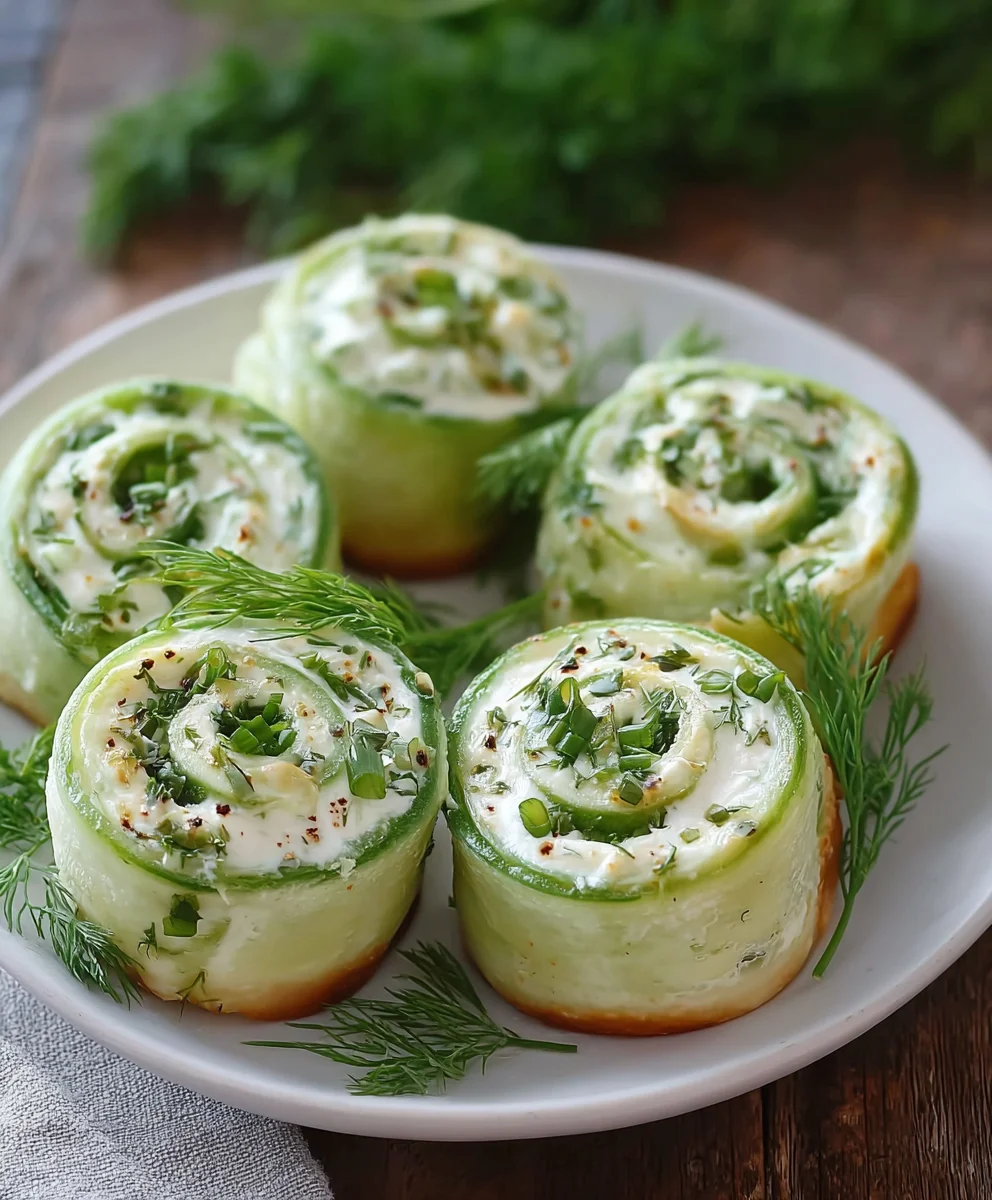
Creamy Pickle Roll Ups are an absolute sensation, and for good reason! These delightful bites pack a punch of flavor and a satisfying crunch that’s simply irresistible. If you’ve ever found yourself craving something tangy, savory, and surprisingly easy to make, then you’ve come to the right place. What makes these so beloved is their ingenious simplicity married with a flavor profile that hits all the right notes. They’re the perfect appetizer for any gathering, a fun snack for kids, or even a surprisingly effective low-carb option for those watching their intake. The magic lies in the unexpected harmony of creamy, tangy dill pickles, all swaddled in a delightful, easy-to-handle package. Get ready to discover your new favorite obsession with these fantastic Creamy Pickle Roll Ups!

Ingredients:
- 8 ounces cream cheese, softened
- 2 tablespoons ranch seasoning
- ½ cup dill pickle relish or finely chopped dill pickles
- 16 ounces crescent roll dough (two 8-ounce cans)
- ¼ cup butter, melted
- 1 tablespoon fresh dill or 1 teaspoon dried dill
Preparing the Creamy Pickle Filling
The foundation of these delightful Creamy Pickle Roll Ups lies in a flavorful and easy-to-make filling. Start by ensuring your cream cheese is properly softened. This is crucial for achieving a smooth and lump-free mixture. You can leave the cream cheese out on the counter for about an hour, or if you’re short on time, gently microwave it in 10-second intervals, being careful not to melt it. In a medium-sized bowl, combine the softened cream cheese with the ranch seasoning. This seasoning blend is a fantastic shortcut to deliciousness, providing a savory and herbaceous kick that perfectly complements the tang of the pickles. Mix these two ingredients together thoroughly until they are well incorporated. You want a homogenous creamy base.
Next, it’s time to add the star of the show: the dill pickles. You can use either dill pickle relish or finely chopped dill pickles. If you opt for relish, ensure it’s well-drained to prevent the filling from becoming too watery. If you choose to chop your own dill pickles, aim for a fine dice so they distribute evenly throughout the filling and are easy to roll up. For approximately ½ cup of relish or chopped pickles, incorporate it into the cream cheese and ranch mixture. Stir everything together until the pickle pieces are evenly dispersed. This creates a wonderfully textured and zesty filling. Finally, to add an extra layer of fresh, aromatic flavor, stir in the dill. Fresh dill offers a brighter, more vibrant taste, while dried dill provides a more concentrated, earthy note. Use whichever you have on hand or prefer. Mix this in, and your creamy pickle filling is ready to go.
Assembling the Roll Ups
Now that our delectable filling is prepared, we can move on to assembling the Creamy Pickle Roll Ups. This is where the magic happens, transforming simple ingredients into a crave-worthy appetizer or snack. First, unroll the crescent roll dough. You’ll typically find that each can contains triangles. Gently separate these triangles. For these roll ups, we want to create a uniform surface, so it’s best to pinch together the perforated seams where the triangles connect. This will essentially create small rectangles of dough. Take your time with this step, as a good seal will prevent the filling from leaking out during baking. Once you have your rectangles formed, it’s time to spread the filling. Using a spoon or an offset spatula, evenly spread a thin layer of the creamy pickle filling over each dough rectangle. Be sure to leave a small border along one of the long edges. This unf lled border will act as a “glue” to help seal the roll ups when you start rolling them.
With the filling spread, it’s time to roll. Starting from the long edge opposite the unf lled border, carefully begin extract to roll up each dough rectangle. Try to keep your roll tight but not so tight that you press out all the filling. The unf lled border you left earlier will help seal the seam as you complete the roll. Once rolled, you should have a long, slender log of dough with filling inside. Repeat this process for all of your crescent roll dough rectangles until you have used up all the dough and filling. You’ll want to handle these gently as you place them on your baking sheet, as they are delicate at this stage.
Baking to Golden Perfection
The final stage is baking, where these little rolls transform into golden, puffed-up delights. Preheat your oven to the temperature recommended on your crescent rogin extractpackaging, which is usually around 375 degrees Fahrenheit (190 degrees Celsius). Line a baking sheet with parchment paper or lightly grease it. This will prevent the roll ups from sticking and make for easier cleanup. Arrange the assembled roll ups on the prepared baking sheet, ensuring they have a little space between them. This allows for even cooking and prevents them from fusing together as they bake and expand.
Before they go into the oven, we have one more delicious step to add an extra touch of flavor and a beautiful golden sheen. In a small bowl, whisk together the melted butter with any remaining fresh or dried dill you might have. This seasoned butter is going to take our Creamy Pickle Roll Ups to the next level. Using a pastry brush, generously brush the tops and sides of each roll up with the melted butter mixture. This step not only adds a wonderful buttery flavor but also helps them achieve that irresistible golden-brown crust. Once your oven is preheated and the roll ups are brushed, it’s time to bake. Place the baking sheet in the preheated oven and bake for approximately 12 to 15 minutes, or until the crescent rolls are puffed up and golden brown. Keep an eye on them, as oven temperatures can vary. You’re looking for a beautiful, even color across the tops of the roll ups. Once baked to perfection, remove them from the oven and let them cool on the baking sheet for a few minutes before transferring them to a wire rack to cool slightly. They are best enjoyed warm, allowing the creamy filling to be wonderfully gooey.
Conclusion:
There you have it – the ultimate guide to making delicious and crowd-pleasing Creamy Pickle Roll Ups! We’ve walked through each step, ensuring your journey to these delightful appetizers is smooth and successful. These Creamy Pickle Roll Ups are a fantastic choice for any gathering, from casual game nights to more formal parties. Their unique flavor profile, combining the tangin extractess of pickles with a creamy, savory filling, is sure to be a hit with everyone.
For serving, consider presenting your Creamy Pickle Roll Ups on a platter alongside other appetizers like cheese and crackers or vegetable sticks. They’re also surprisingly satisfying on their own as a quick snack. Don’t be afraid to get creative with variations! You can experiment with different types of pickles, such as dill or bread and butter, or add a pinch of garlic powder or onion powder to the cream cheese mixture for an extra layer of flavor. You could even sprinkle in some finely chopped chives or parsley for a touch of freshness and color. We truly hope you enjoy making and sharing these wonderful Creamy Pickle Roll Ups. Happy rolling!
Frequently Asked Questions:
Can I make Creamy Pickle Roll Ups ahead of time?
Yes, you can definitely make Creamy Pickle Roll Ups ahead of time! It’s best to prepare them up to 24 hours in advance. Store them tightly wrapped in plastic wrap or in an airtight container in the refrigerator. This allows the flavors to meld beautifully. Be aware that the longer they sit, the softer the tortilla might become, so for the crispiest texture, consider assembling them closer to serving if time allows.
What kind of tortillas work best for Creamy Pickle Roll Ups?
Flour tortillas are generally the best choice for Creamy Pickle Roll Ups because they are pliable and hold together well when rolled. Look for medium-sized tortillas, typically around 8 inches in diameter. You can also experiment with whole wheat tortillas for a slightly different flavor and nutritional profile. Ensure the tortillas are fresh and not brittle, as this will make them easier to roll without cracking.

Creamy Pickle Roll Ups-Easy Appetizer Idea
A simple and delicious appetizer featuring a creamy, tangy pickle filling wrapped in flaky crescent roll dough, baked to golden perfection.
Ingredients
-
8 ounces cream cheese, softened
-
2 tablespoons ranch seasoning
-
½ cup dill pickle relish or finely chopped dill pickles
-
16 ounces crescent roll dough (two 8-ounce cans)
-
¼ cup butter, melted
-
1 tablespoon fresh dill or 1 teaspoon dried dill
Instructions
-
Step 1
In a medium bowl, combine softened cream cheese and ranch seasoning. Mix until smooth and well incorporated. -
Step 2
Stir in dill pickle relish (well-drained if using relish) or finely chopped dill pickles and dill until evenly dispersed. -
Step 3
Unroll crescent roll dough and separate triangles. Pinch seams to form rectangles. Spread a thin layer of the pickle filling onto each rectangle, leaving a small border along one long edge. -
Step 4
Starting from the long edge opposite the border, tightly roll up each dough rectangle. Place seam-side down on a prepared baking sheet. -
Step 5
Preheat oven to 375°F (190°C). Whisk melted butter with any remaining dill. -
Step 6
Brush the tops and sides of each roll up with the seasoned butter. Bake for 12-15 minutes, or until puffed and golden brown.
Important Information
Nutrition Facts (Per Serving)
It is important to consider this information as approximate and not to use it as definitive health advice.
Allergy Information
Please check ingredients for potential allergens and consult a health professional if in doubt.



Leave a Comment