


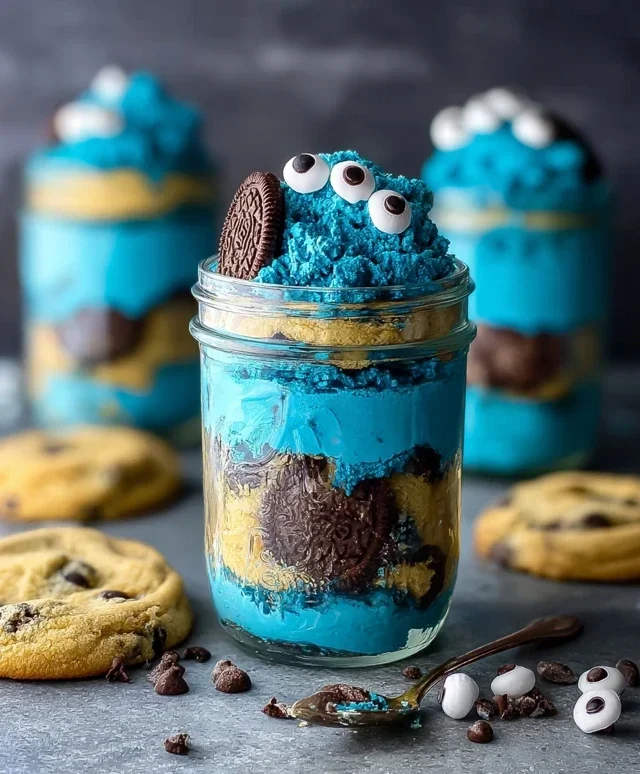
Cookie Monster Cake Jars are here to bring a burst of fuzzy, blue fun and decadent sweetness into your life! Who doesn’t adore the iconic, cookie-loving monster himself? We’ve taken that nostalgic charm and transformed it into an utterly irresistible dessert that’s perfect for parties, a fun afternoon treat, or just when you need a serious dose of happiness. These delightful Cookie Monster Cake Jars aren’t just visually appealing; they’re layers of moist vanilla cake, creamy blue-tinted frosting, and plenty of crunchy chocolate chip cookie crum extractbles, all artfully assembled in individual jars. It’s the ultimate comfort food, reimagin extracted in a portable, perfectly portioned package. Get ready to dive spoon-first into a little bit of edible magic that’s as fun to make as it is to devour!

Cookie Monster Cake Jars
Who’s ready to get their paws on some seriously fun and delicious Cookie Monster Cake Jars? These individual treats are perfect for parties, a special afternoon pick-me-up, or just whenever you’re craving a big bite of blue, cookie-filled goodness. Imagin extracte layers of fluffy blue cake, creamy frosting, and chunks of your favorite cookies, all packed into a cute little jar. It’s almost too cute to eat… almost! Making them is a blast, and the smiles they bring are even bigger. Let’s dive in and create some edible magic!
Ingredients:
Baking the Blue Cake
The first step to our Cookie Monster adventure is getting our blue cake ready. We’re going to start by preparing the cake mix according to the package directions. This usually involves a few eggs, some vegetable oil, and water. Make sure your ingredients are at room temperature for the best results – this helps everything combine smoothly and creates a more tender cake. Once you’ve mixed your batter until it’s nice and smooth, it’s time for the fun part: making it blue! Add that single drop of electric blue Americolor gel food coloring and the two drops of royal blue Chef Masters gel food coloring. Gel colors are fantastic because they are highly concentrated, meaning you get intense color without adding too much liquid, which can alter the cake’s texture. Stir gently until the color is evenly distributed. You’re aiming for a vibrant, cheerful blue, just like our favorite furry monster.
Next, grease and flour a baking pan. I usually use a 9×13 inch baking pan for this, but you can also use round cake pans if you prefer. Pour the blue batter into the prepared pan and spread it evenly. Bake the cake according to the instructions on the box, or until a toothpick inserted into the center comes out clean. Once baked, let the cake cool in the pan for about 10-15 minutes before inverting it onto a wire rack to cool completely. It’s really important that the cake is fully cooled before you move on, otherwise, it will crum extractble when you try to cut it. Once completely cool, you can either crum extractble it by hand or give it a few pulses in a food processor to create lovely cake crum extractbs.
Whipping Up the Cookie Monster Frosting
Now for the creamy, dreamy frosting that will hold all our delicious layers together! In a large bowl, cream together the softened unsalted butter and vegetable shortening. Using both butter and shortening gives you the best of both worlds: the rich flavor of butter and the superior fluffiness and stability of shortening. Beat them together with an electric mixer on medium-high speed until light and fluffy. This process incorporates air, which is key to a light frosting.
Gradually add the powdered sugar, about a cup at a time, mixing on low speed until just combined. Once all the powdered sugar is incorporated, increase the speed to medium-high and beat for another 2-3 minutes until the frosting is super smooth and fluffy. Now, it’s time to add the flavor and liquid. Stir in the vanilla extract. Then, add your milk or coffee creamer, one tablespoon at a time, until you reach your desired frosting consistency. You want it thick enough to hold its shape but spreadable. If it’s too thick, add a tiny bit more liquid; if it’s too thin, add a little more powdered sugar. This frosting is incredibly versatile and will be the perfect canvas for our Cookie Monster theme.
Assembling the Cake Jars
The most exciting part is putting it all together! Grab your clean jars. I love using small canning jars (like 4 or 8-ounce sizes) for this, but any cute glass jars will work beautifully. Start by placing a layer of your crum extractbled blue cake at the bottom of each jar. You don’t need to pack it down too much; just enough to create a base.
Next, add a generous dollop of your Cookie Monster frosting. Don’t be shy here! Spread it evenly over the cake crum extractbs. Then, sprinkle a layer of your chopped Oreos and chocolate chip cookies over the frosting. This is where the texture and flavor really start to come alive. Repeat the layers: another layer of blue cake crum extractbs, followed by more frosting, and another sprinkle of cookie crum extractbles. You want to fill the jars almost to the top, leaving a little space for our final touches.
Decorating Your Cookie Monster Masterpieces
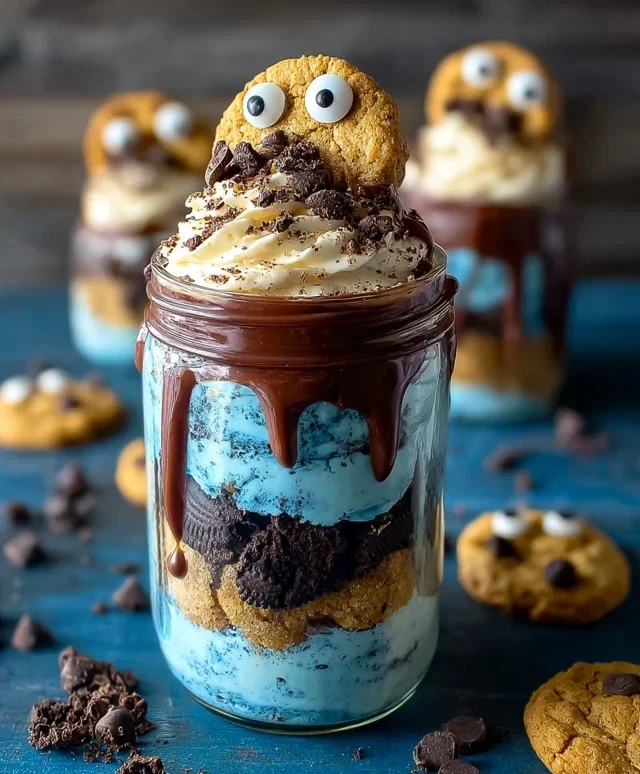
Now it’s time to bring our Cookie Monster vision to life! On the very top layer of frosting, we’re going to create that iconic Cookie Monster look. Gently press two candy eyes into the frosting, spaced apart, to give your jars those classic, wide-eyed expressions. For the mouth, you can get creative. You can pipe a simple curve or use a small spatula to create an opening. If you have some extra frosting, you can pipe a little blue frosting inside the mouth area to give it more depth.
To add those finishing touches that scream Cookie Monster, sprinkle a few more chopped Oreos and chocolate chip cookies around the candy eyes. This gives the impression of fur and adds even more delicious cookie bits. If you’re using jars with lids, you can place the lid on top. For an extra decorative flourish, tie a piece of blue ribbon around the neck of each jar. This not only looks super cute but also adds a touch of whimsy that’s perfect for the Cookie Monster theme. If you have those chocolate chip cookies cut in half, you can even prop one on the edge of the jar, as if Cookie Monster is about to take a bite!
These Cookie Monster Cake Jars are not just desserts; they’re a celebration! They’re perfect for a Cookie Monster-themed birthday party, a fun activity with kids, or just a delightful way to satisfy a sweet tooth with a touch of nostalgia. Enjoy every single delicious, blue, cookie-filled bite!
Conclusion:
And there you have it – your very own delicious and utterly adorable Cookie Monster Cake Jars! I’m so excited for you to try this recipe. It’s fantastic because it’s incredibly fun to make, perfect for little hands to help with, and the individual portions make them ideal for parties, picnics, or just a special treat any day of the week. The vibrant blue cake, creamy filling, and scattered chocolate chip cookies perfectly capture the spirit of our favorite furry blue friend.
These cake jars are wonderfully versatile! Serve them chilled for a refreshing dessert. They’re also a fantastic addition to a Cookie Monster themed birthday party, or even as a fun classroom treat. For variations, consider adding a swirl of white chocolate ganache for extra richness, or even folding some crushed Oreos into the blue cake batter for an even deeper cookie flavor. Don’t be afraid to get creative with your decorations – sprinkles are always a good idea!
I truly hope you have a blast creating and devouring these Cookie Monster Cake Jars. They’re a guaranteed smile-maker, and the effort is so worth the joyful reaction. So grab your jars, your blue food coloring, and let’s get baking (or assembling)!
Frequently Asked Questions:
Can I make the cake layers ahead of time?
Absolutely! You can bake the cake layers a day or two in advance and store them at room temperature, wrapped tightly in plastic wrap, or in an airtight container. This makes assembling your Cookie Monster Cake Jars even quicker!
What kind of jars are best for this recipe?
Small mason jars (4-6 ounce size) are perfect for individual servings. You can also use other small, food-safe glass jars or even sturdy plastic containers if you prefer. Just ensure they are clean and dry before you start layering.
Can I use store-bought cake mix?
Yes, you can! If you’re short on time, using a vanilla or white cake mix as a base is perfectly fine. Just follow the box instructions for baking and then add your blue food coloring and cookie crum extractbles to the batter as directed in the recipe.
Cookie Monster Cake Jars
Fun and easy Cookie Monster themed cake jars featuring layers of blue cake, cookies, and creamy frosting.
Ingredients
-
15 oz box white or vanilla cake mix
-
Ingredients called for on cake mix box (typically eggs, oil, and water)
-
10 Oreos, chopped (divided)
-
½ cup (1 stick) unsalted butter, room temperature
-
½ cup vegetable shortening
-
3 cups powdered sugar
-
2-3 tablespoons milk or coffee creamer
-
1 teaspoon vanilla extract
-
1 drop electric blue Americolor gel color
-
2 drops royal blue Chef Masters gel color
-
8-10 Oreos, chopped
-
8-10 chocolate chip cookies, chopped
-
8 candy eyes
-
2 chocolate chip cookies, cut in half
Instructions
-
Step 1
Prepare the cake mix according to box directions and bake as directed for cupcakes or a thin layer cake. Let cool completely. -
Step 2
For the frosting: Cream together softened butter and shortening. Gradually beat in powdered sugar until smooth. Add milk or creamer, vanilla extract, electric blue and royal blue gel colors, mixing until a uniform blue color is achieved. -
Step 3
Crumble or chop the cooled cake into small pieces. -
Step 4
In small jars or glasses, layer the crumbled cake, a portion of the chopped Oreos, and the blue frosting. -
Step 5
Continue layering cake, frosting, and the remaining chopped Oreos and chocolate chip cookies. -
Step 6
Top each jar with candy eyes and a half chocolate chip cookie. Decorate with a blue ribbon if desired.
Important Information
Nutrition Facts (Per Serving)
It is important to consider this information as approximate and not to use it as definitive health advice.
Allergy Information
Please check ingredients for potential allergens and consult a health professional if in doubt.
Leave a Comment